How to edit your Illustrator template
Chances are if you are reading this article it is because you have purchased an Origami Collective Illustrator template and you are now looking to edit your template. Well you have come to the right place!
If you haven’t purchased a template from us and you have stumbled upon this article from somewhere else, feel free to read along as the techniques I speak about are useful for any Illustrator user to know.
Editing the colours to suit your business branding
On the side of your artboard you will see some swatches. This is where you will add in your business branding colours. Click on the first square, then double click on the foreground colour in the toolbar and this will bring up the Colour Picker window:
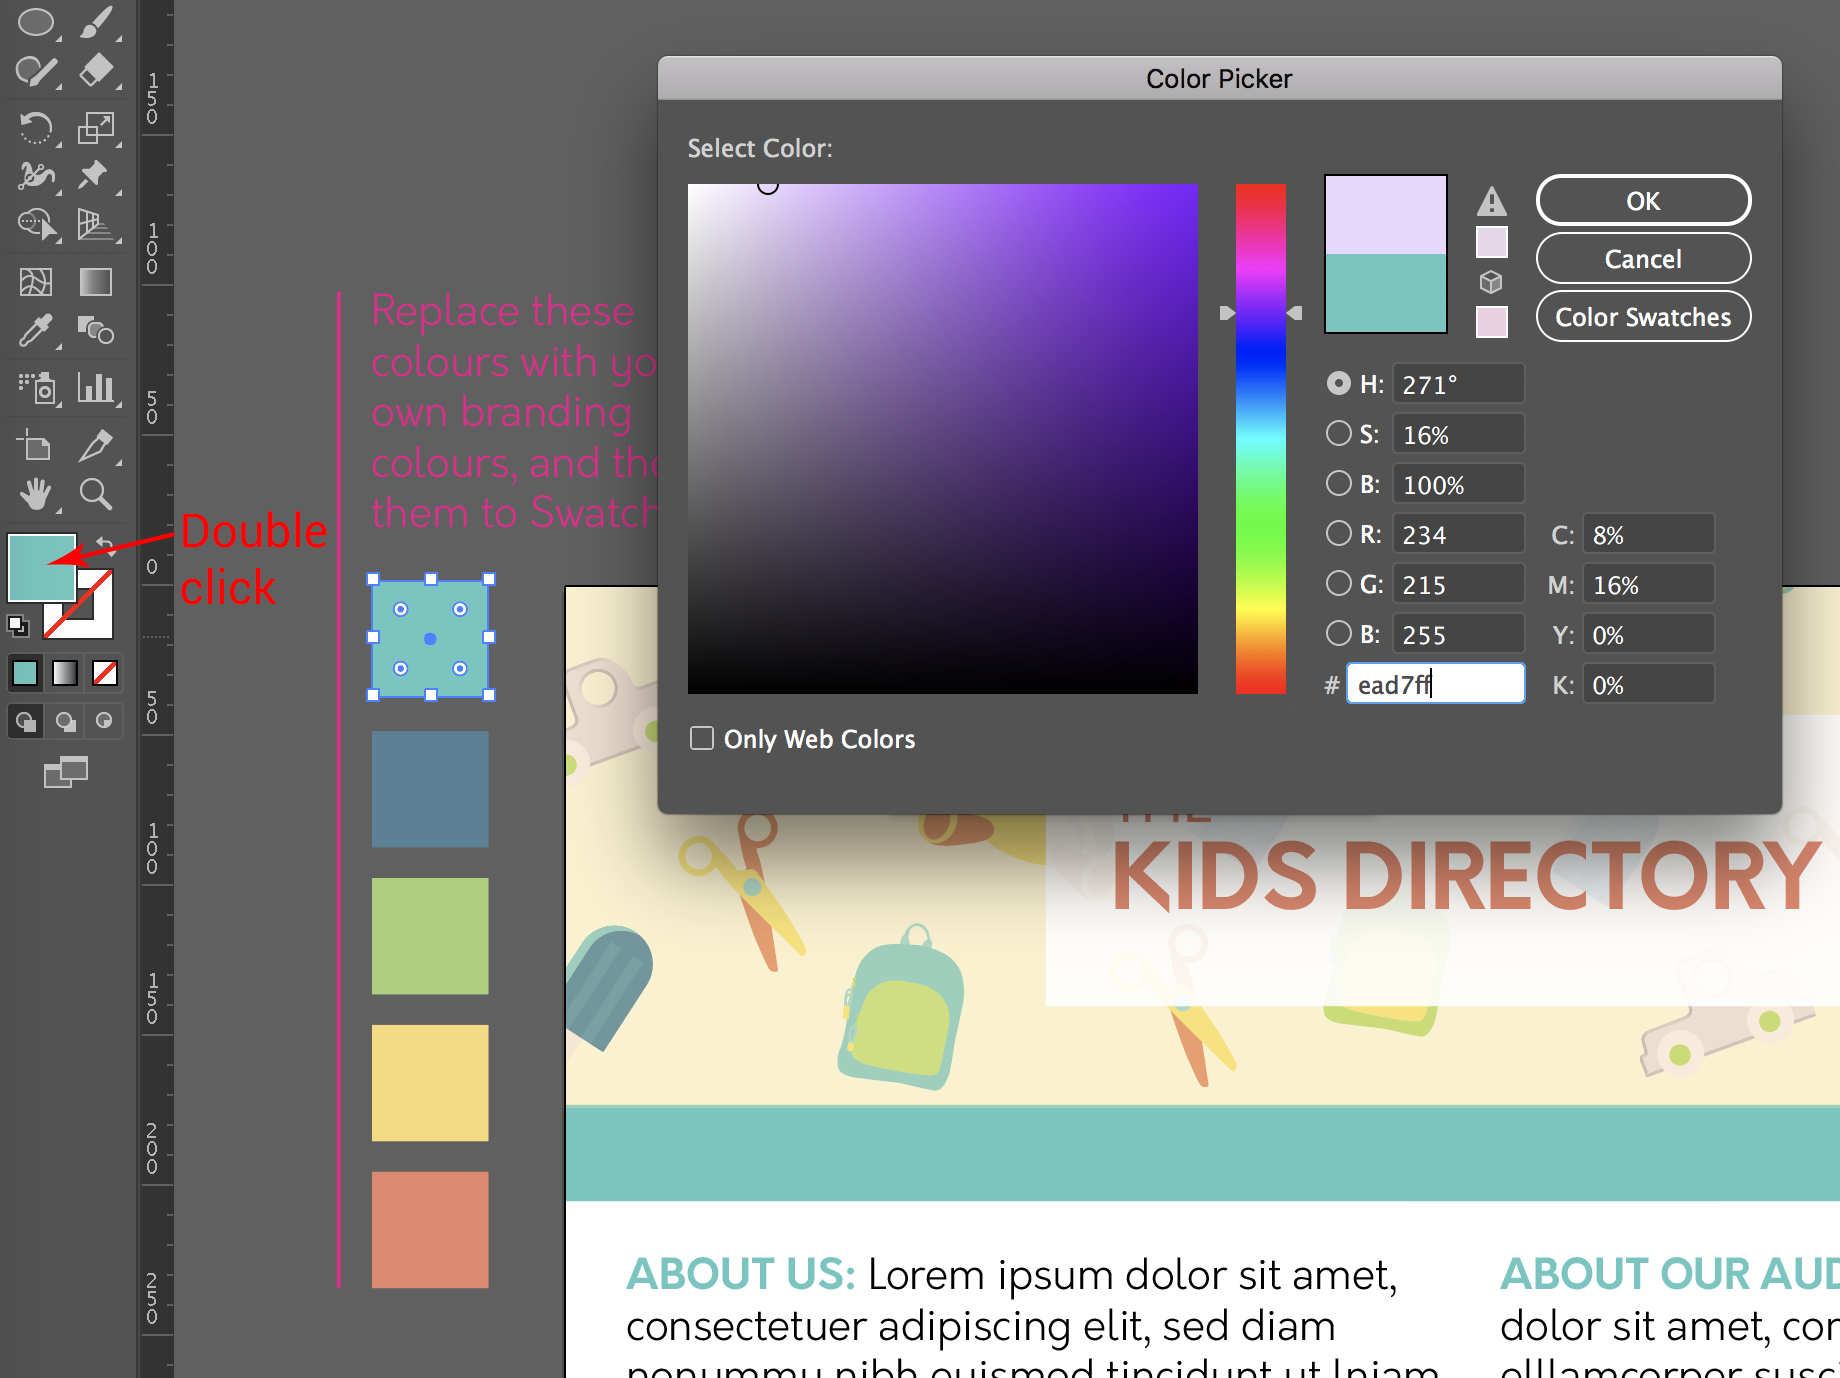
You can then either select your colour by moving the circle around, or you can input the HEX code of the colour you would like to use in the # field.
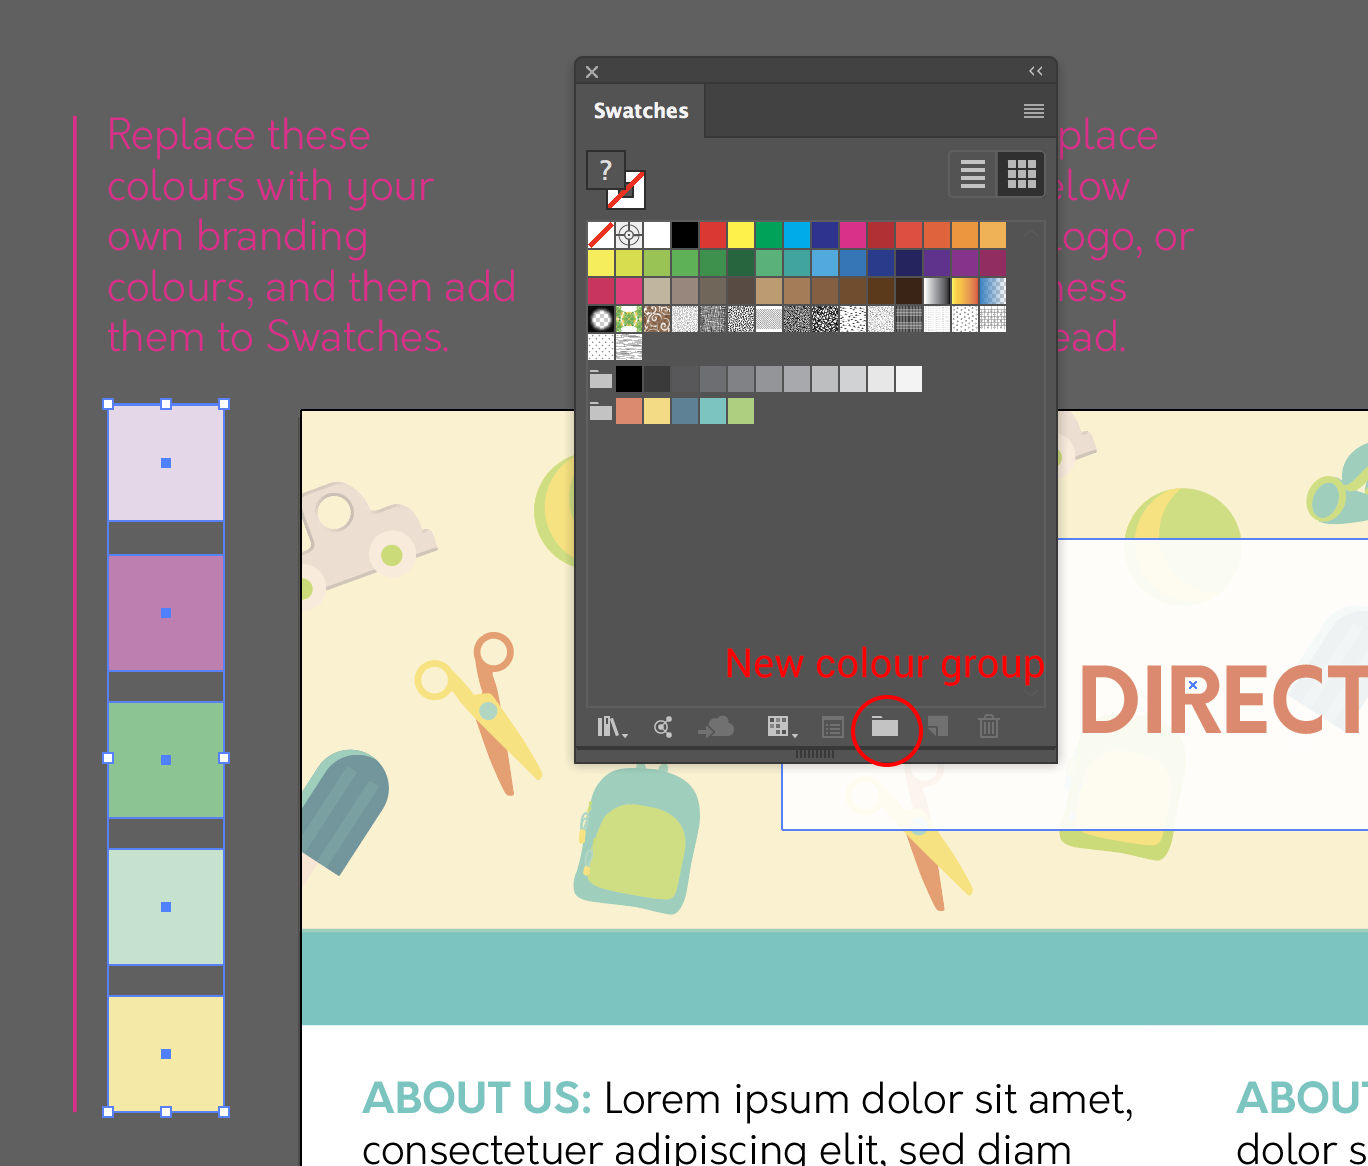
Change the rest of the squares to colours of your choosing, preferably colours from your business branding. Once you have done this, select all the squares using the direct select tool (keyboard shortcut V). In the swatches window, select the new colour group icon which will create a new swatch group out of the colours of the squares:

You should now see your new swatch group in your swatches window. Now onto changing the colours of the template. Select the whole artwork using the Selection tool (keyboard shortcut V). Go to Edit > Edit Colours > Recolour Artwork and the Recolour artwork window will pop up.
Select your colour group from the window and your artwork will change colours:
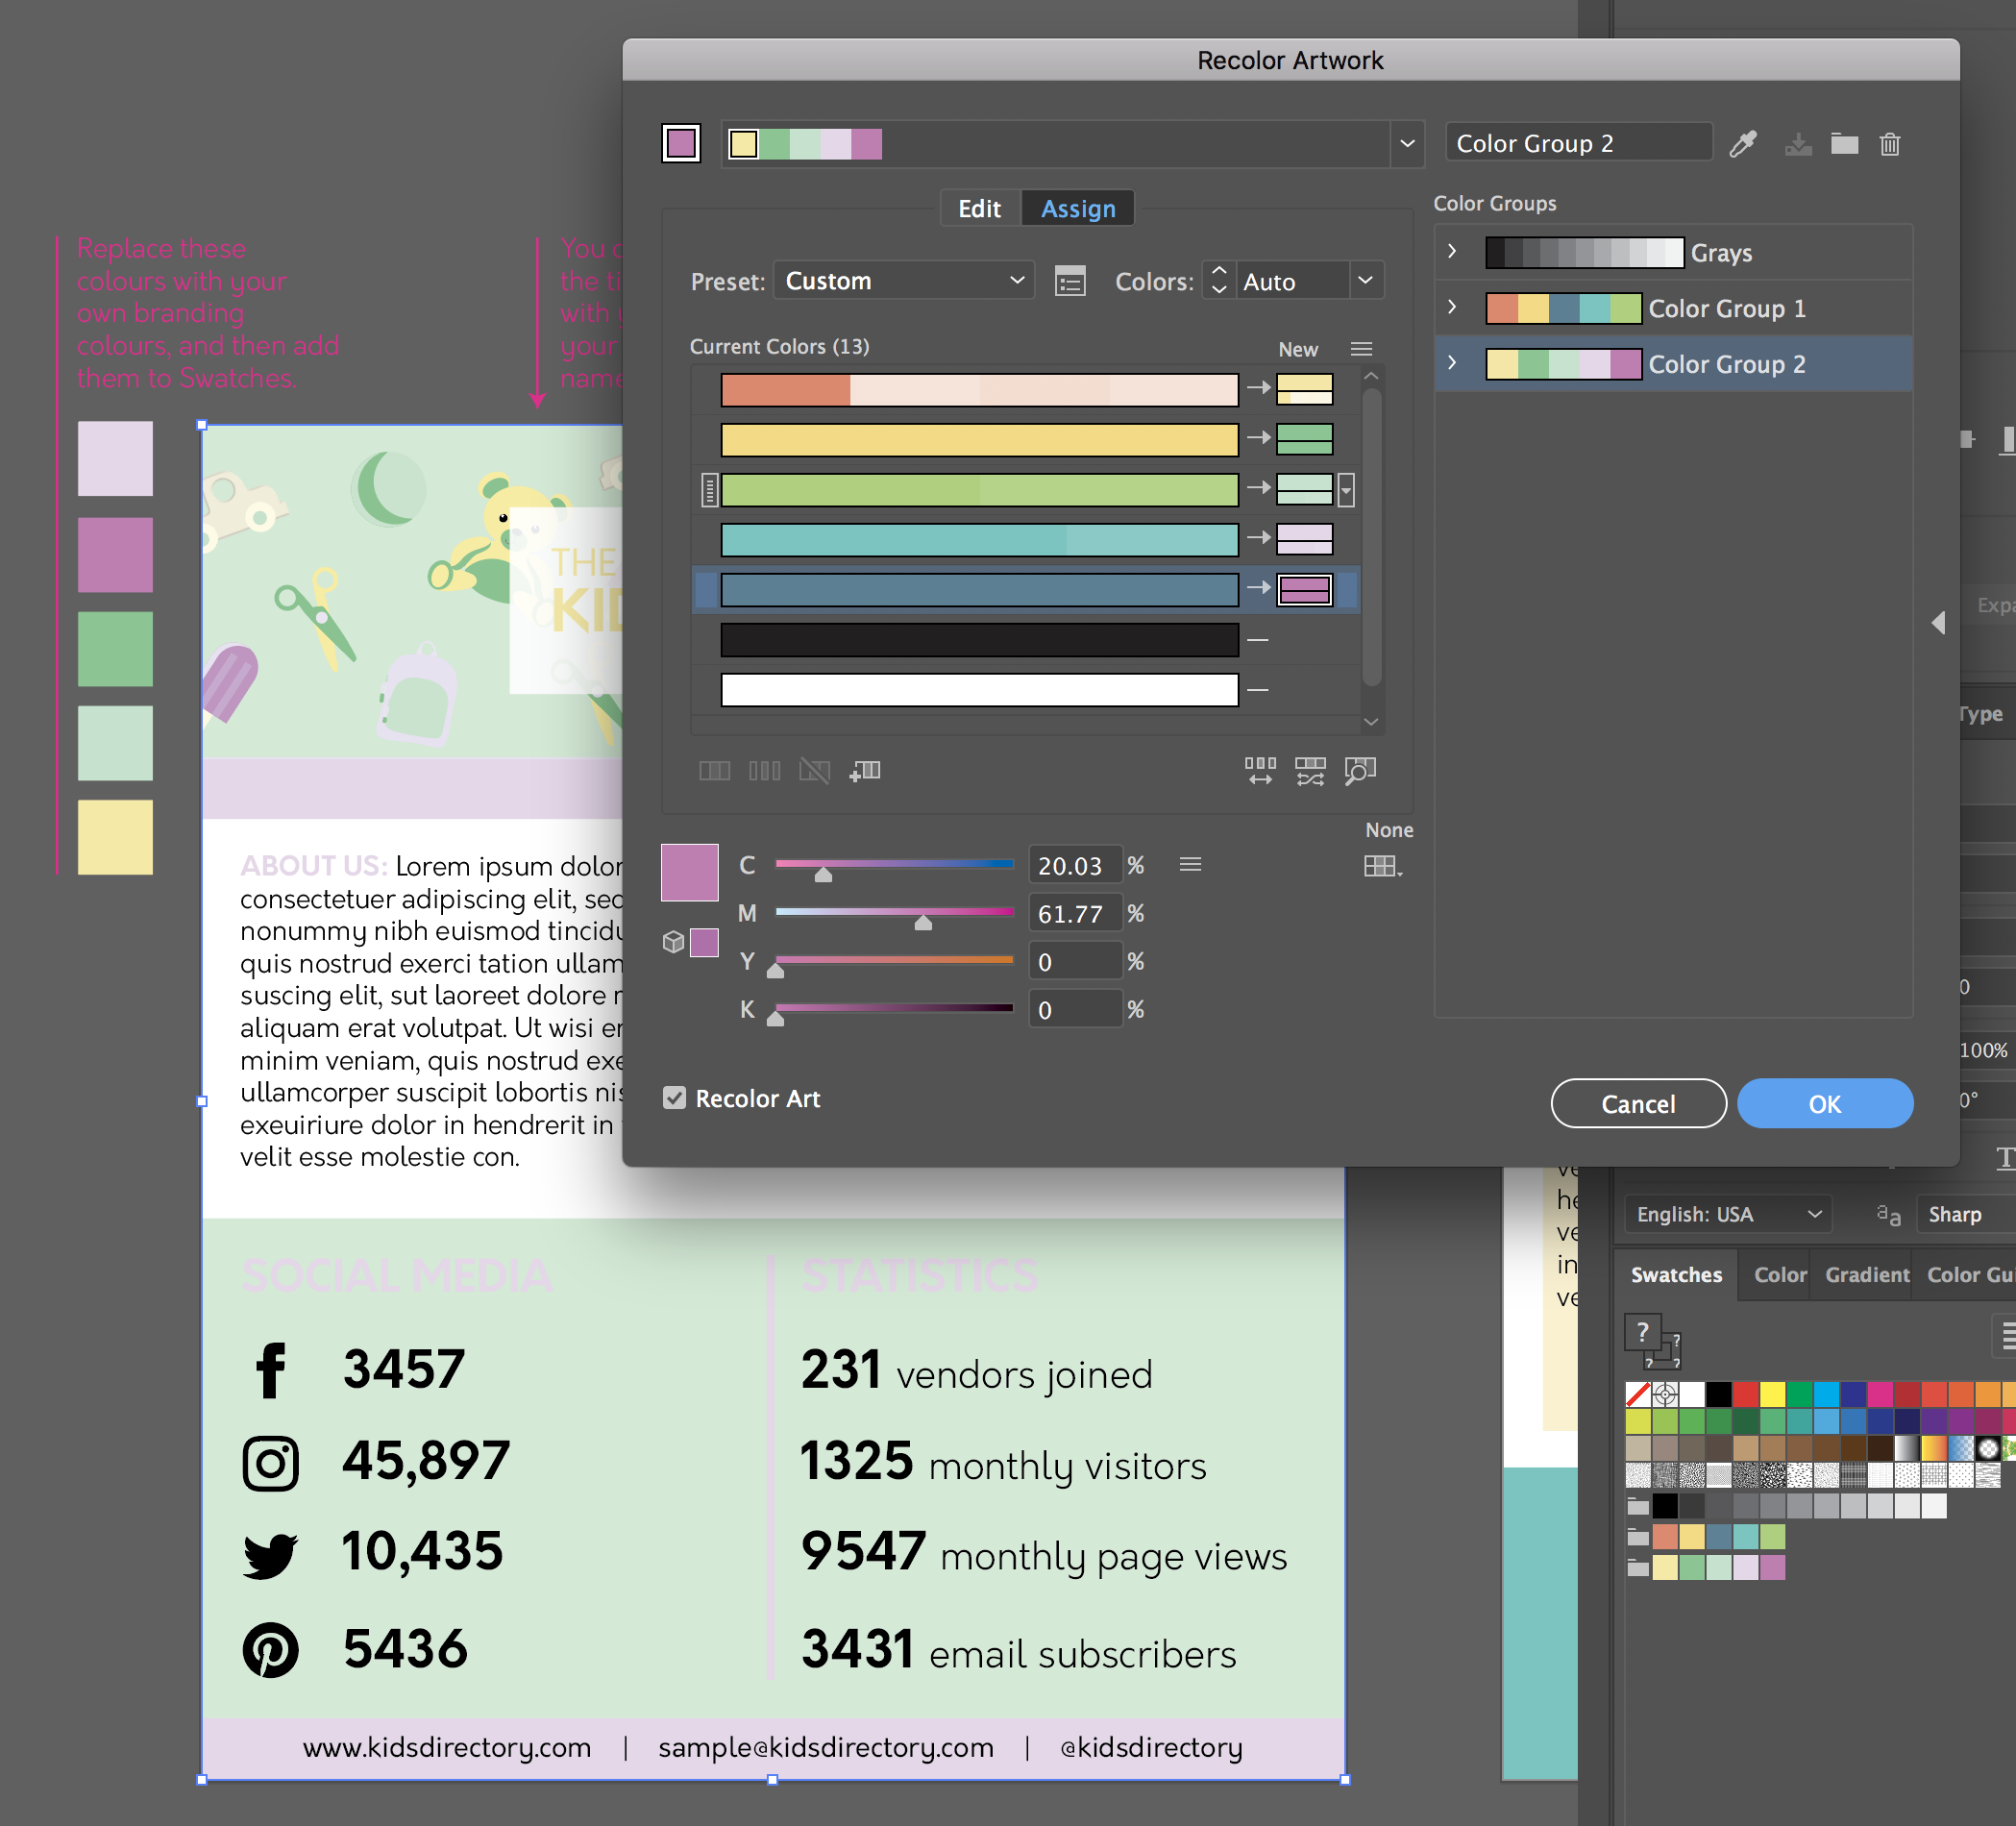
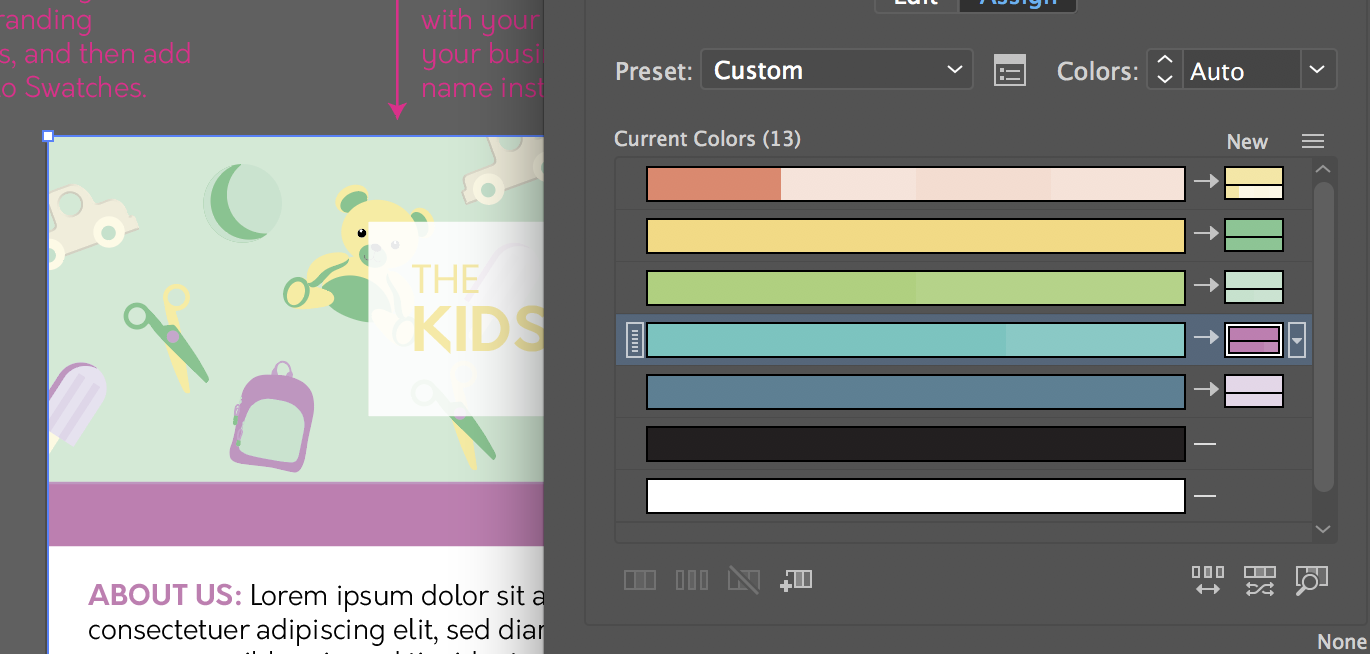
You can then click and drag the new colours in the ‘Current Colours’ section to choose which colour you would like to replace. In the below example I have clicked and dragged the dark purple into the light purple spot:
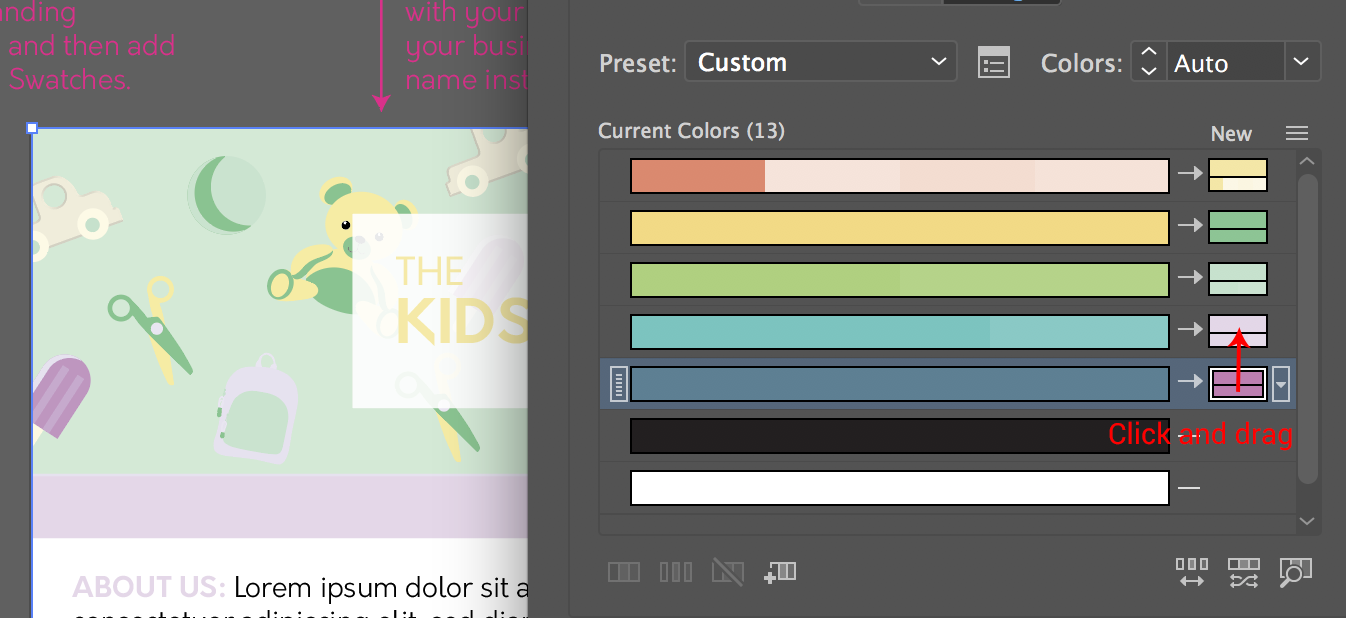
You will see that the document started with 13 colours, but they have been grouped to fit into the 5 colours from your new colour group. You could also changed the colours manually by adjusting the CMYK values of each colour. Although I would not recommend this, time is money! And I am all about doing things as efficiently as possible.
[thrive_leads id='87585']
Replacing or adding images to your template using a clipping mask
Depending on which template you have purchased, you may have images in your template. These are easily replaced using clipping masks.
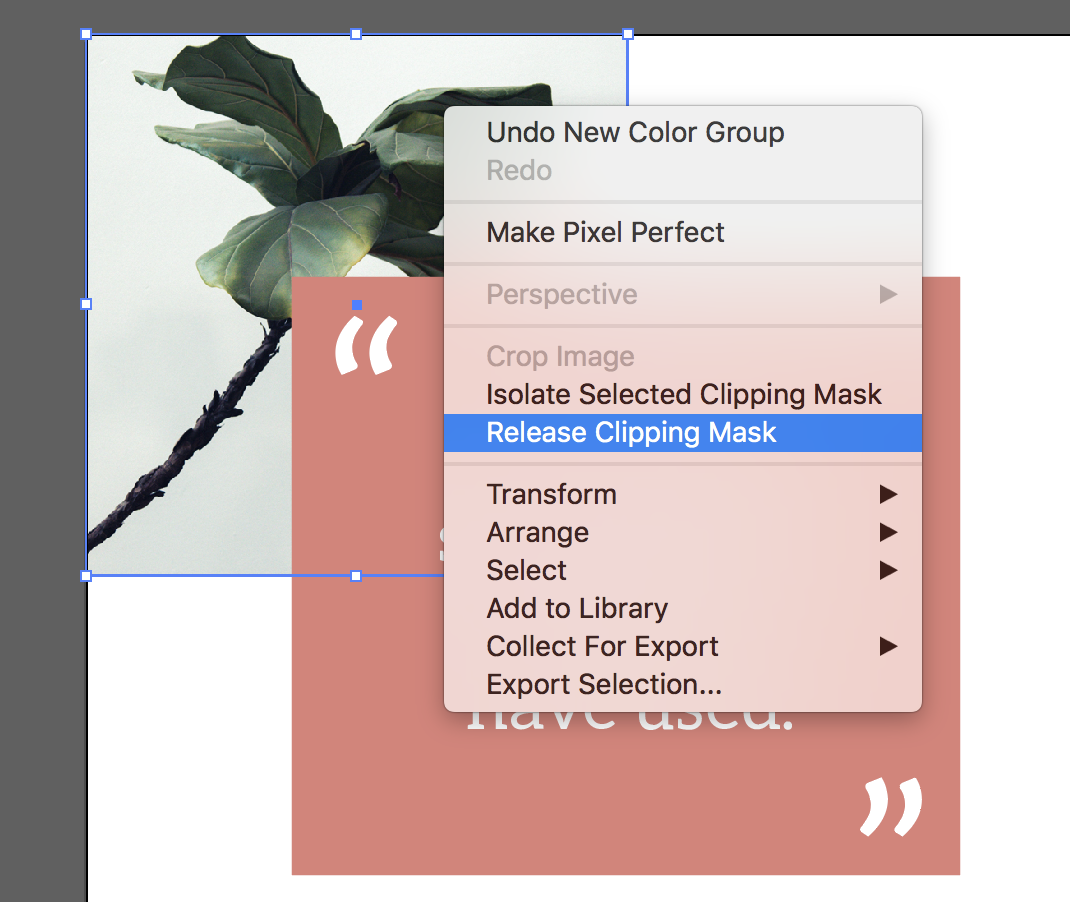
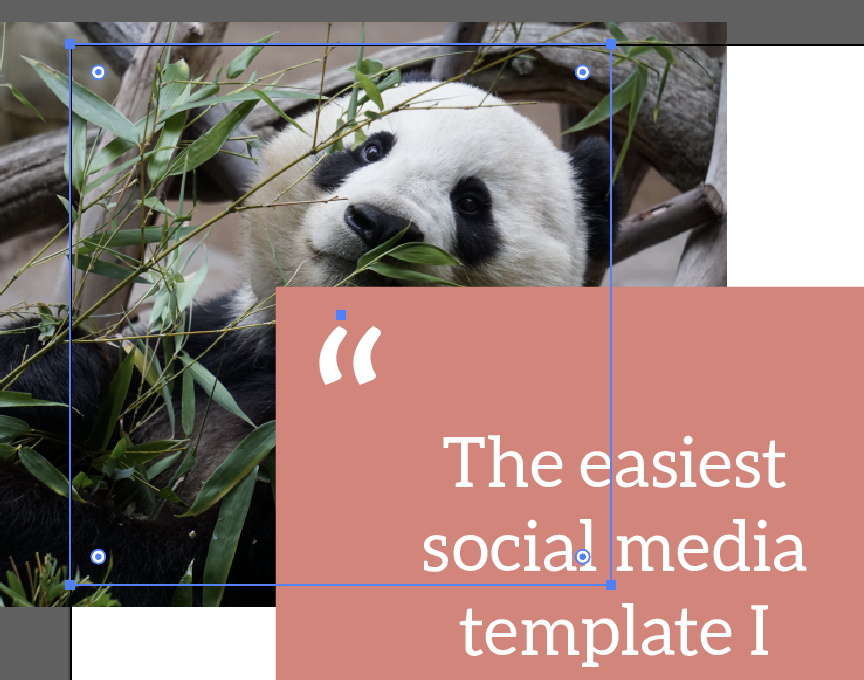
Select the image you want to replace, then right click on it and select release clipping mask:
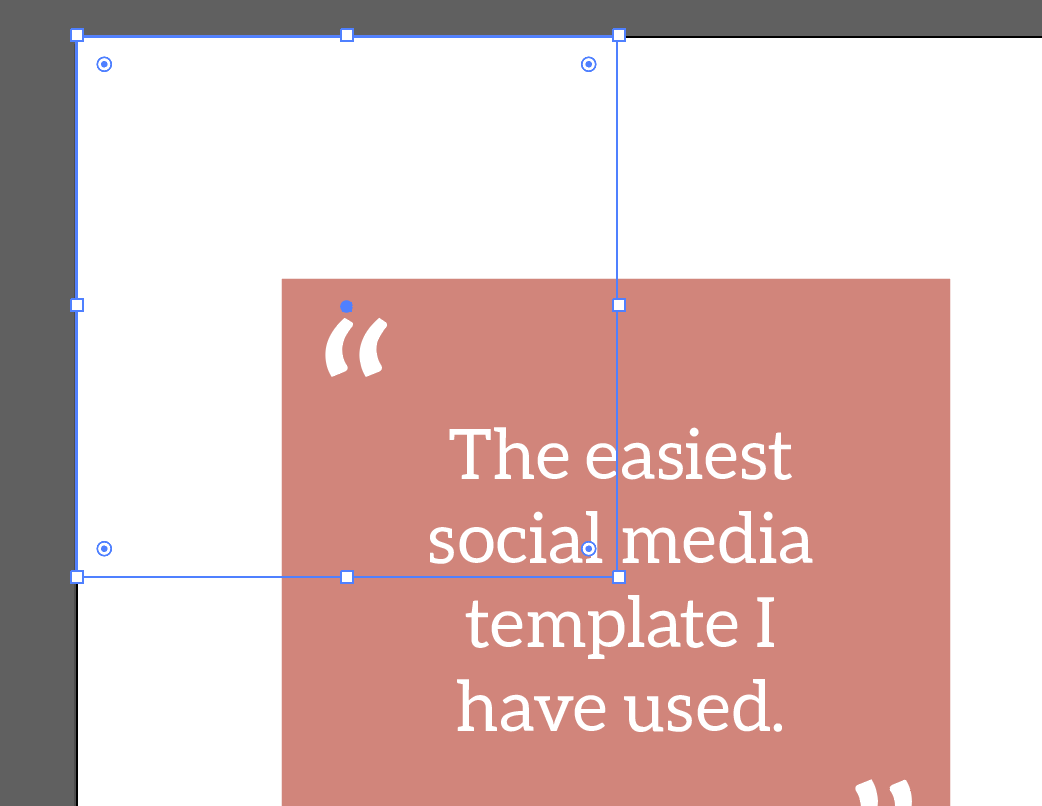
Click anywhere on your artboard to deselect everything, and then delete the current image. You will be left with a box with no fill or outline:
Drop in the image that you would like to add, and position it above the empty square. Then send the image ‘to the back’ by right clicking and selecting Arrange > Send to back (keyboard shortcut cmd/ctrl + shft + [ ). The reposition it if needed so that no important parts will get cut off when we apply the clipping mask:
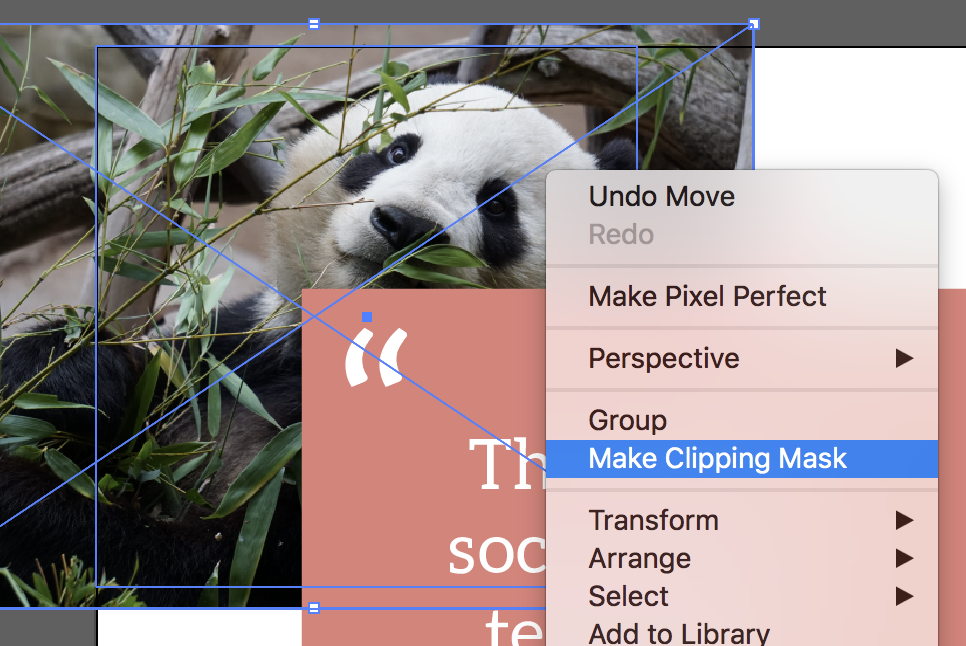
Then with the image and the square selected, right click and go to Make Clipping Mask:
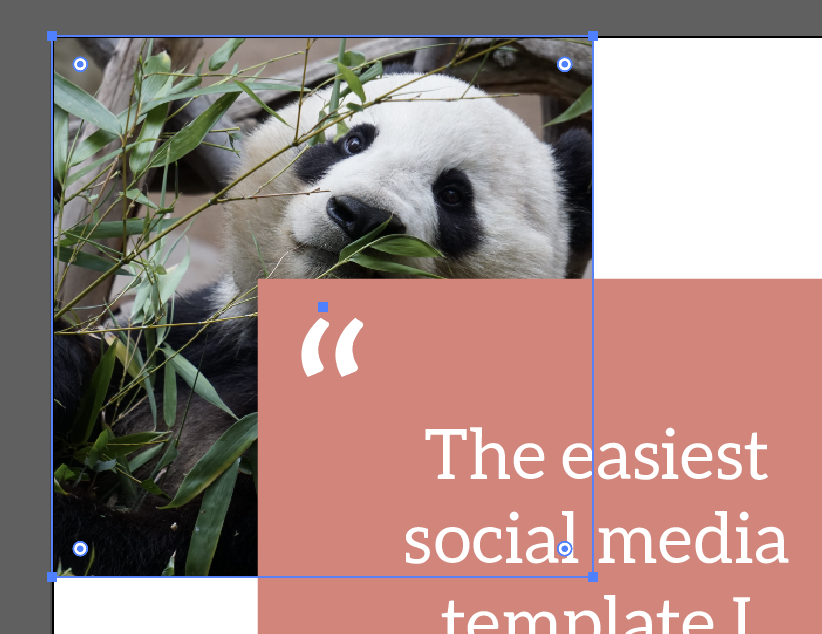
And now your image has been replaced! You could of course use Illustrators crop tool to crop/resize your image, but I find this way easier as it means you can replicate the template exactly without too much effort.

How to edit your Photoshop template
Chances are if you are reading this article it is because you have purchased an Origami Collective Photoshop template and you are now looking to edit your template. Well you have come to the right place! For those of you that are more visual learners, I have created a video containing all the information in this article.
If you haven’t purchased a template from us and you have stumbled upon this article from somewhere else, feel free to read along as the techniques I speak about are useful for any Photoshop user to know.
Editing colours to suit your business branding
There are two different methods that have been used to allow you to change the colours on your template (depending on what template you have purchased), either using solid colour layer with a layer mask, or using smart objects.
Before we begin changing colours, it will come in handy if you have the HEX codes of your business colours. Or even the RGB values.
1. Changing the template colours using a solid colour layer (business card templates & media kit templates)
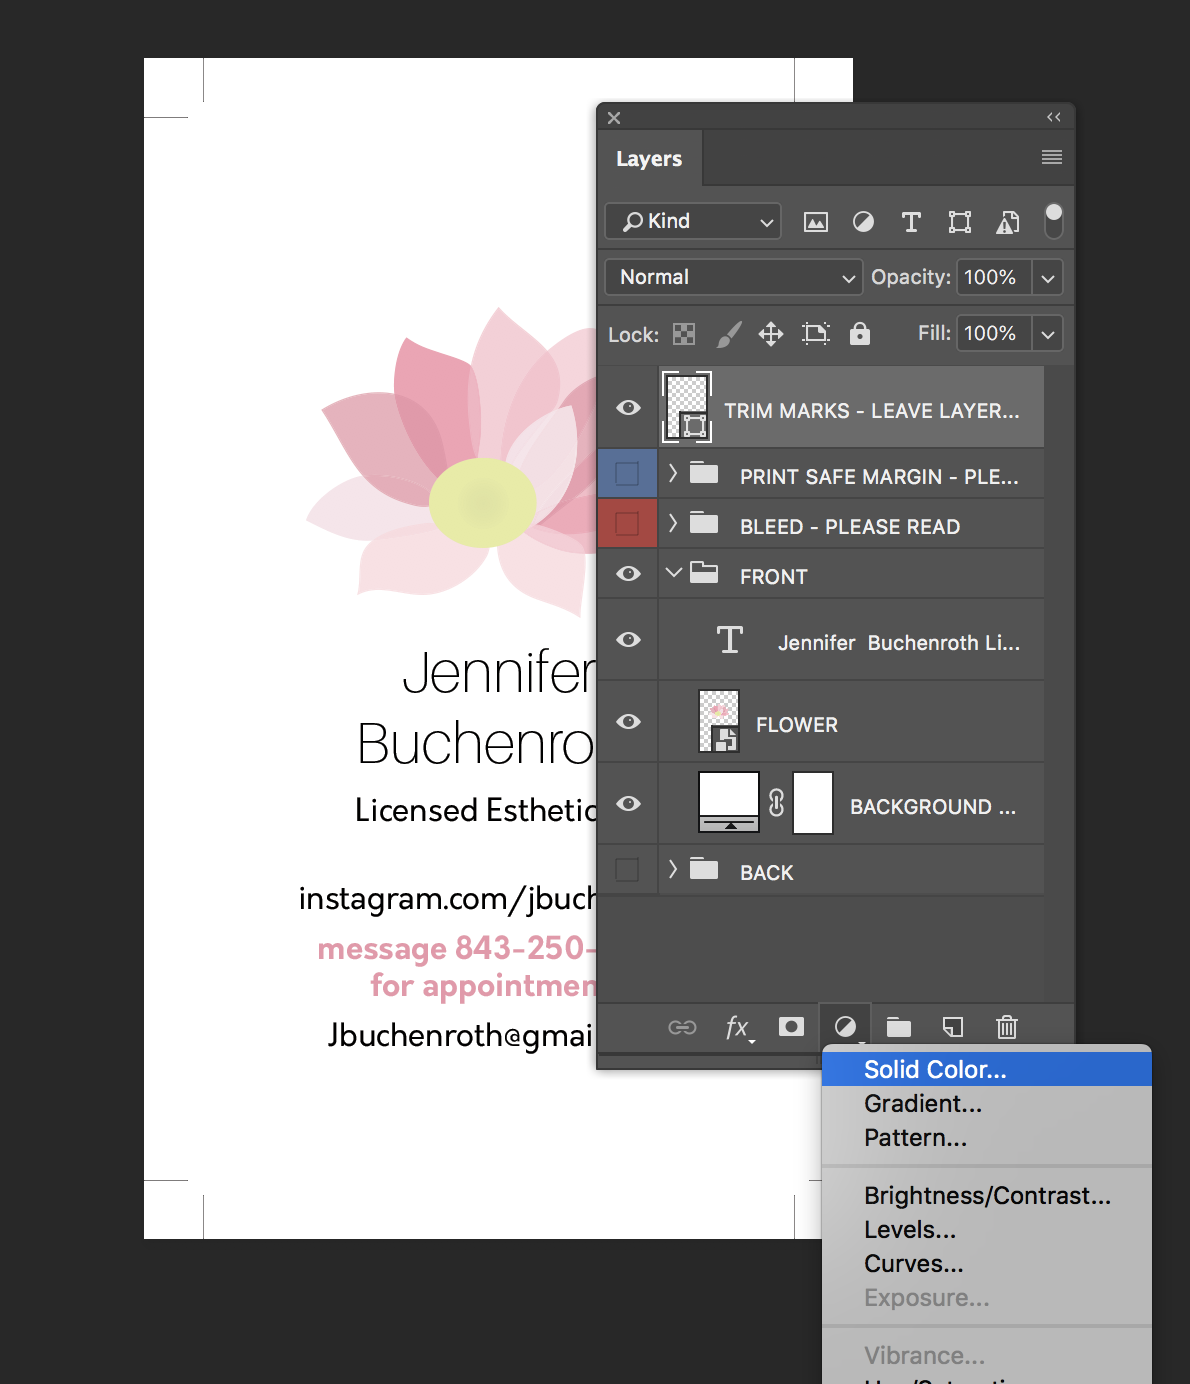
If you look in layers panel you will see a solid colour layer with a layer mask attached to it. This layer has been linked with the layer below it to allow us to change the colour:
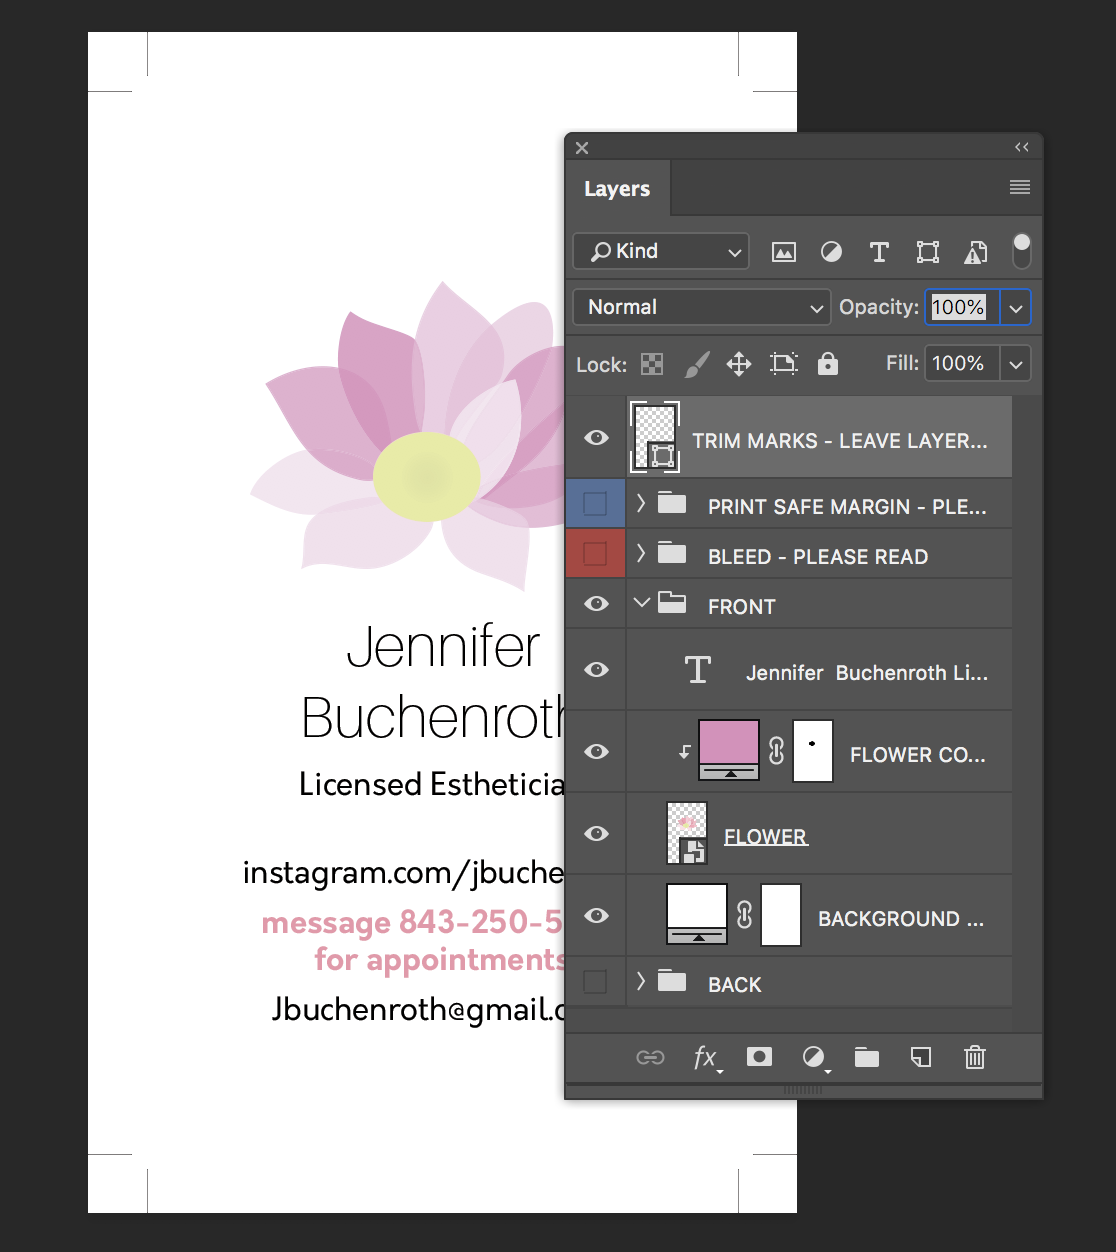
So you can see that the flower layer has had its colour changed to pink using the solid colour layer.
To change the colour, simply double click the solid colour layer (the pink square) and select the colour you would like to change it to.
How solid colour layers work:
To set up a solid colour layer, select it from the menu at the bottom of the layers panel:
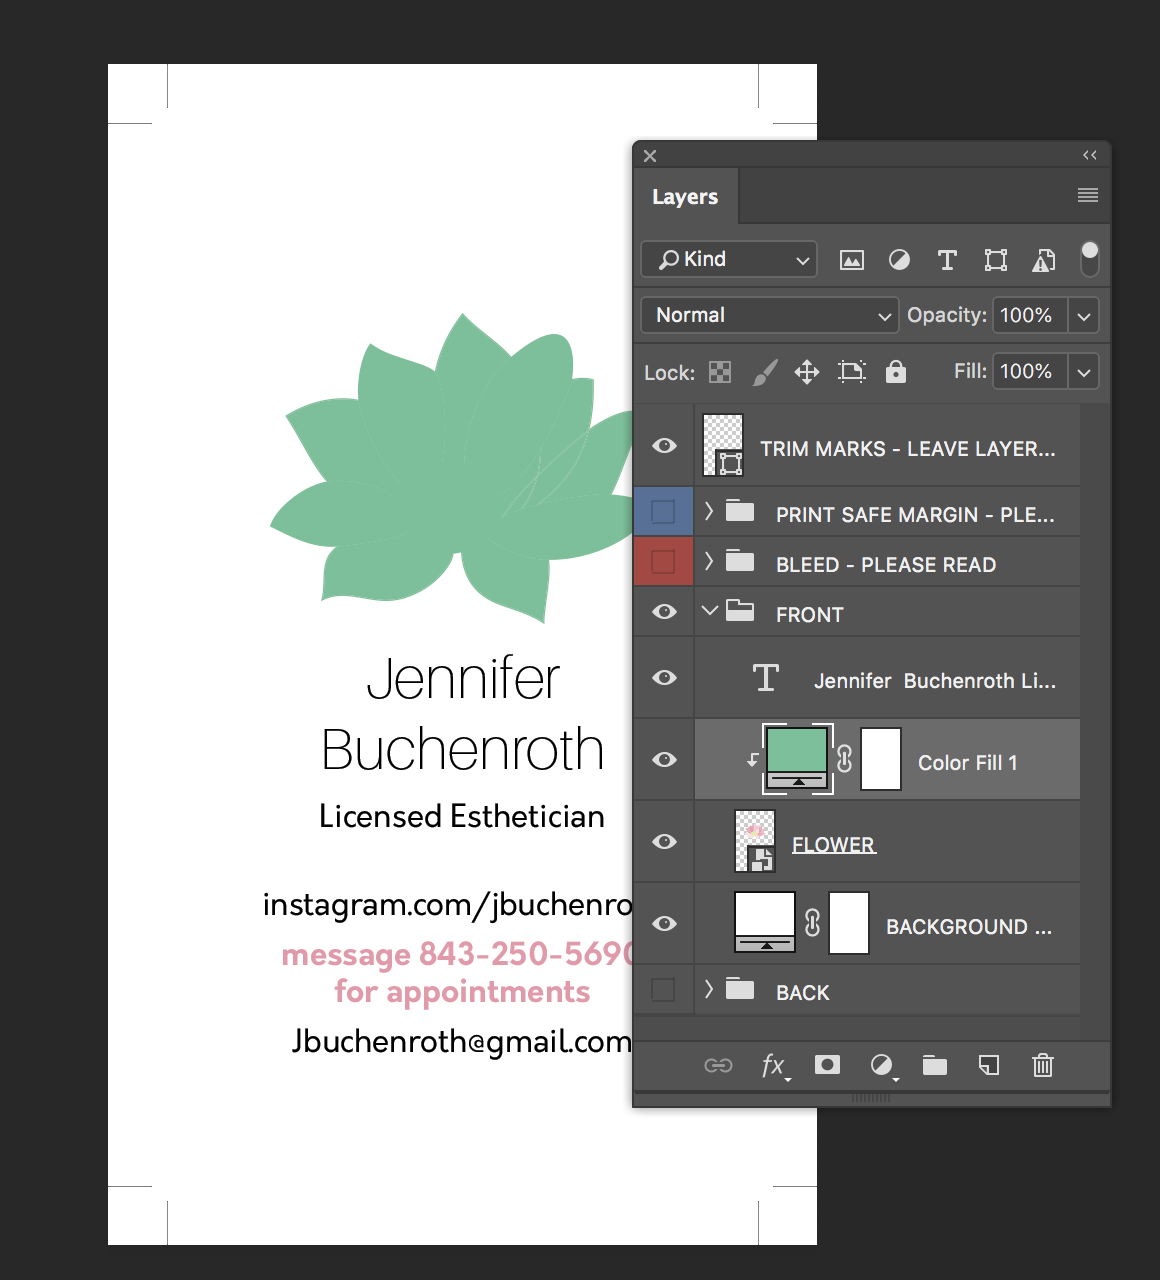
You will be asked to select a colour, choose any one as it can always be changed later. Then, whilst holding the option (alt for PC users) hold you mouse between the solid colour layer and the flower layer and your cursor should change into a down arrow with a box next to it. Click between the two layers and this will link them together:
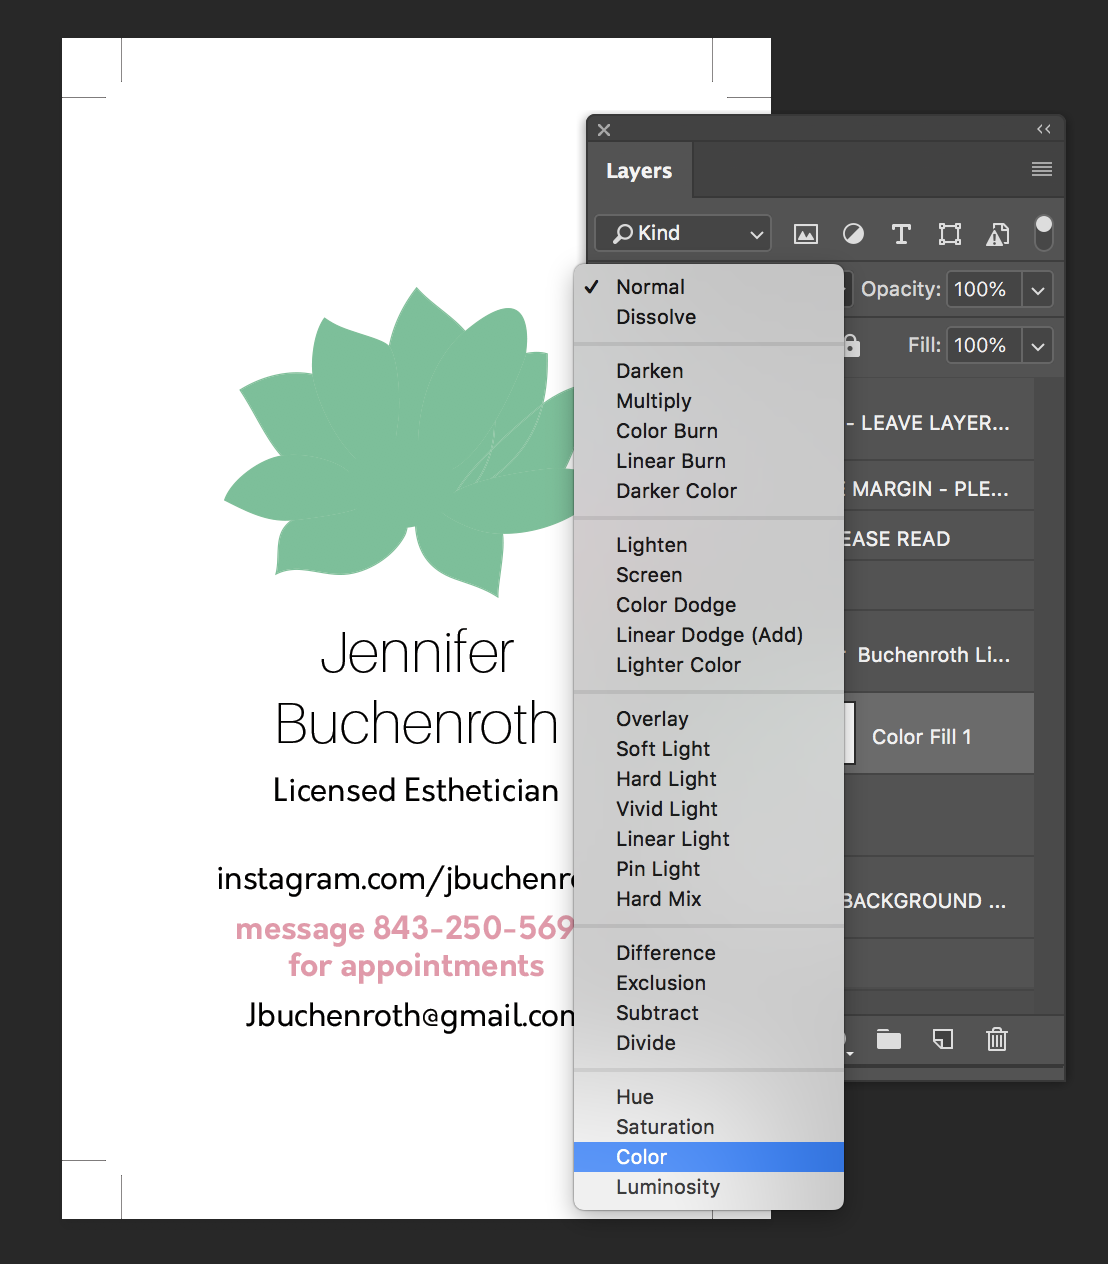
You then need to select the solid colour layer and change the layer mode to colour from the drop down box:
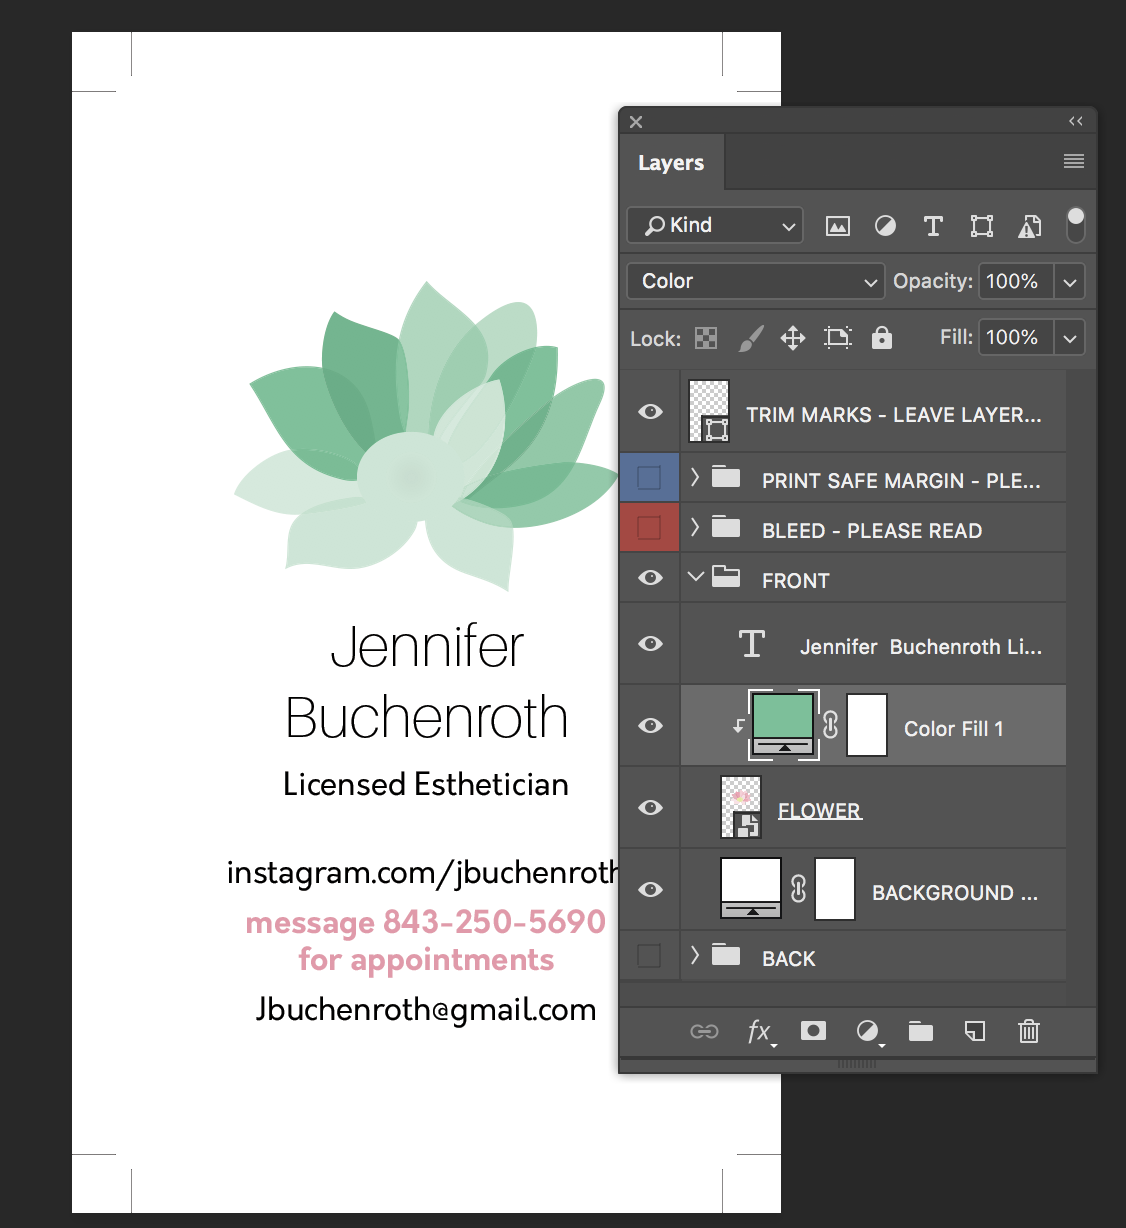
As you can see, this has also changed the colour of the middle of the flower (which we don’t want). So this is where the layer mask comes in. Select the brush tool (keyboard shortcut - B) change it to 50% hardness, and make sure black is your foreground colour.
Then click on the layer mask that is next to the solid colour layer, and once it is selected you can use your brush tool to start brushing away the colour from the middle of the flower:

You can use this method to essentially recolour anything you like!
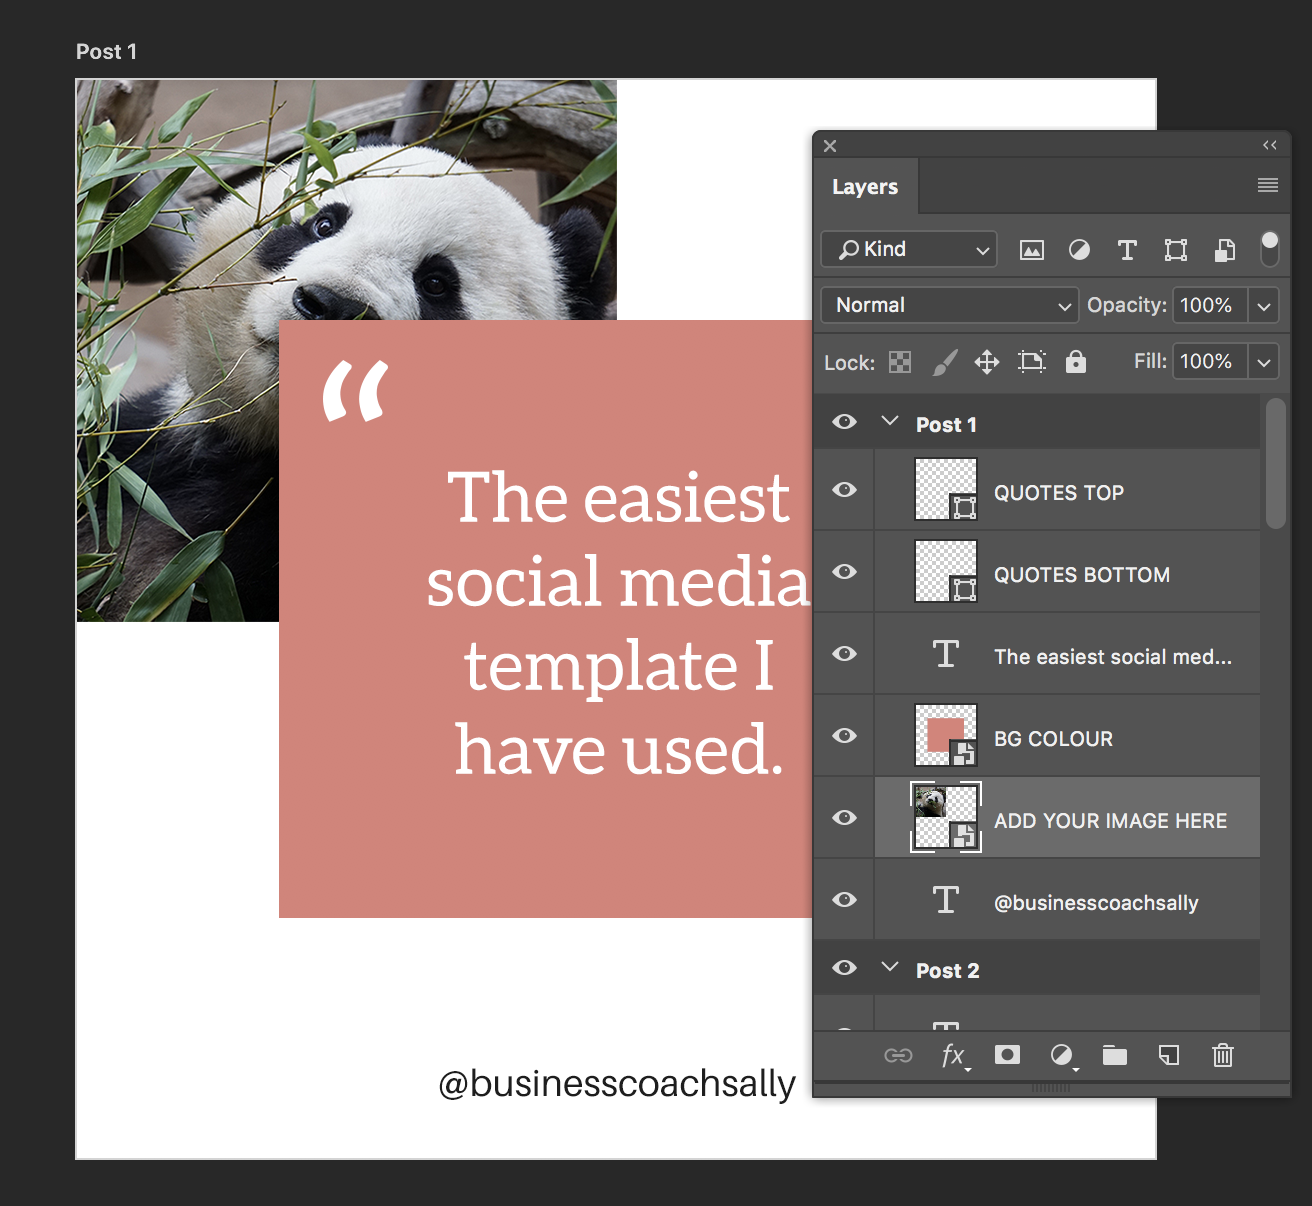
2. Changing the template colour using linked smart object layers (social media templates)
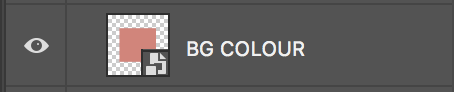
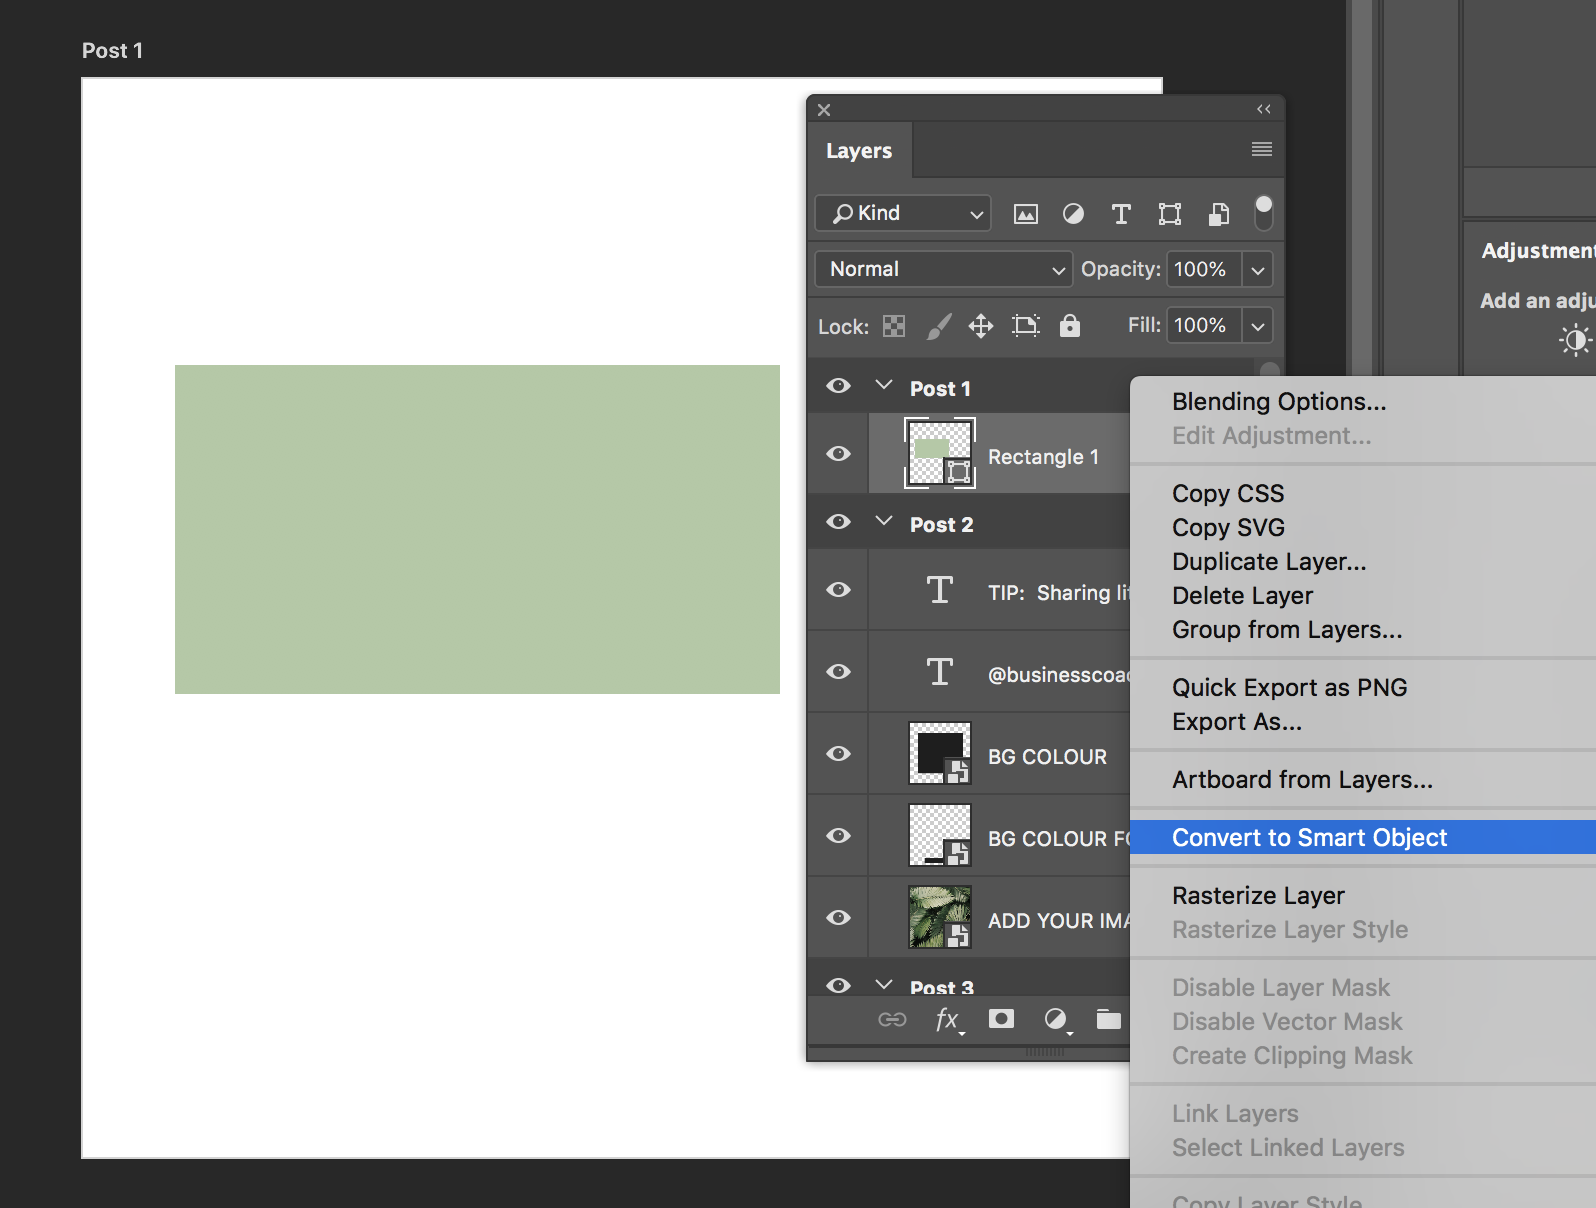
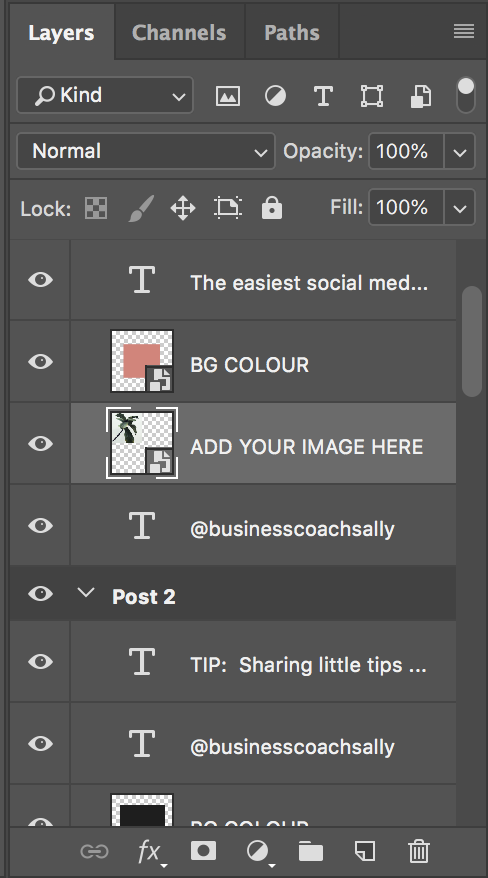
If you look in your layers panel you will see layers with solid blocks of colour in them. You can tell that they are smart object layers by the symbol in the bottom right hand corner of the layer preview:
To change the colour of the layer, simply double click it and a new window will pop up:
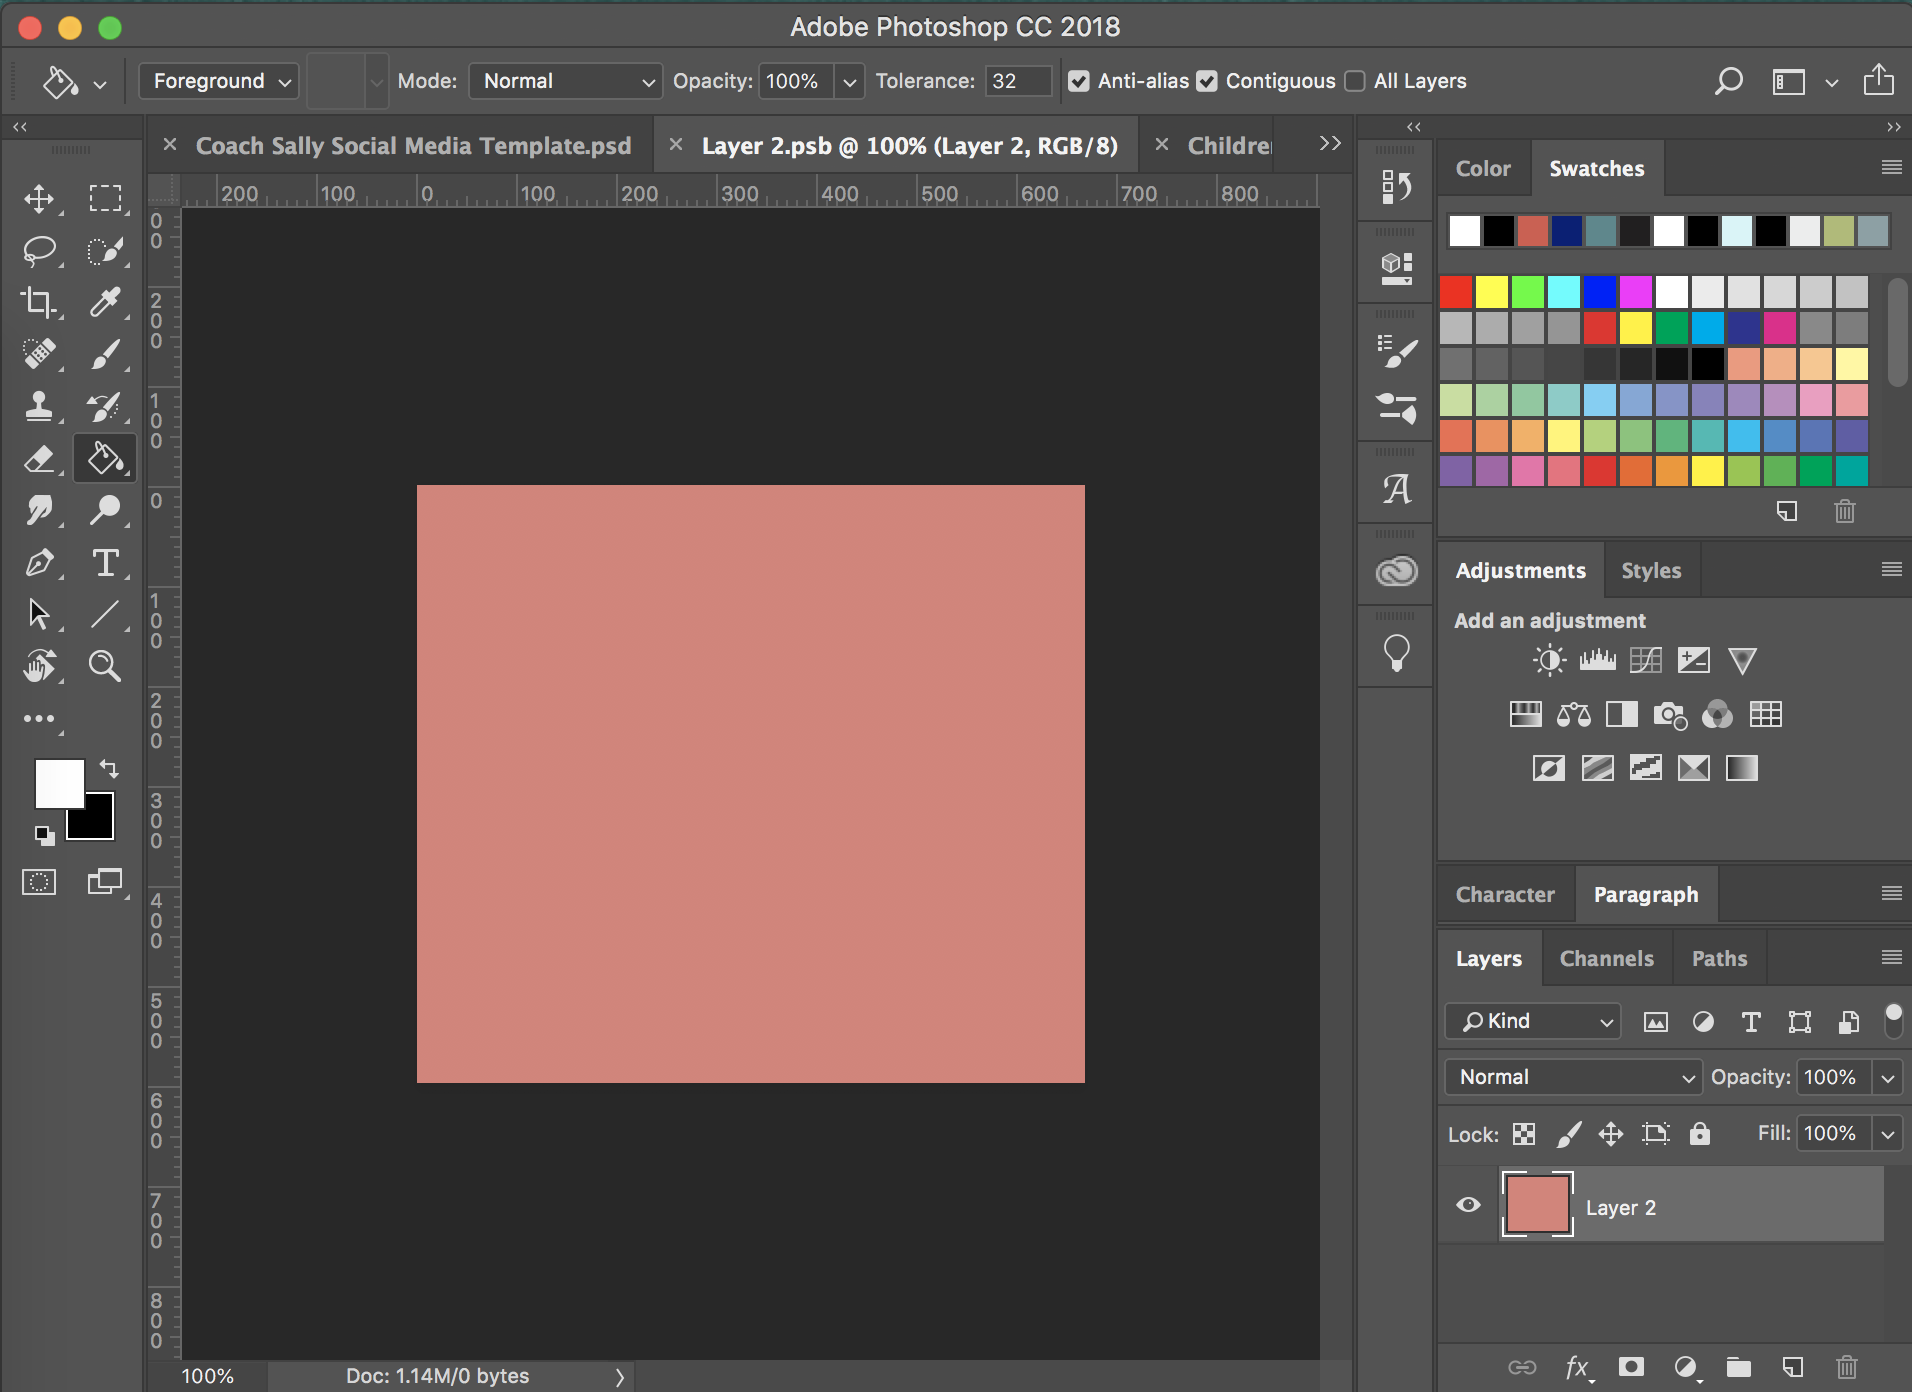
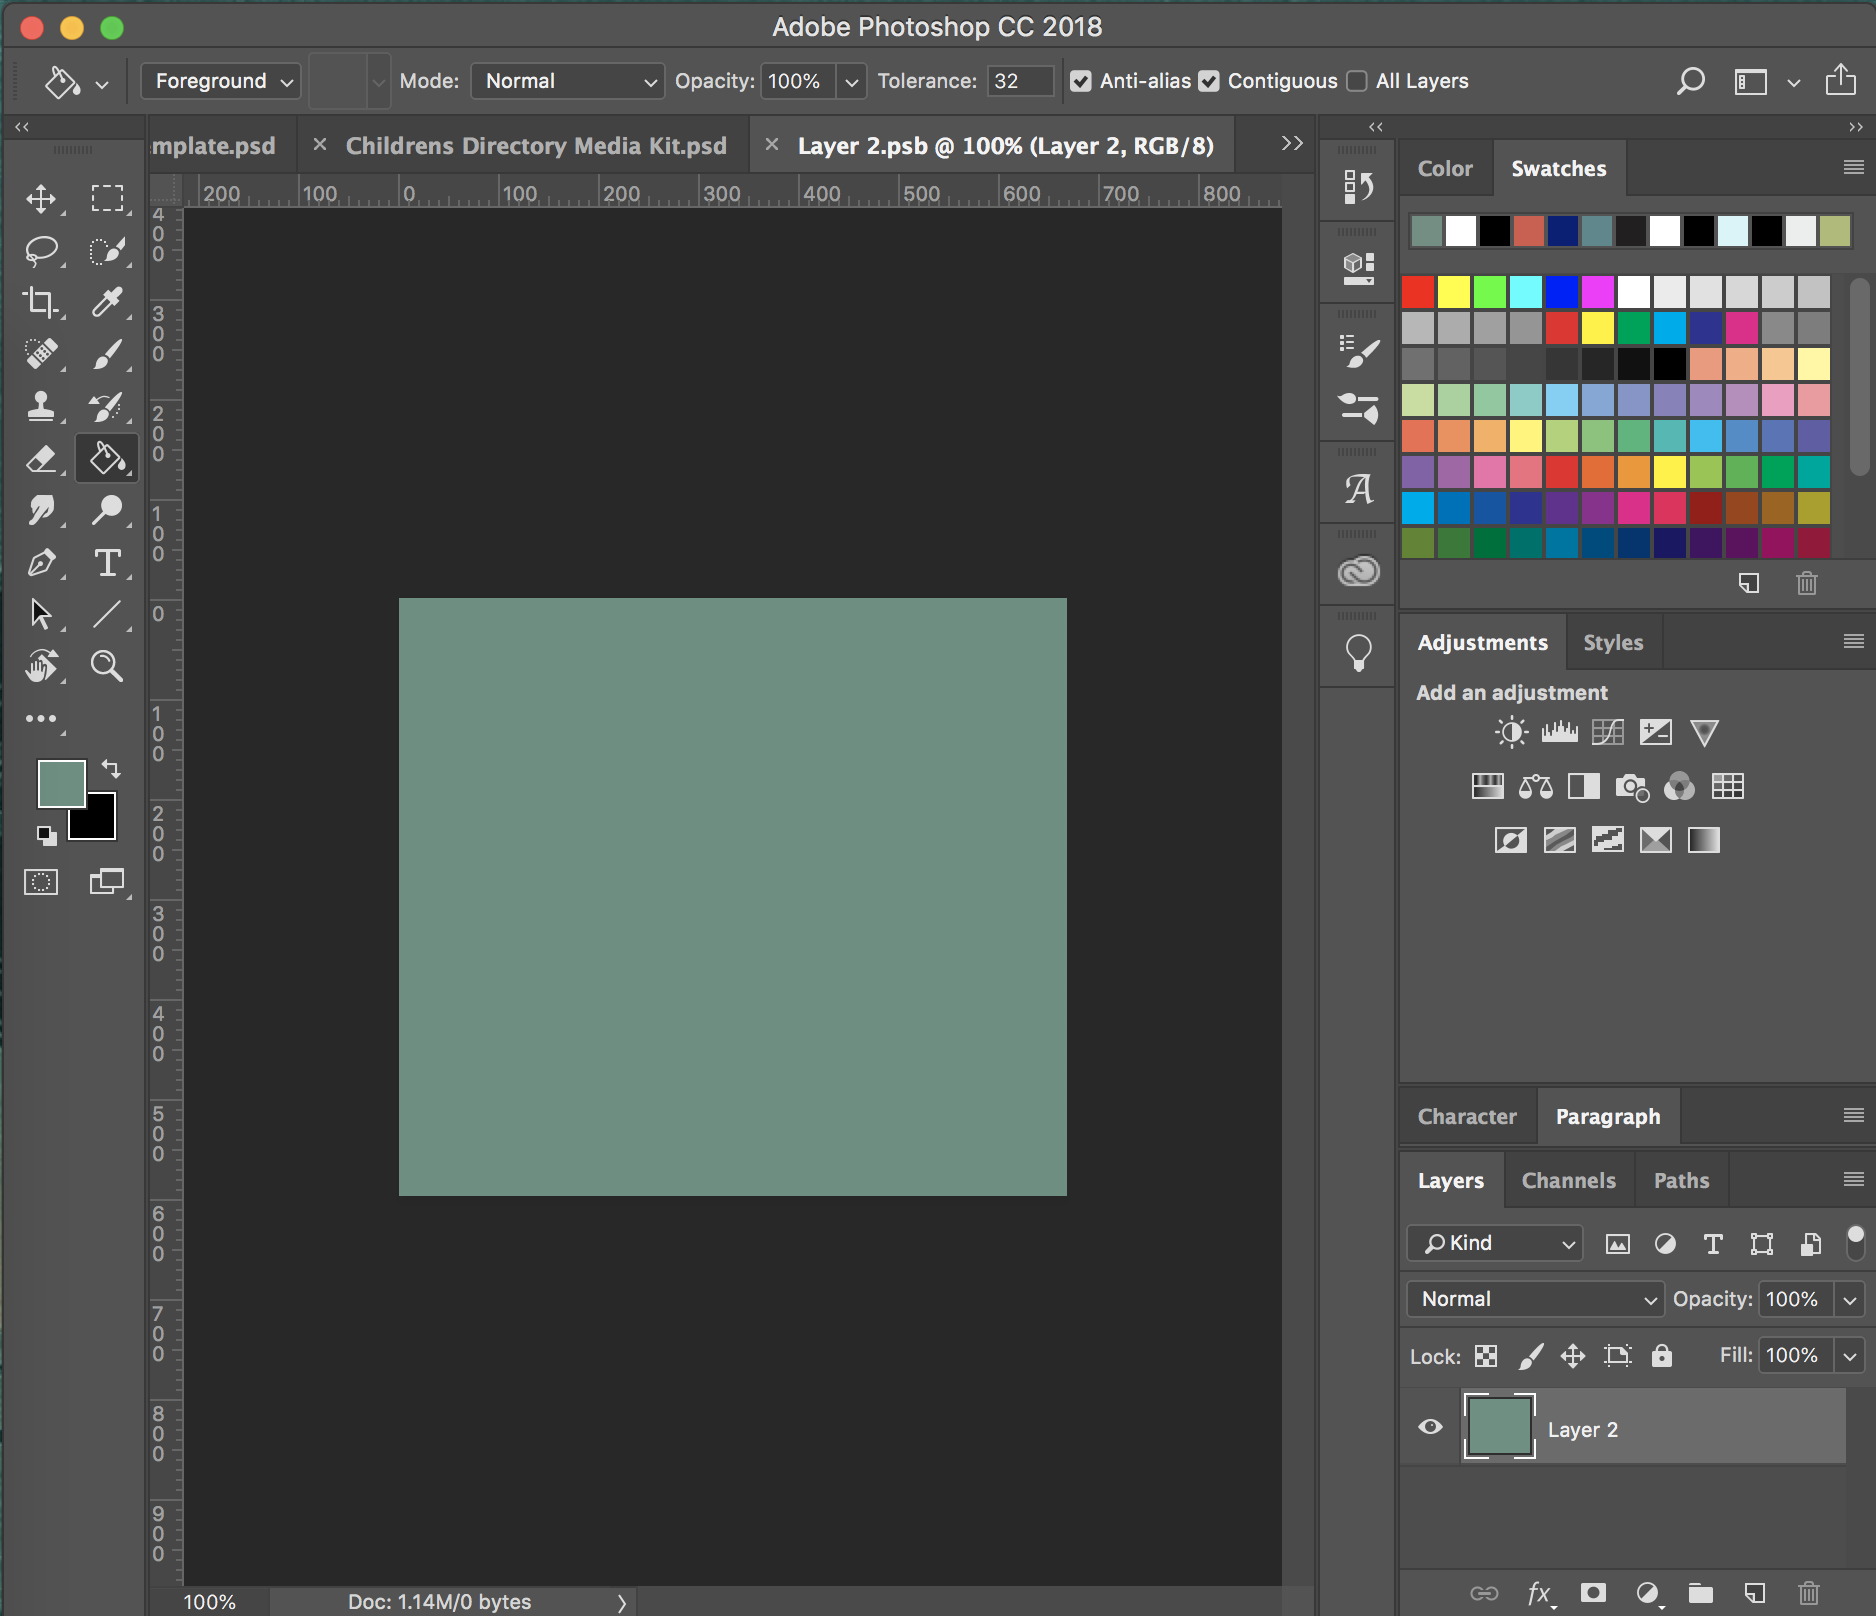
Then using the paint bucket tool (keyboard shortcut - G), fill the layer with your desired colour. Hit cmd + s to save the file, and then close it.
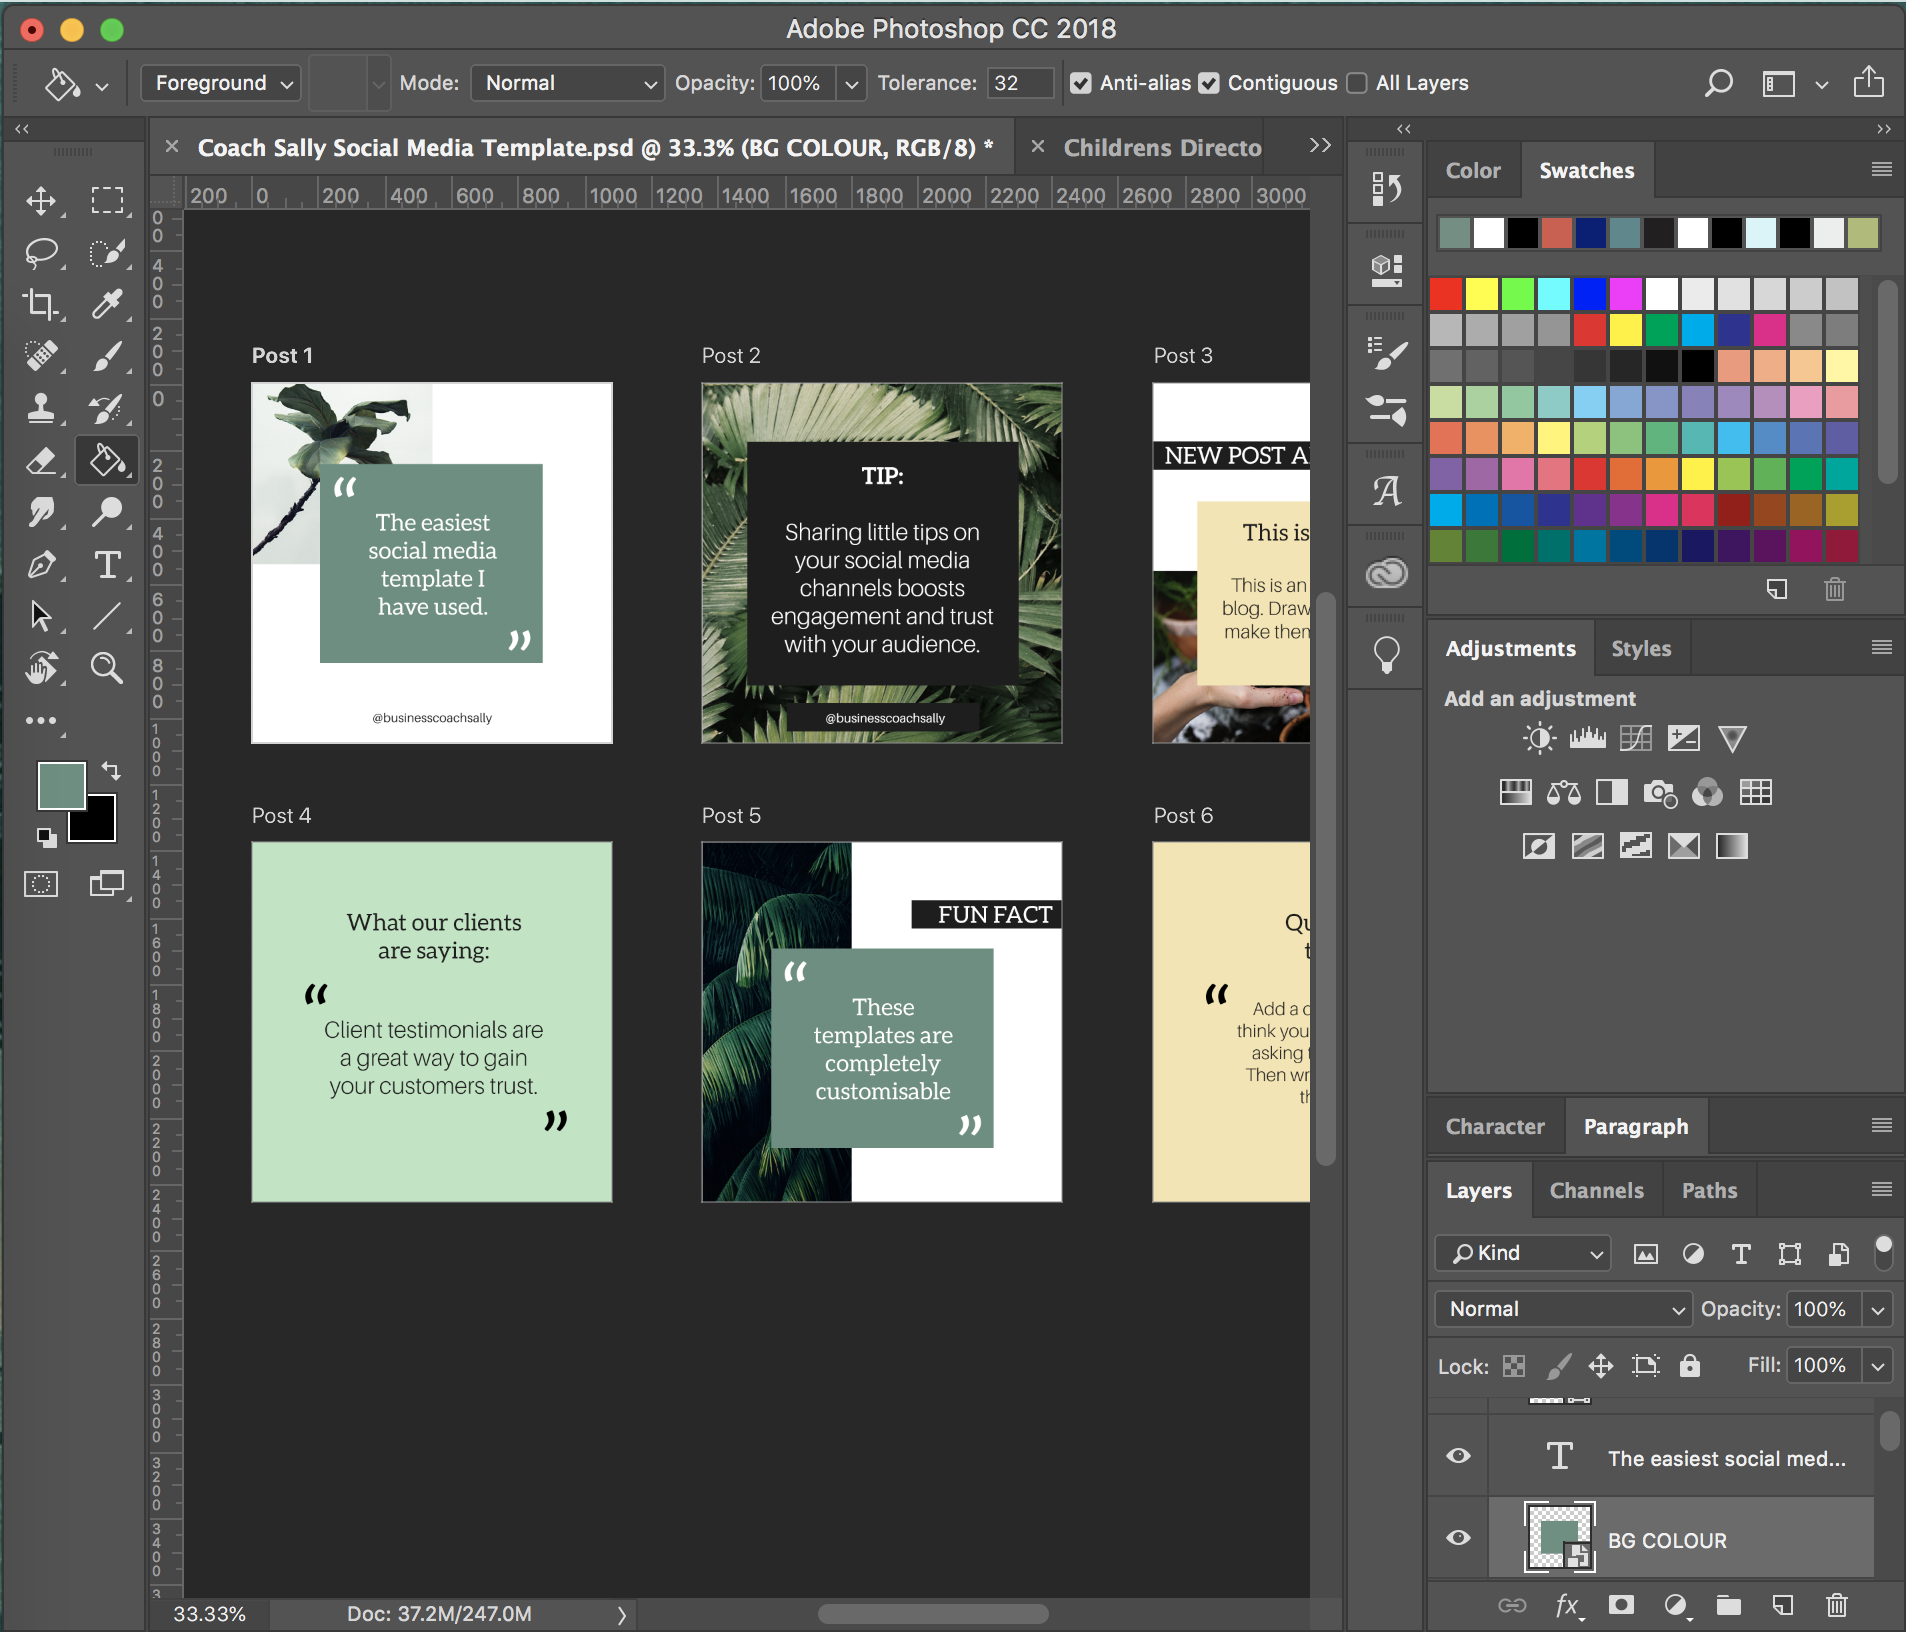
You will then see all the instances of the peach colour have now been changed to your selected colour in the file.
How linked smart object layers work:
Smart objects allow us to edit layers without changing the layers original characteristics. If you duplicate a smart object and make a change to the duplicated layer, this change will be reflected on the original layer as well. Smart object layers are linked, allowing you to make changes throughout files with ease.
To set up a smart object layer, use the shape tool (keyboard shortcut - U) and create a shape with a solid fill colour and no stroke. Then right click on the shapes layer (you need to right click on the name of the layer) that has been created in the layer panel and select ‘convert to smart object’ from the menu that appears.
You now have a smart object. Using free transform (keyboard shortcut - cmd/ctrl + T) you can resize the shape to suit your needs. Duplicate this layer to create linked smart object layers.
This smart object layer can also be used to recolour an object. I have dropped a graphic into my file, and placed the layer underneath the smart object layer. You need to ensure that the coloured rectangle is covering all of the graphic. Then you need to hold alt and click between the two layers to link them. This will then change the colour of the graphic.
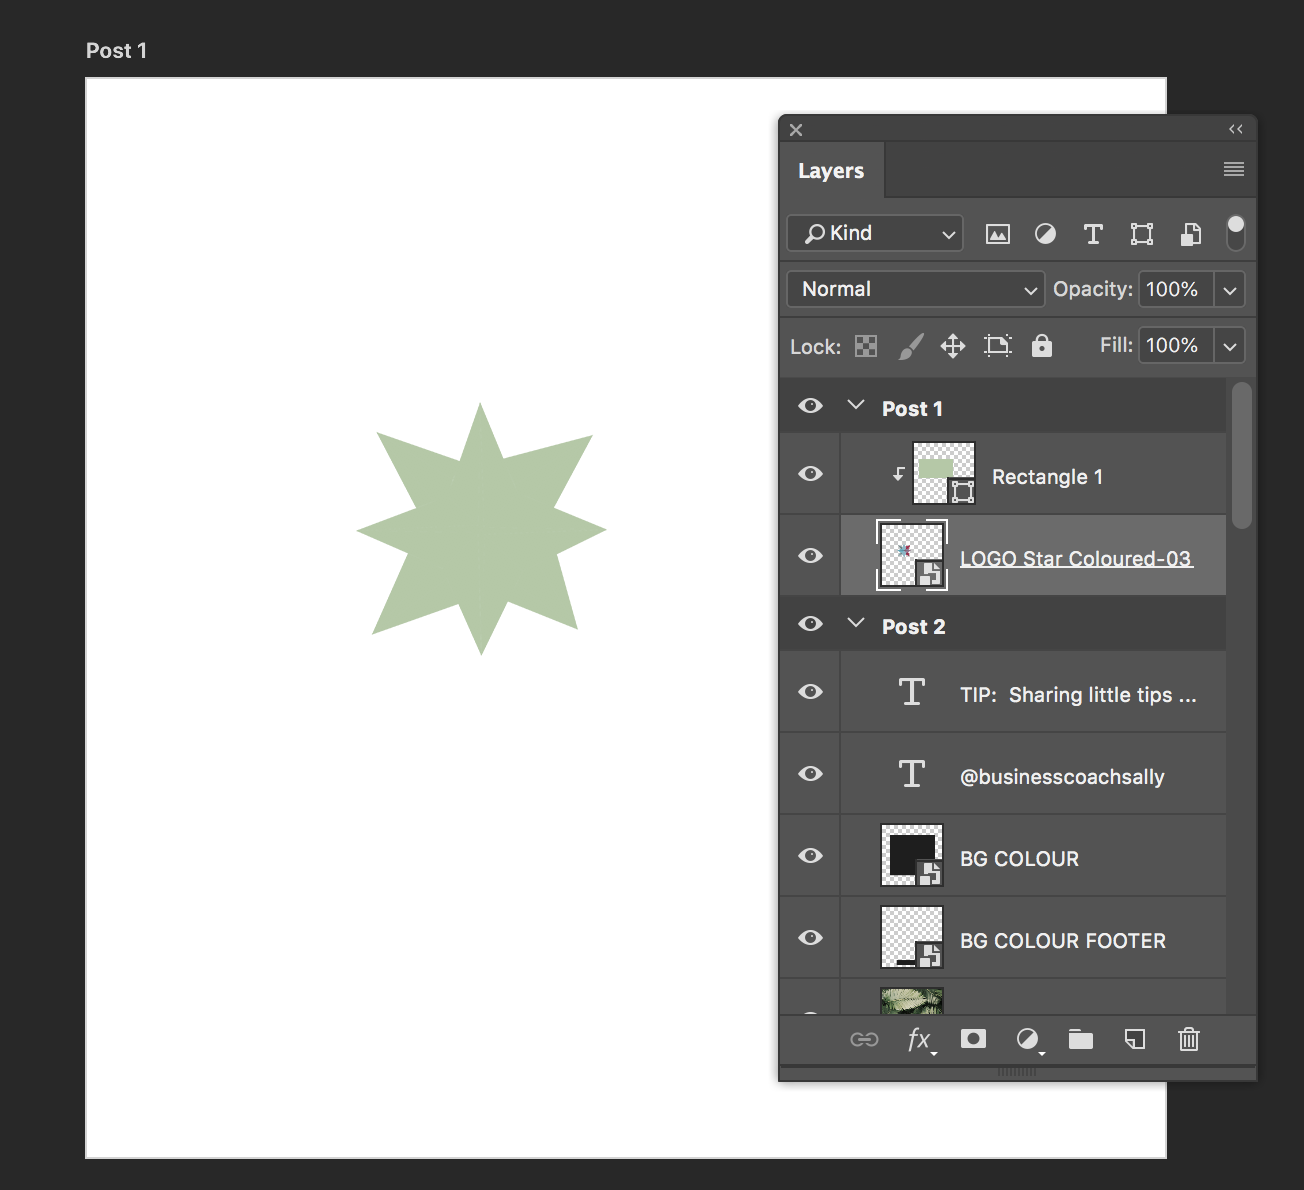
You could then duplicate the smart object rectangle layer and link it to other objects to recolour them. If you ever wanted to change the colour later, you would only need to adjust the colour on of the smart object layers, and they would all change.
NOTE: The linking only works if you duplicate the smart object layer. Any duplicates of the original will be linked. If you create a new smart object layer from scratch it will not be linked to your other smart object layers.
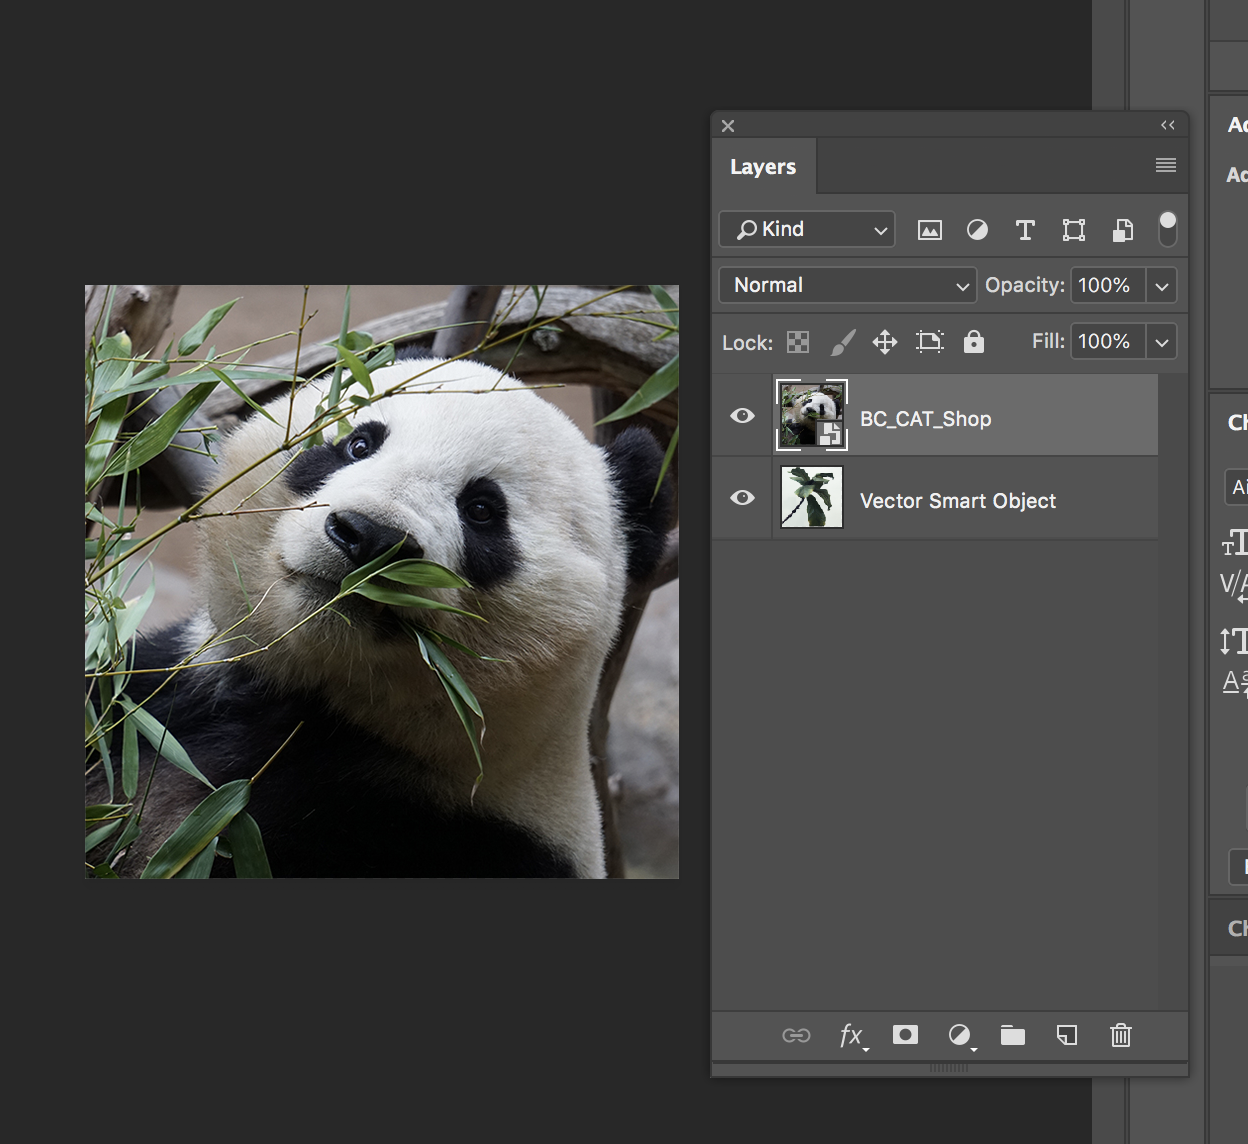
Adding or replacing images using smart objects
Editing a smart object layer with an image is it is essentially the same as editing a colour smart object layer.
Double click the smart object layer and a new window will pop up with just the image on the artboard.
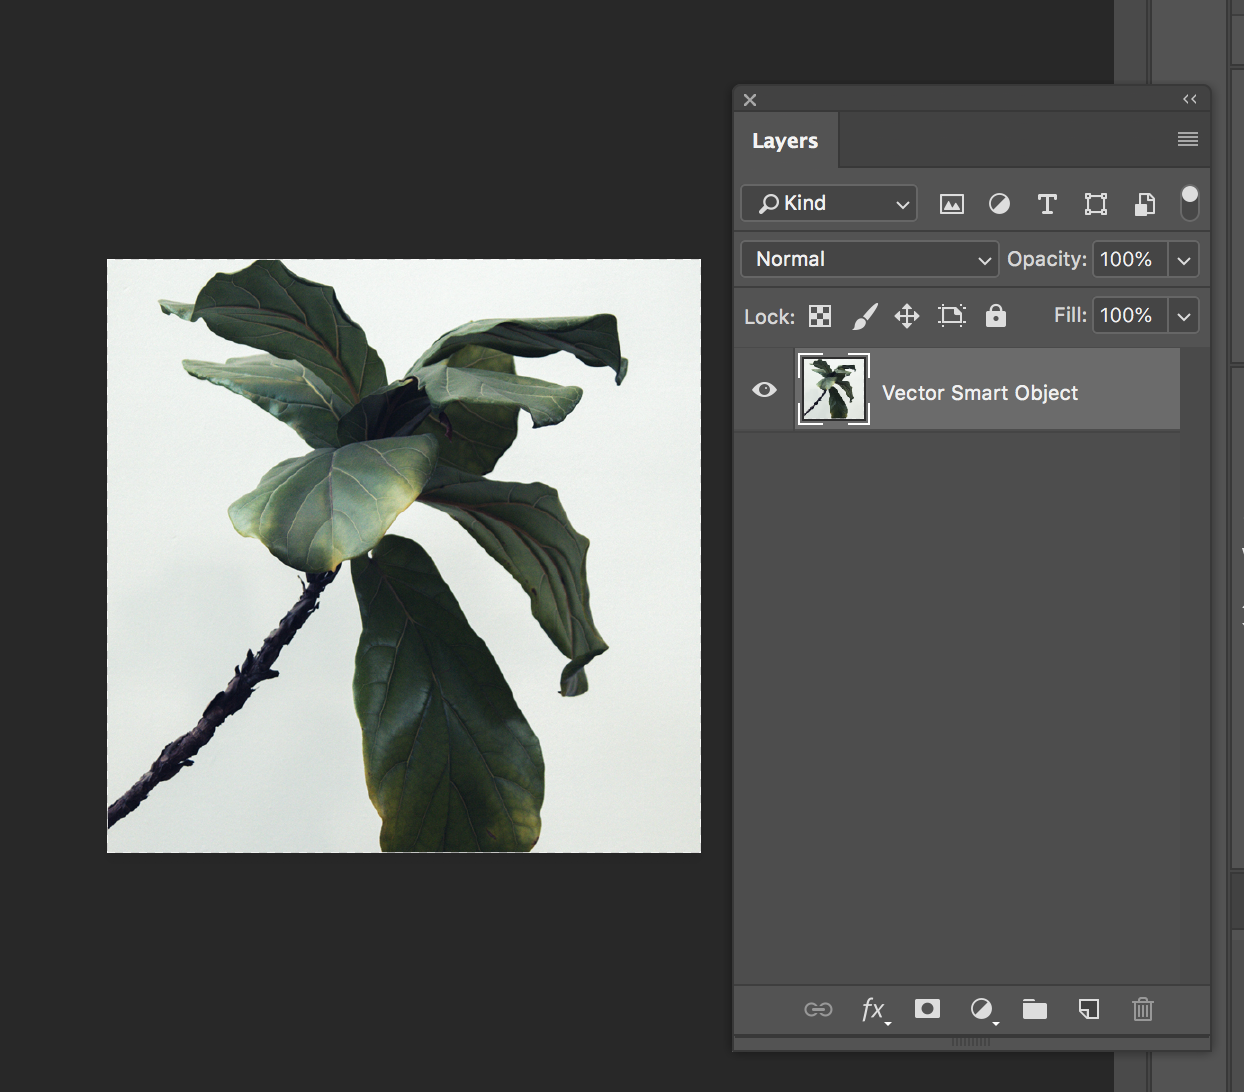
Drag and drop you new image onto the artboard. Place it as desired using free transform (keyboard shortcut cmd/ctrl + T), hit enter once the image positioned to your liking. Go to File > Save (keyboard shortcut cmd/ctrl + S) and then close the window. Your image should now be changed!
Print & bleed layers for print files
If you have purchased a business card template from us, please ensure you read the print and bleed layers on the Photoshop file before you make any changes to your template.
How to edit your Canva template files
Chances are if you are reading this article it is because you have purchased an Origami Collective Canva template and you are now looking to edit your template. Well you have come to the right place! For those of you that are more visual learners, I have created a video containing all the information in this article.
If you haven’t purchased a template from us and you have stumbled upon this article from somewhere else, feel free to read along as the techniques I speak about are useful for any Canva user to know.
Setting up a digital asset in Canva using an Origami Collective template
If you haven’t already, you can purchase one of our templates here. We have created templates that any small business owner would need to DIY their business creative.
For this tutorial I will be using one of our social media templates as an example. The template comes with 6 different post types, as well as as no text option for each post. The no text options allow you to change colours and images by layering your own elements on top of the template. The text version is for those of you who are super time poor, and allows you to just add some text and post.
[thrive_leads id='87585']
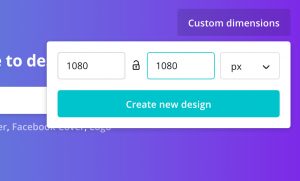
To edit a no text version (I am using a social media template as an example, but the tutorial applies for any of our Canva templates) with your own colours and images, open up Canva and select ‘Custom dimensions’ from the top right hand corner of the screen. As we are doing a social media post, we will make the size 1080 x 1080px and then hit ‘Create new design’:
Click on ‘Uploads’ from the side menu that appears, and drag your graphic into the the window:
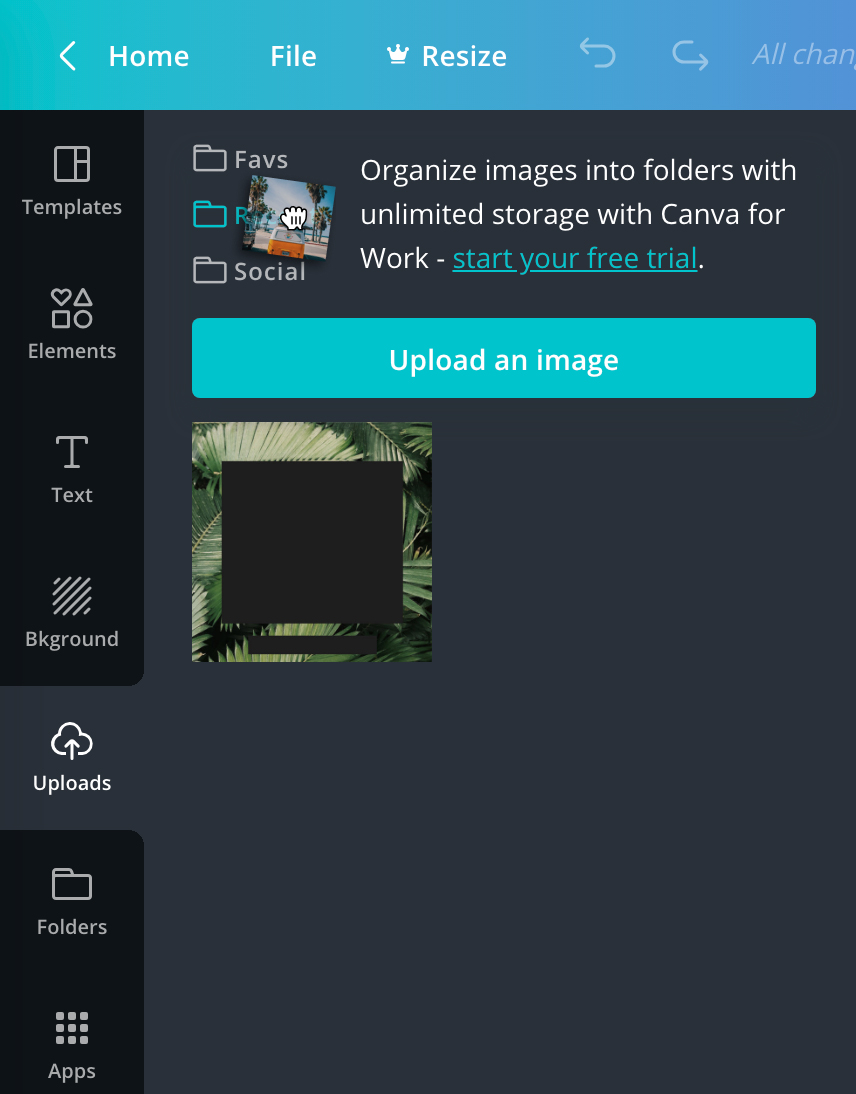
You will also want to drop in the image you would like to replace the template image with so that it’s ready to go for later.
Click on your template image and drag into onto the blank page, then you will need to reposition it and resize it using the arrows that appear when you hover your mouse near the corner or middle of the image.
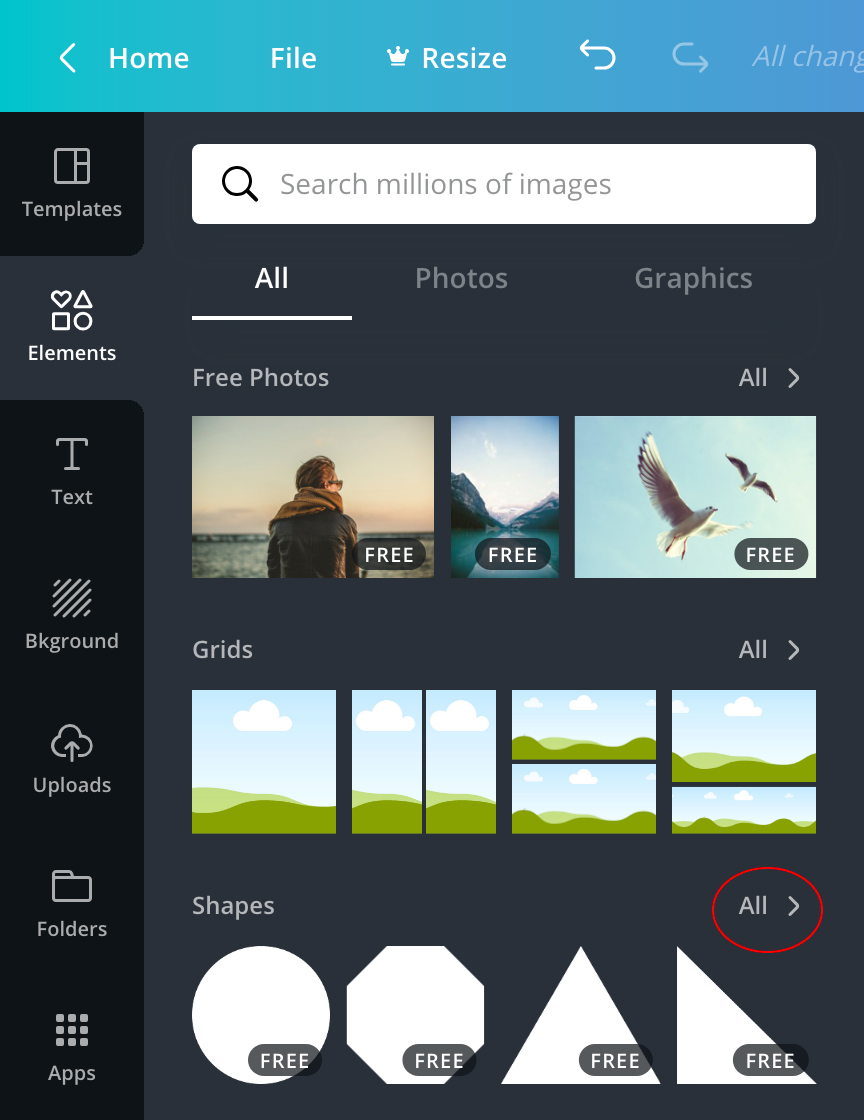
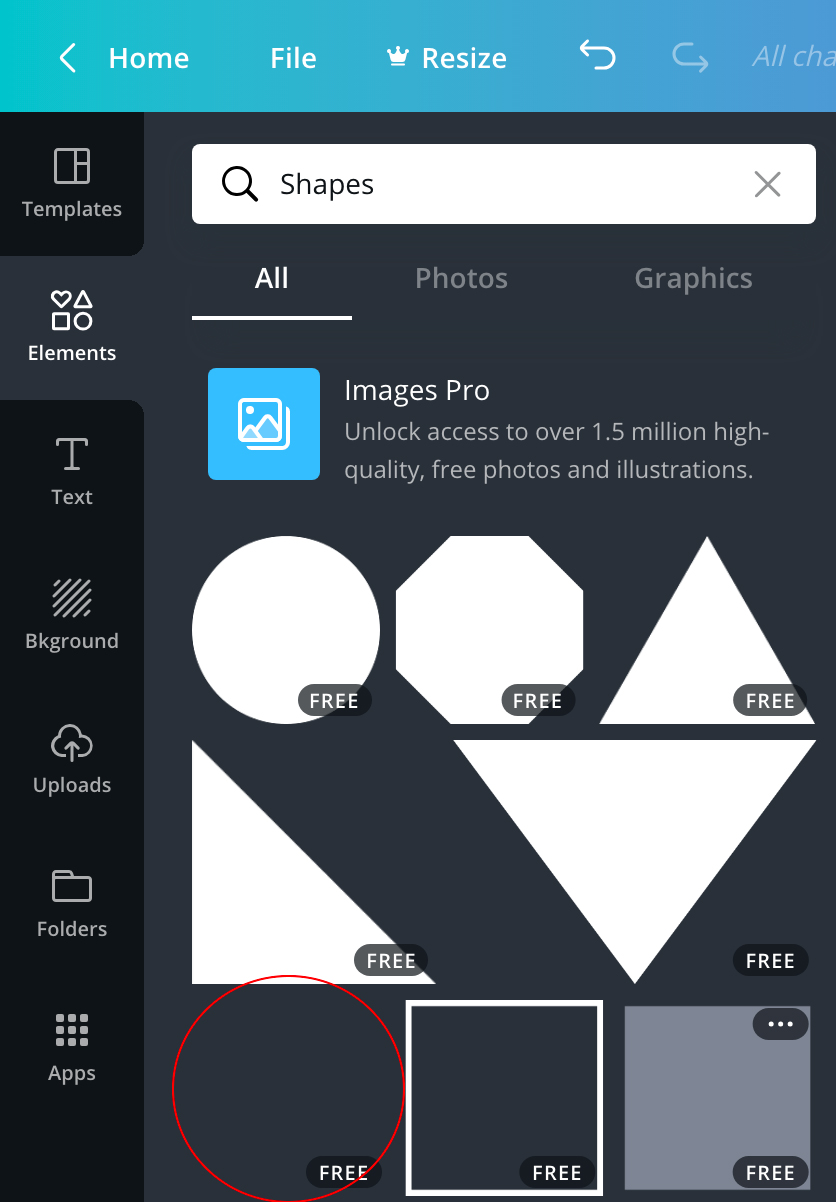
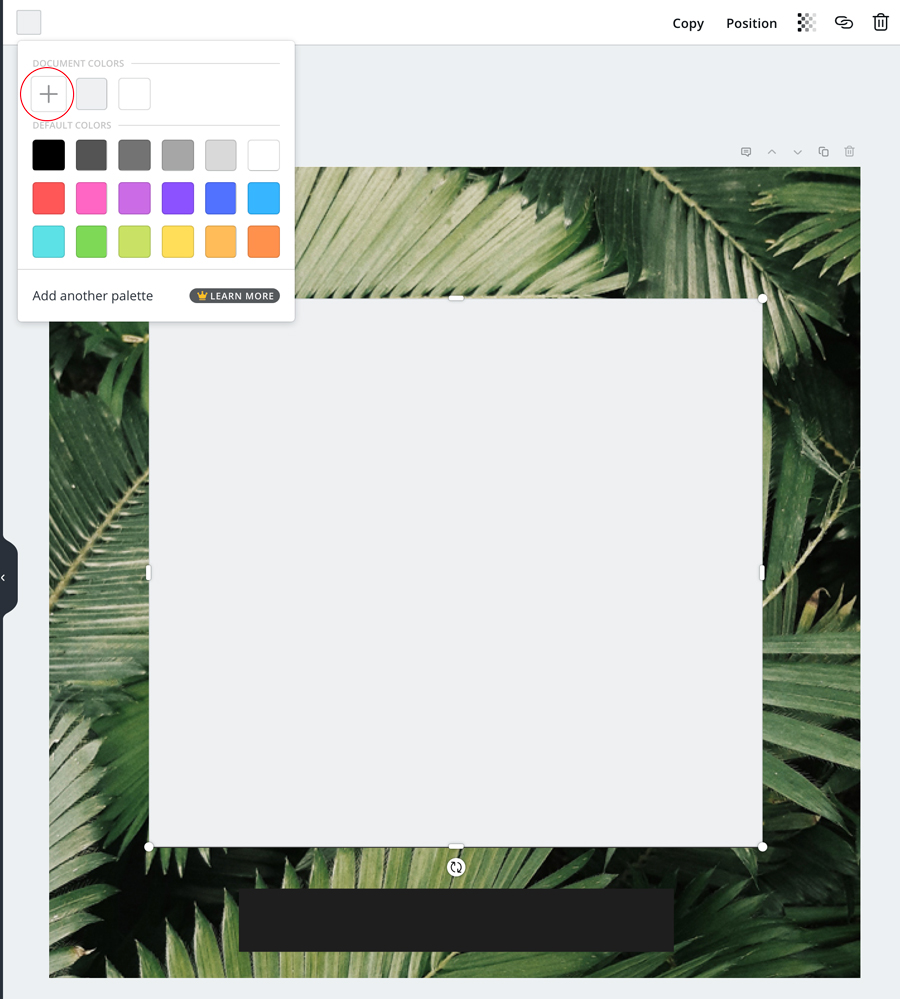
Now we are going to recreate the black shapes in another colour. Select ‘Elements’ from the side menu, and next to shapes select ‘All >’. Then select the square shape and drag it onto your canvas:
Reposition and resize the square so that it fits over the square we are changing the colour of. Then click on the small square at the top left of the editing menu to change the colour of the square:
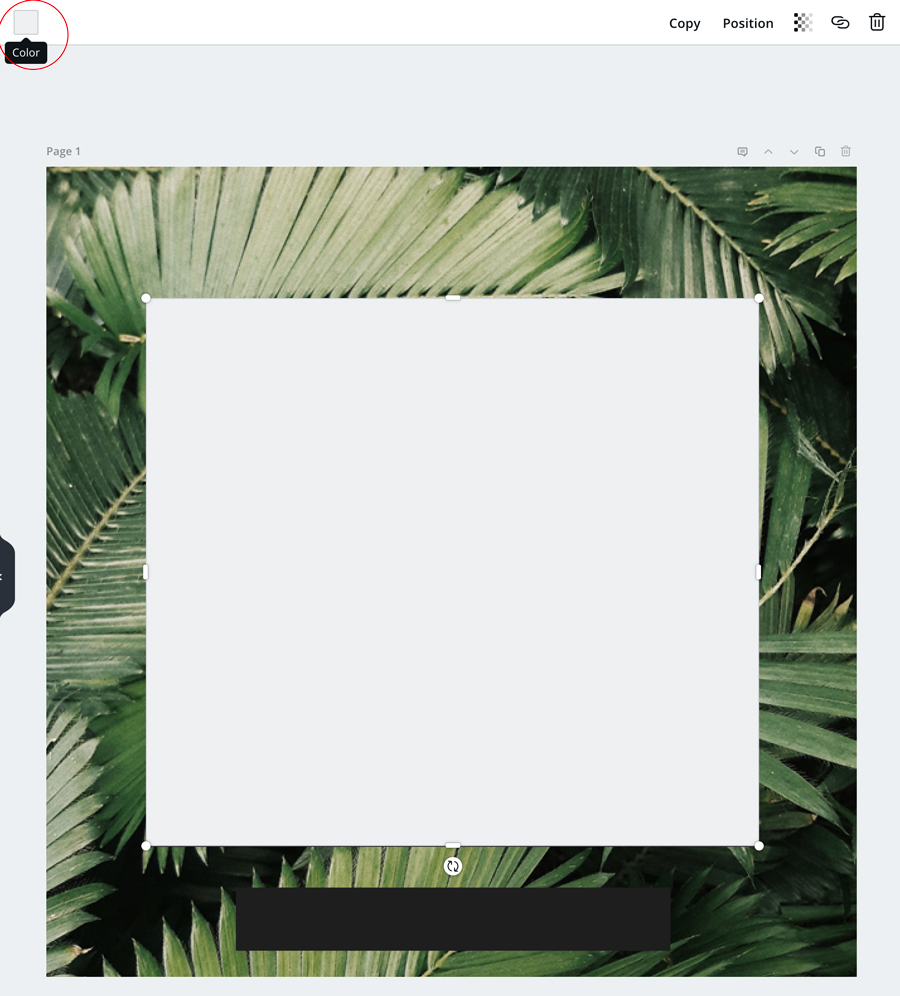
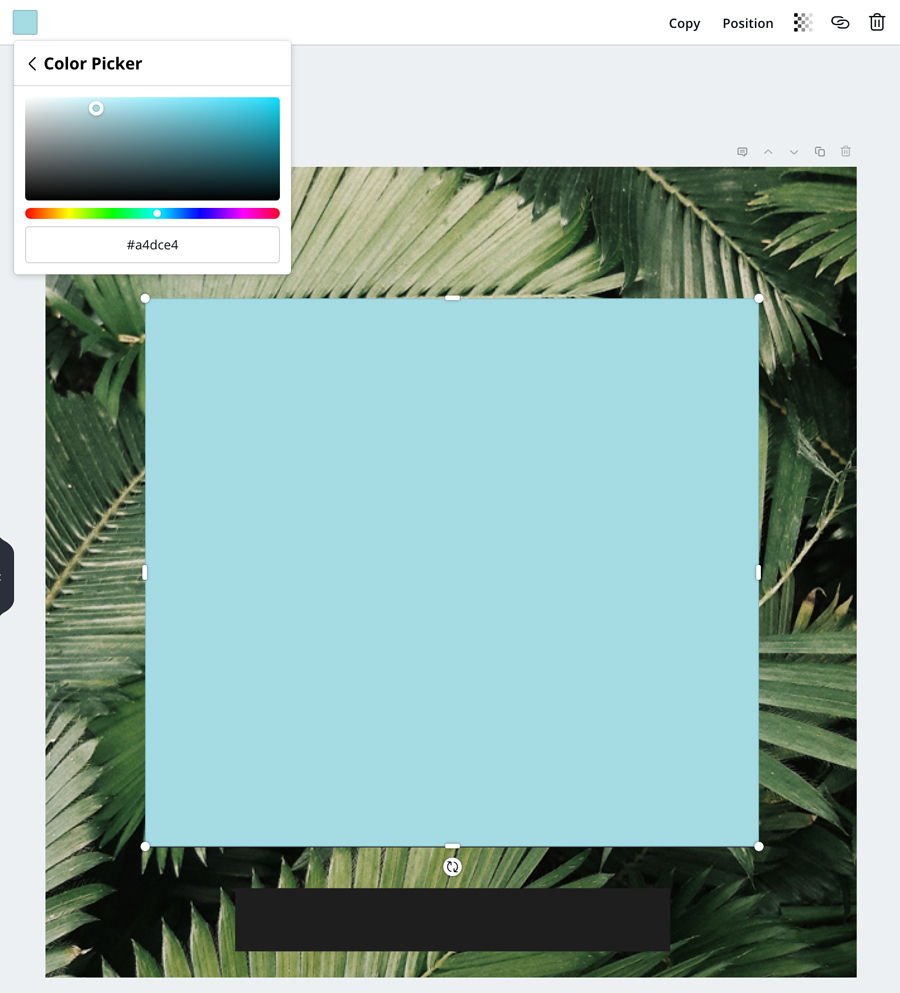
You can then follow the above steps to recolour the smaller rectangle.
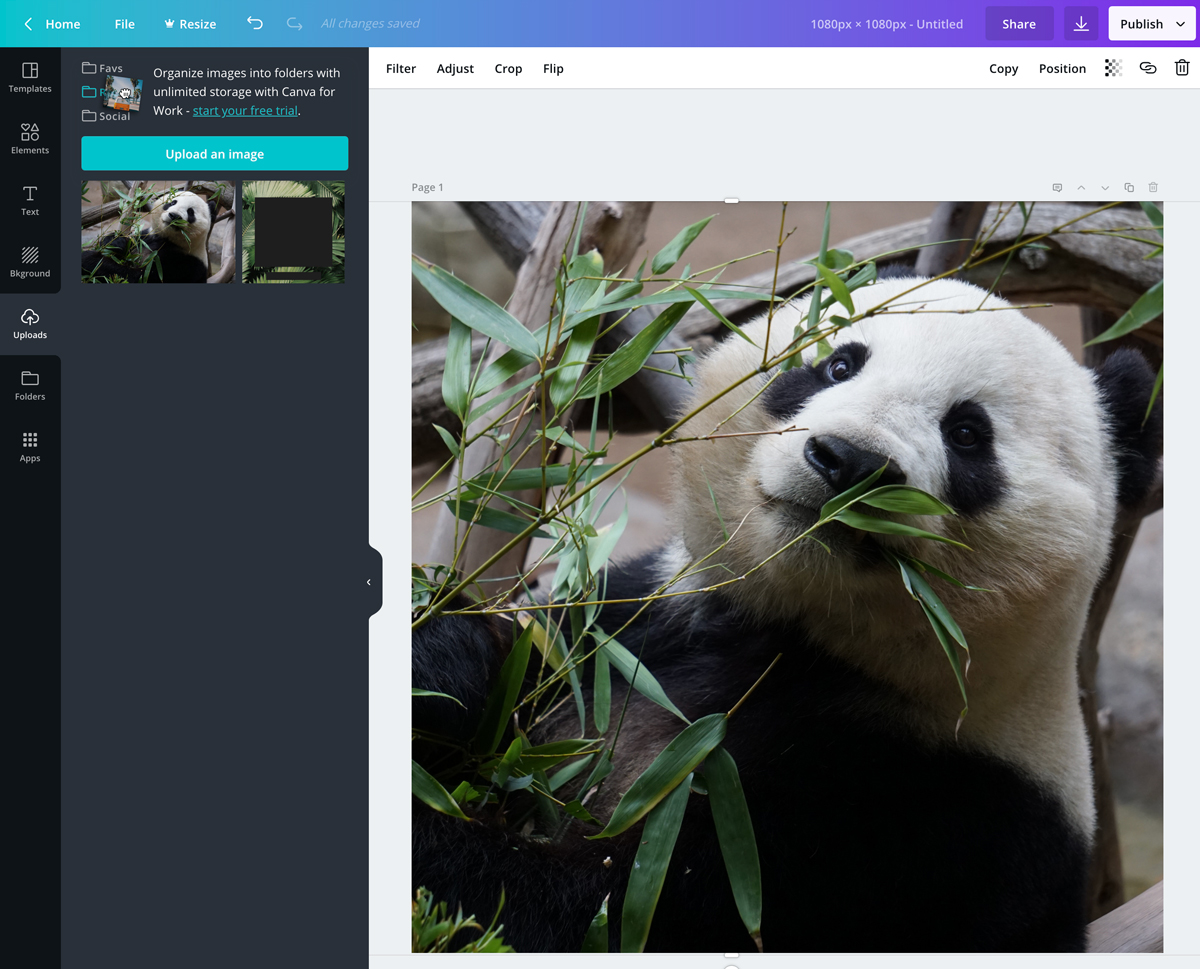
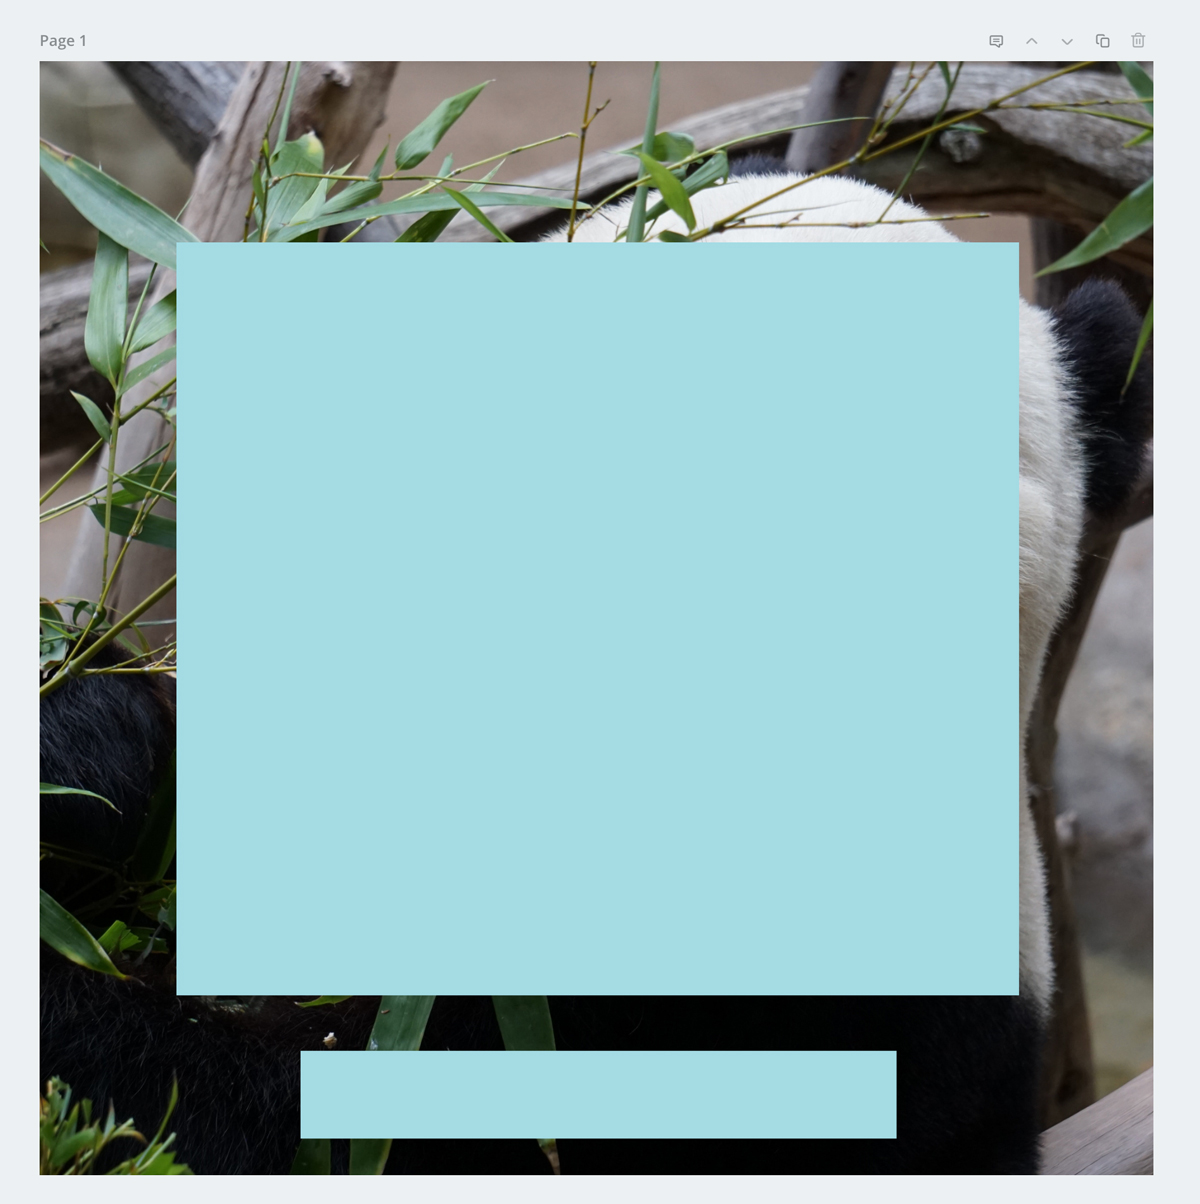
Go back to the Uploads menu item and drag your new background image onto the canvas. Reposition the image so that it covers the whole canvas:
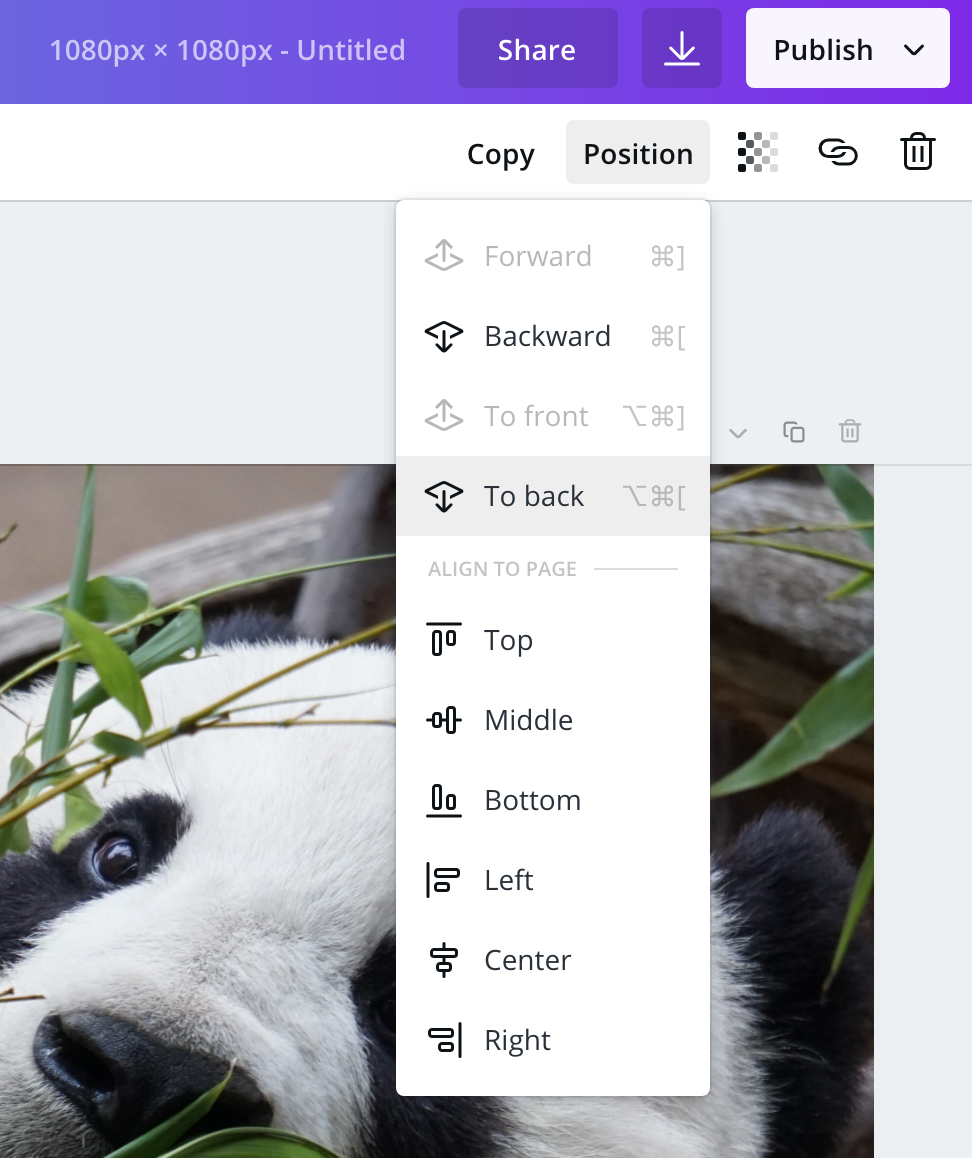
With the image still selected, click on Position from the editing menu and send the image to back. This will put the new image behind our template, which you can now delete:
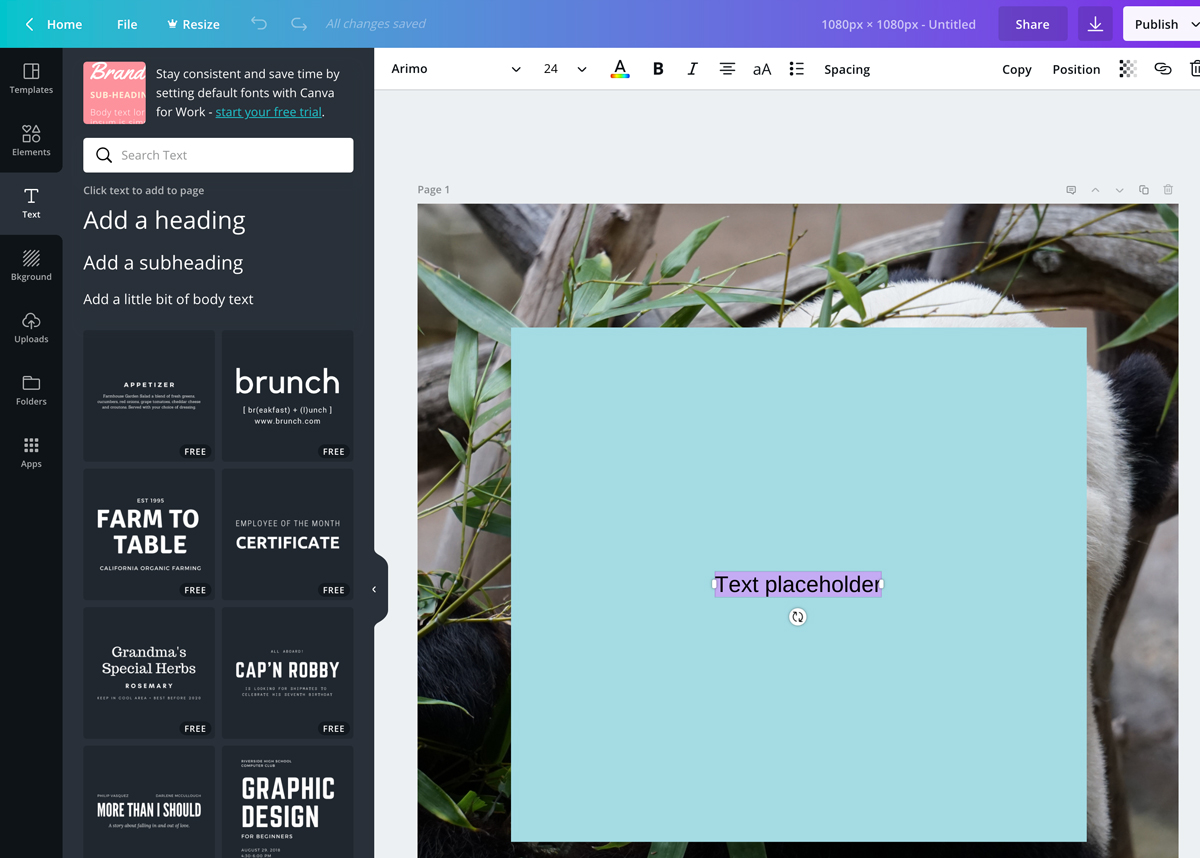
You can now start adding text to your post using the SAMPLE (included in your package) file as reference. Go to Text in the side menu and click on Add a heading to add some text:
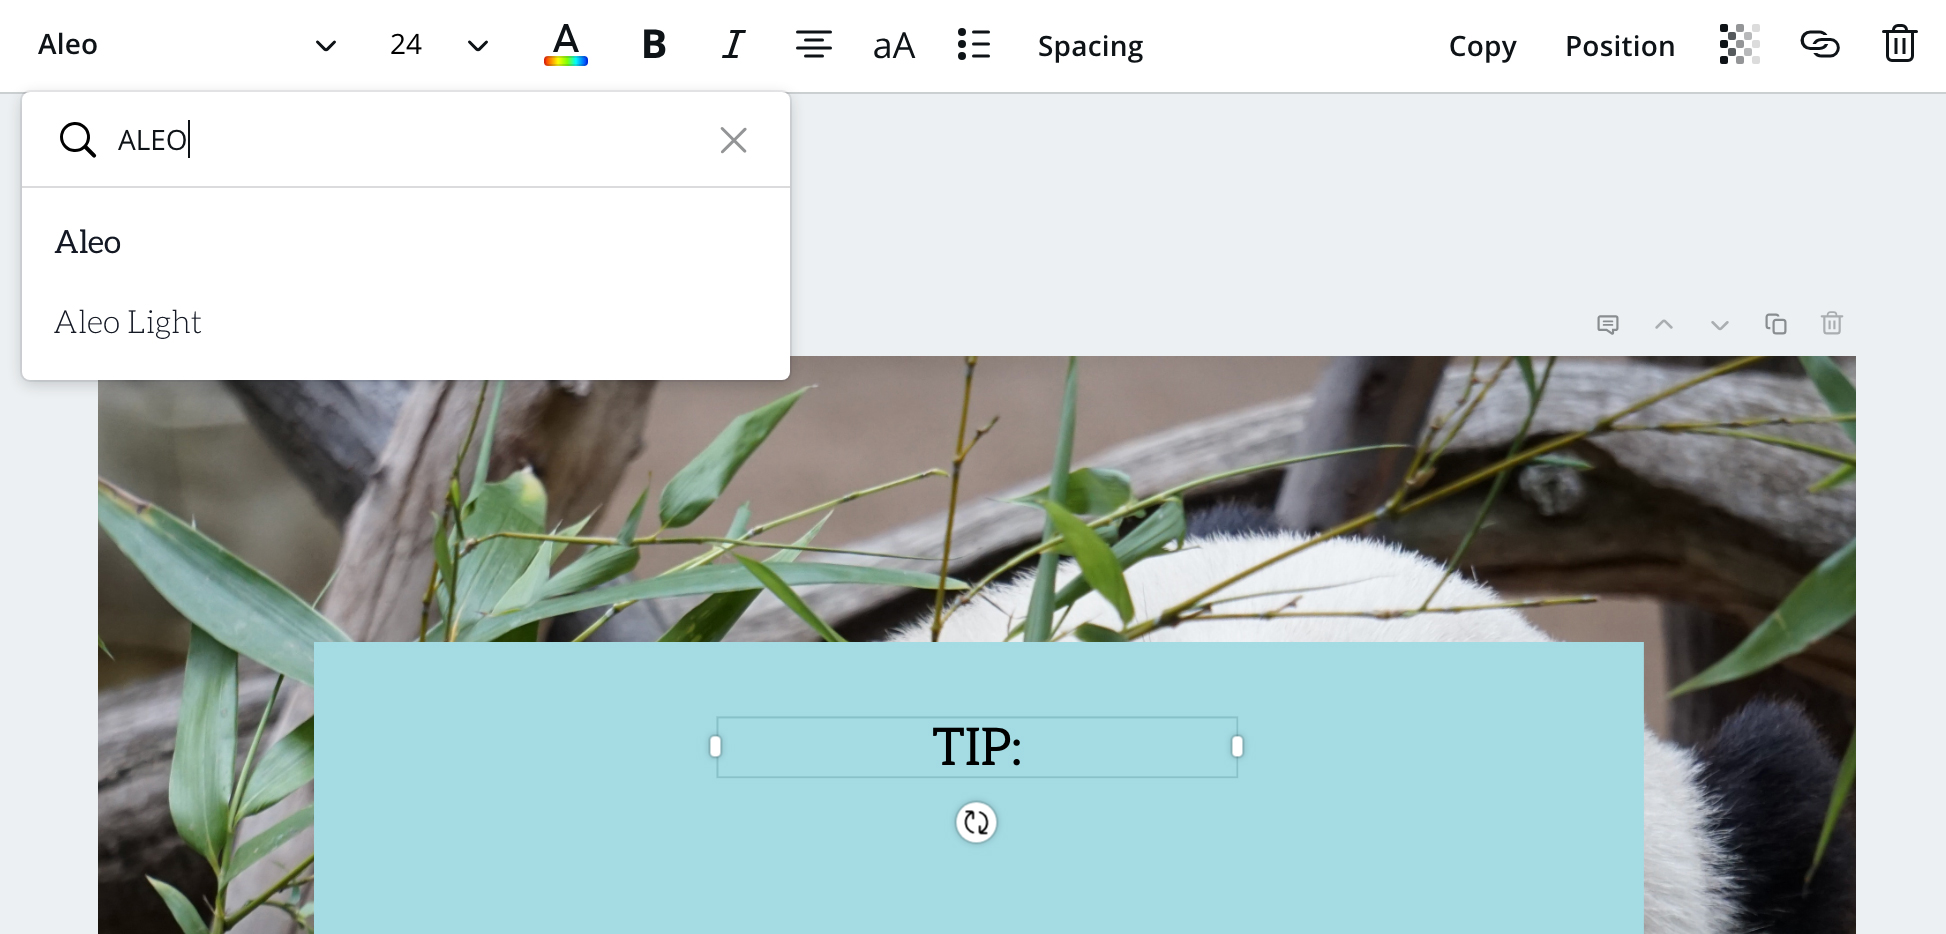
Move the text to the top of the blue square, and then using the menu editing bar select the font you want to use, for this template we are using Aleo. Adjust the size of the text so that it resembles the SAMPLE file, I have also made it bold:
Go back to the text menu and select ‘Add a little bit of body text’ and adjust the placing, font and size. You can also adjust the line spacing:
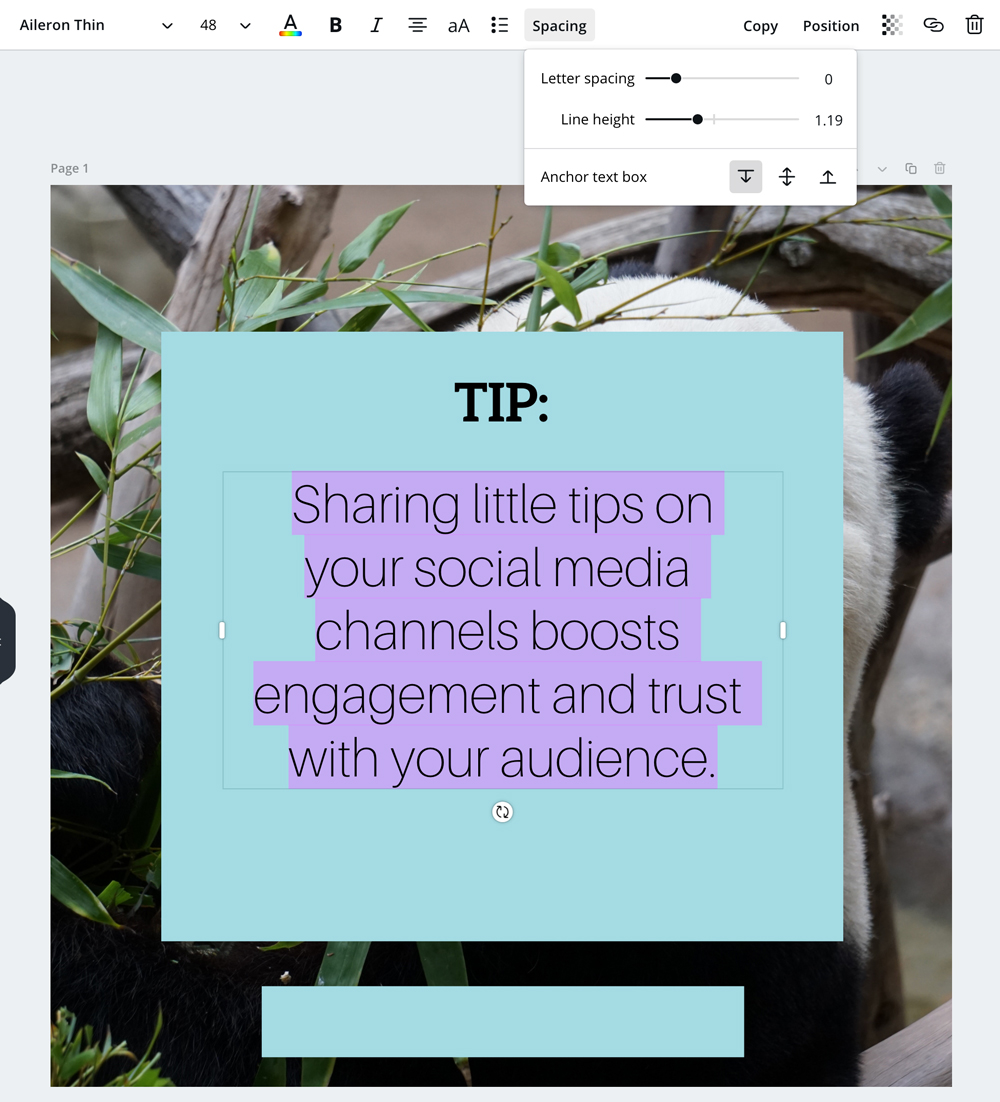
Add the final bit of text using the same steps as above and you’re done:

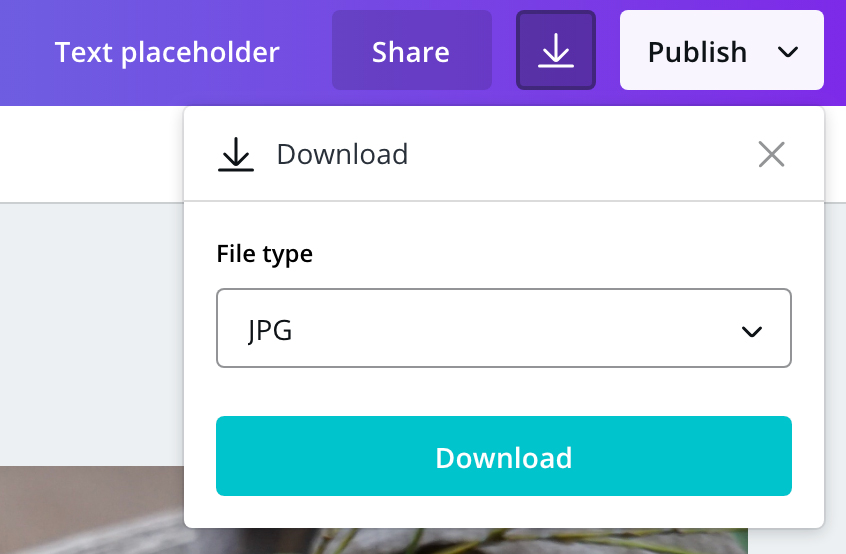
Select the download icon from the top menu, select JPG for your file type and then download your customised social media template:
Setting up a business card in Canva using an Origami Collective template
If you haven’t already, you can purchase one of our business card templates here.
Setting up your business card template in Canva is essentially the same as the above steps, except you just need to add bleed to your document.
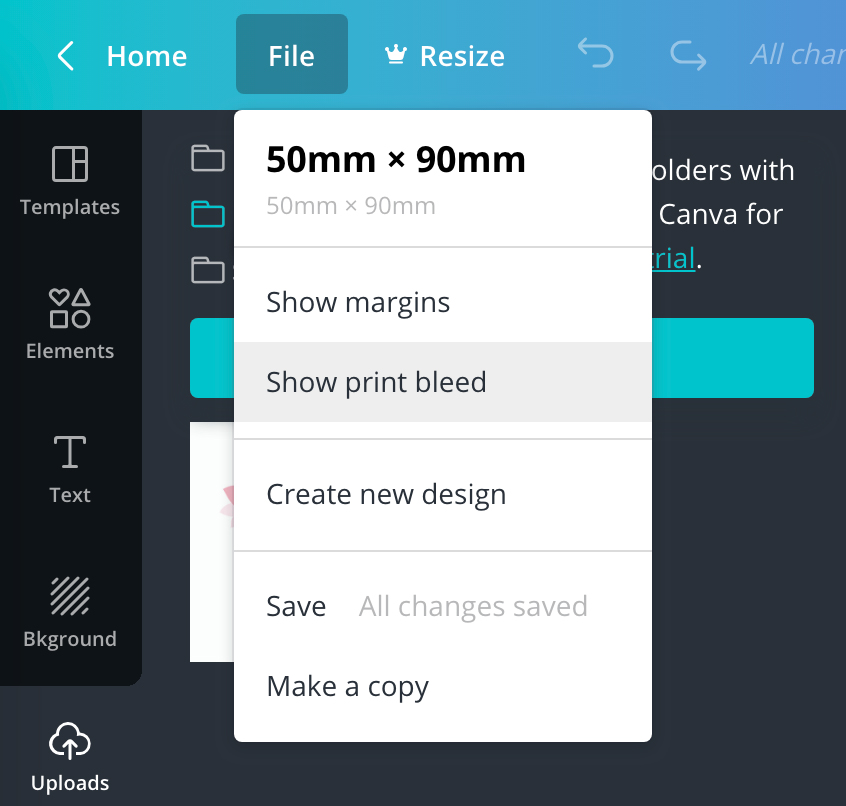
Create a design with custom dimensions, this business card template is 50 x 90mm. Go to the Uploads menu item on the left hand side, and drop in your two business card template files that have the word BLEED in the file name.
Then go to File from the top menu and select ‘Show print bleed’:
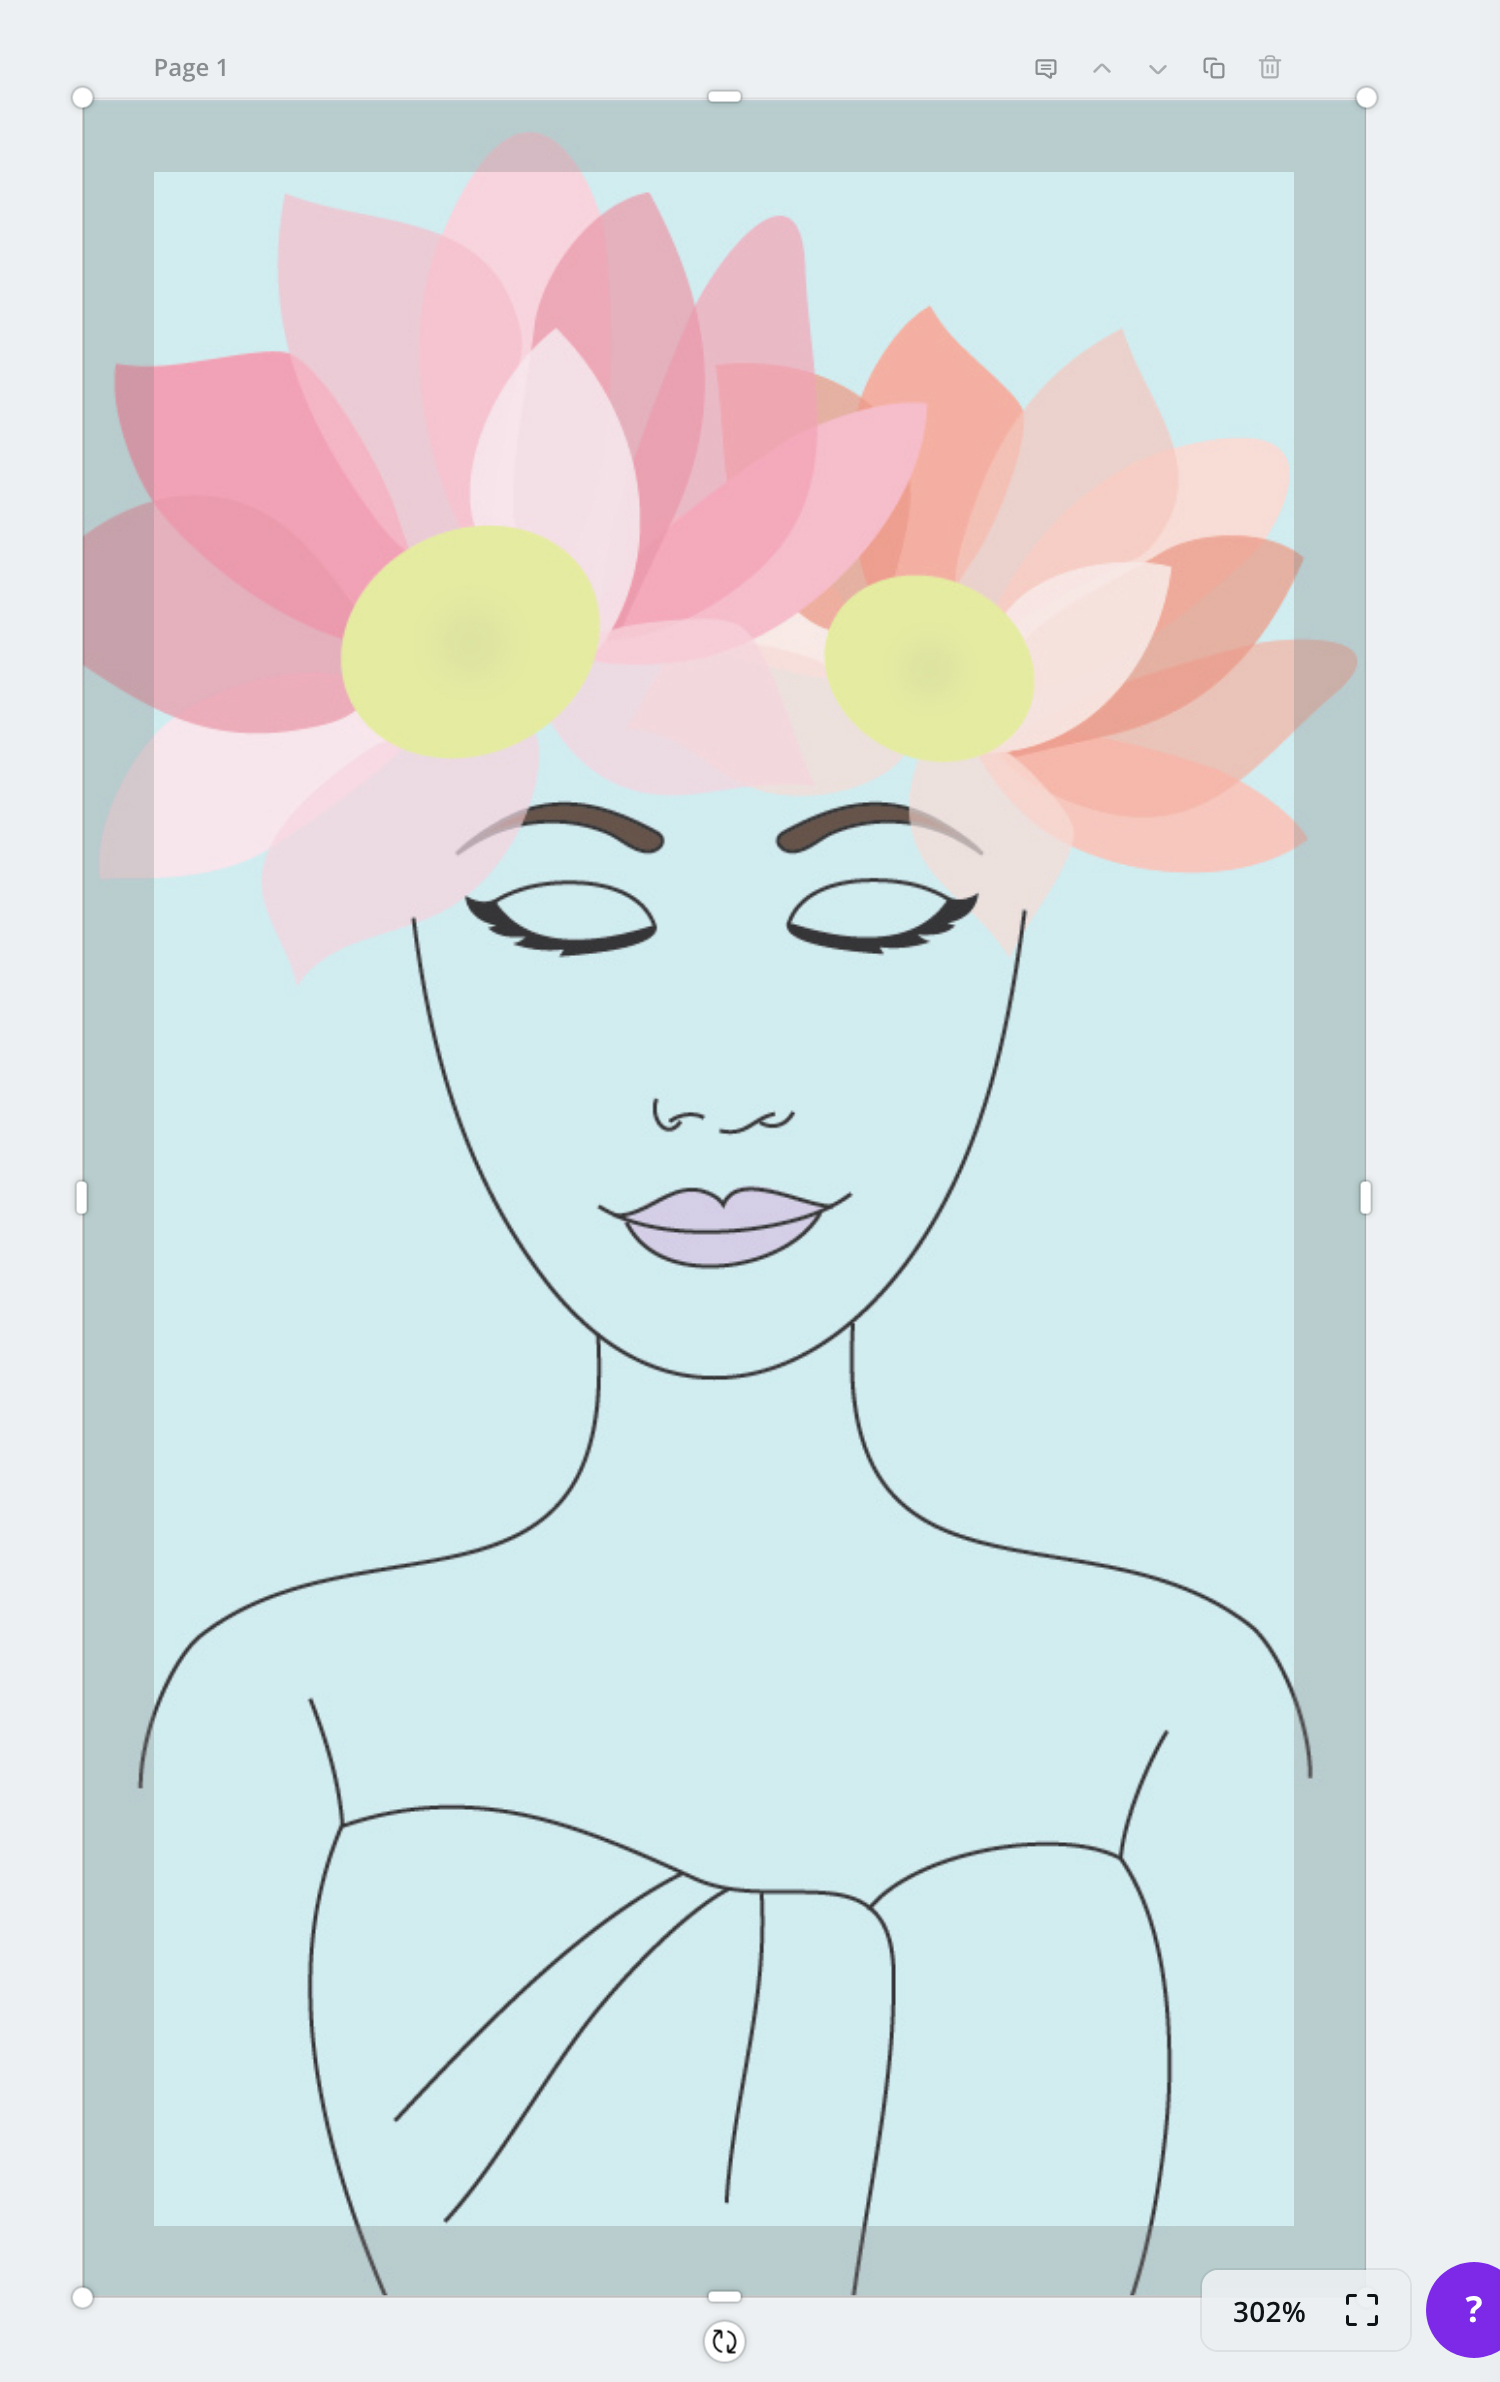
You can then drag your file onto the artboard making sure it covers the whole area, including the bleed area:
You can then add a page by clicking ‘+ Add a new page’ underneath the current page and drop in the second side of your business card template.
Once you have added your text, to save the business card, click on the download button from the top menu, change the file type to PDF print and select ‘Crop marks and bleed’:
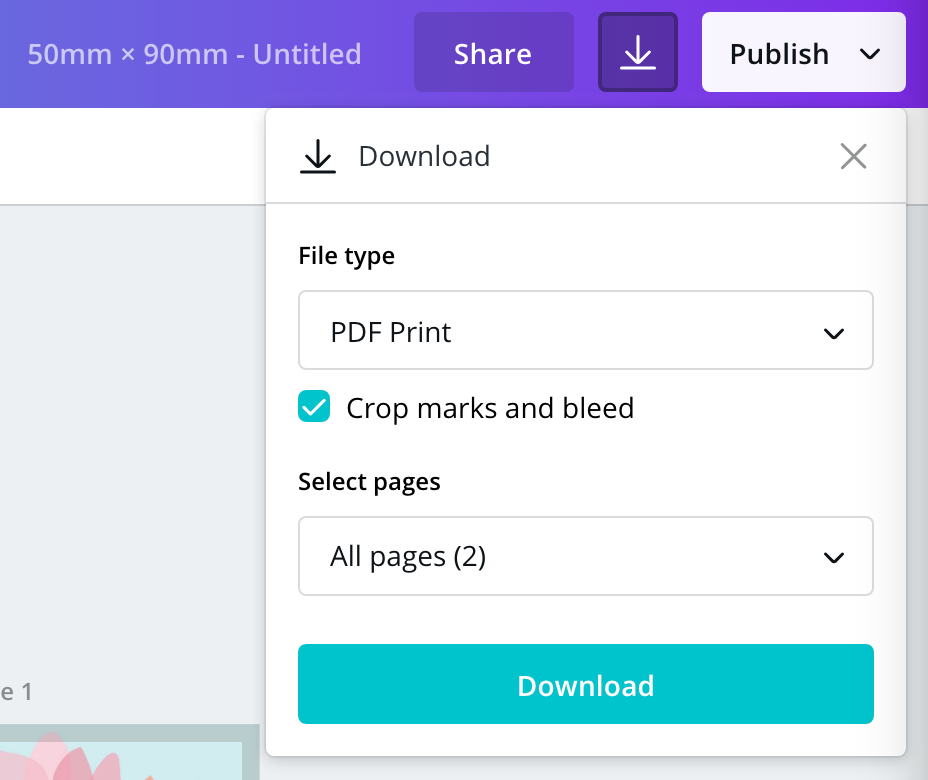
You will then be given a print ready file that you can give to your printer.
How to export logo files in Illustrator CC
So you've designed a logo, now what? Because a logo is used across a variety of mediums, it needs to be saved in a variety of different file types. This tutorial is going to show you how to save your logo files for print, and how to use the 'Export for Screens' function to save for web.
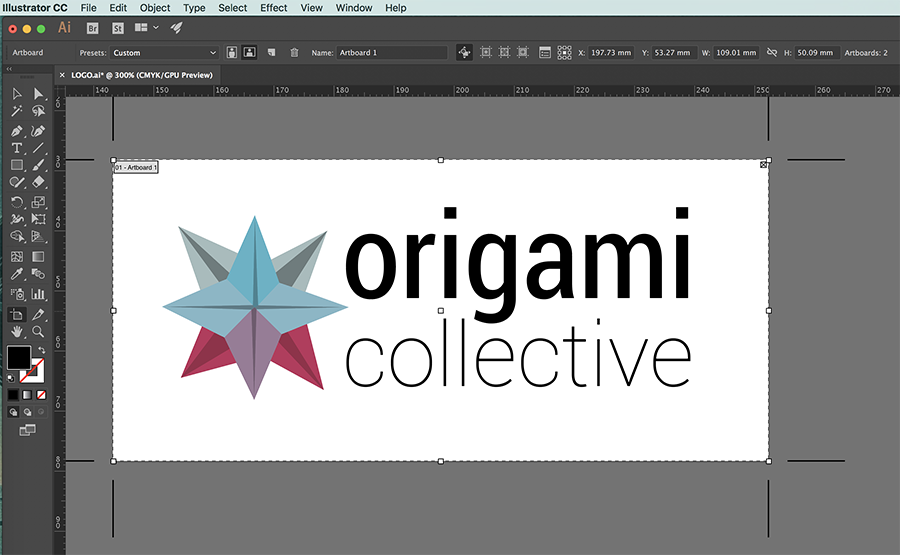
Before you save, you want to make sure your logo is right in the middle of your artboard, and that there isn't too much white space around it. A good artboard width for a logo is around 400px (140-150mm) as it is better to have a larger file than one that is too small.
You can change the size of your artboard by going to File > Document Set Up and clicking 'Edit Artboards' (or by the short cut SHFT + O) and dragging the artboard in or out. You can also use the W: and H: to manually put in an exact size for your artboard.
Saving logo files for print
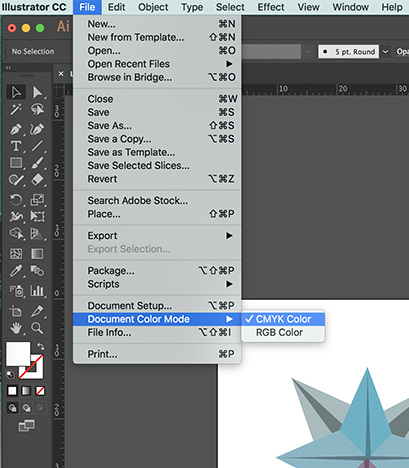
First you want to make sure that your file is in CMYK colour mode by going to File > Document Colour Mode > CMYK. I always recommend designing a logo in CMYK, as this avoids any colour surprises when you see your logo on printed materials.
Then, you want to select your whole logo (CMND + A) and go to Type > Create Outlines (SHFT + CMD + O). This turns any text into a vector object so that you don't have issues with missing fonts when you send your logo to printers.
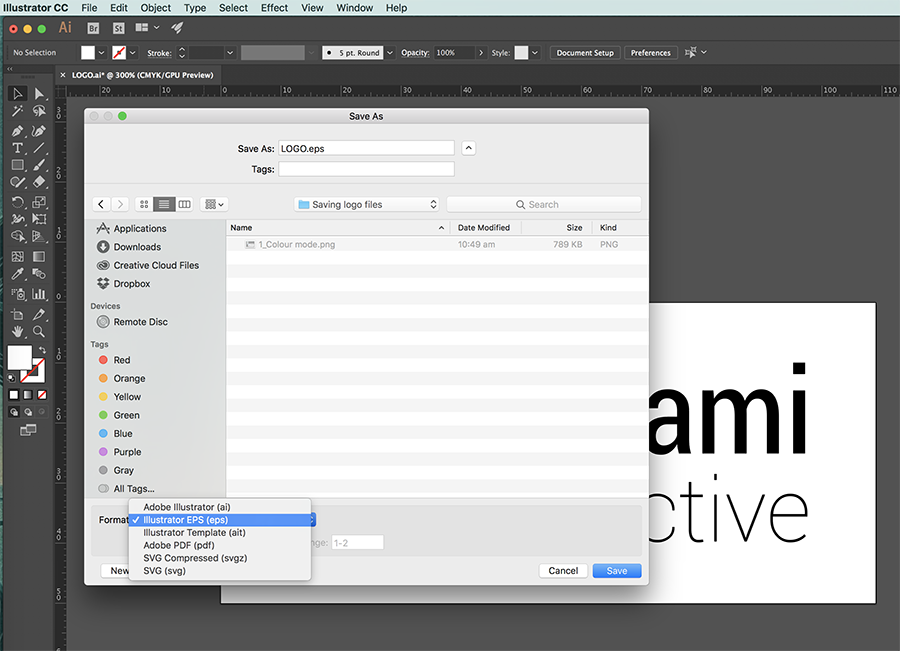
Now it's time to save. I usually save an eps. and .pdf version of the logo for print, just to make sure all my bases are covered. Go to File > Save As (CMND + SHFT + S) and chose where you want the file saved. Then you want to select 'Illustrator EPS (eps)' from the drop down box next to 'Format'. My preference is to tick 'Use Artboards' underneath the drop down box, as this will make my file the size of the artboard. Then hit save, and a new window with your EPS options will pop up.
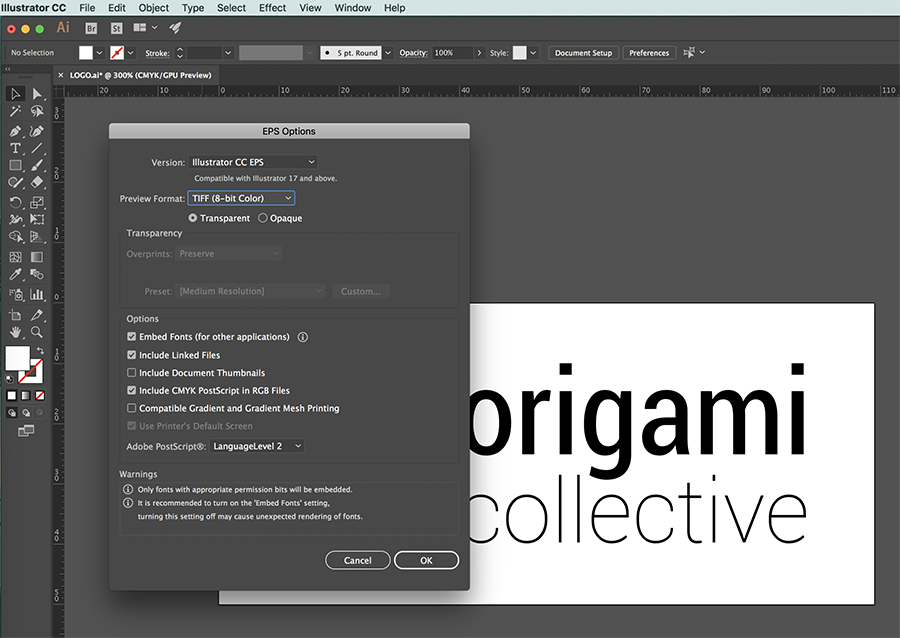
I generally just use the standard options that have been pre selected, but make sure 'Transparent' is selected. This gives your file a transparent background. Hit OK and you're done!
Now you need to go back and save as a PDF. This is a simple as going to File > Save As (CMND + SHFT + S) and selecting Adobe PDF (pdf) from the 'Format' drop down box instead of eps.
You will then get a new window pop up with your PDF options. Generally, these are the options you should select:
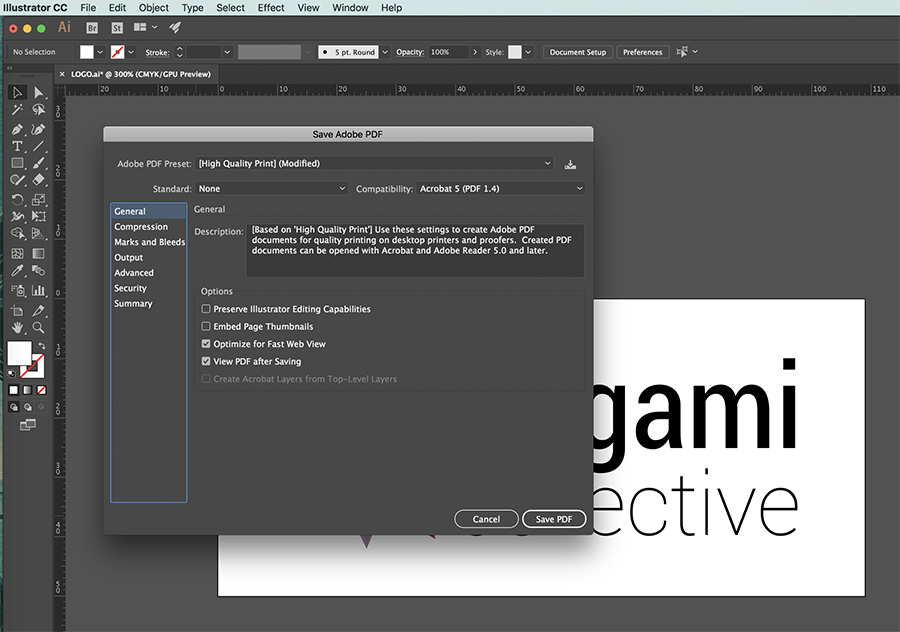
I like to turn off 'Preserve Illustrator Editing Capabilities' to try and avoid my logo file being altered in any way. I don't usually edit any of the other PDF options when saving a logo file.
[thrive_leads id='72553']
Saving logo files for web using 'Export for Screens'
When you are saving a logo for web you want to change the colour mode to RGB by going to File > Document Colour Mode and selecting RGB.
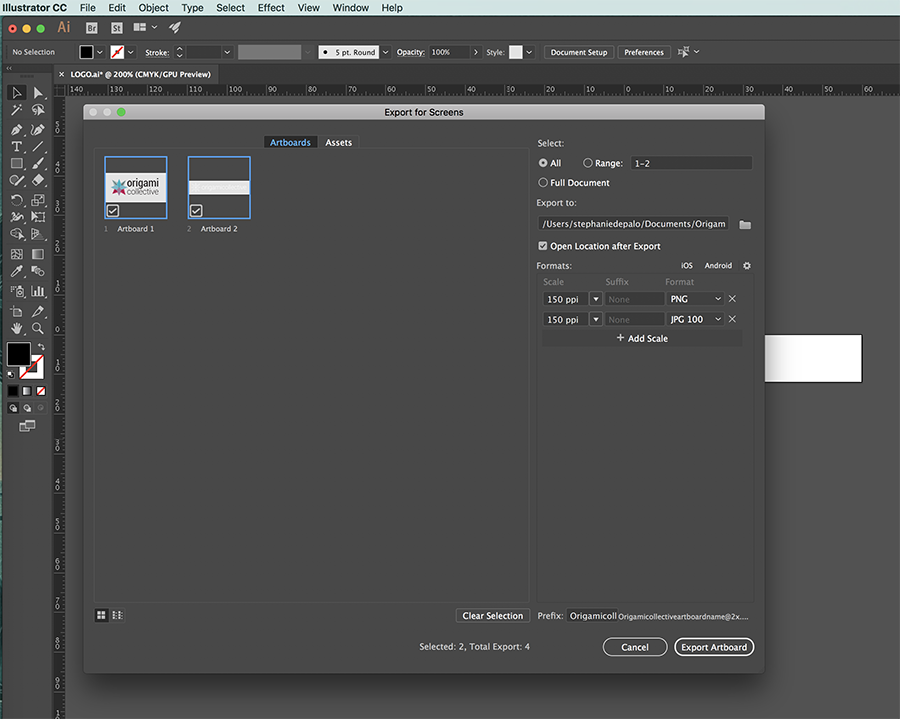
Once that is done, go to File > Export > Export for Screens (OPT + CMND + E) and the Export for Screens window will pop up. This new function is awesome as it lets you save .jpg, .png, .svg, and .pdf files all in one go. You can even save them at different resolutions, and only save the Artboards that you have selected.
Select the artboards you want to save, and the location you want the files saved to.
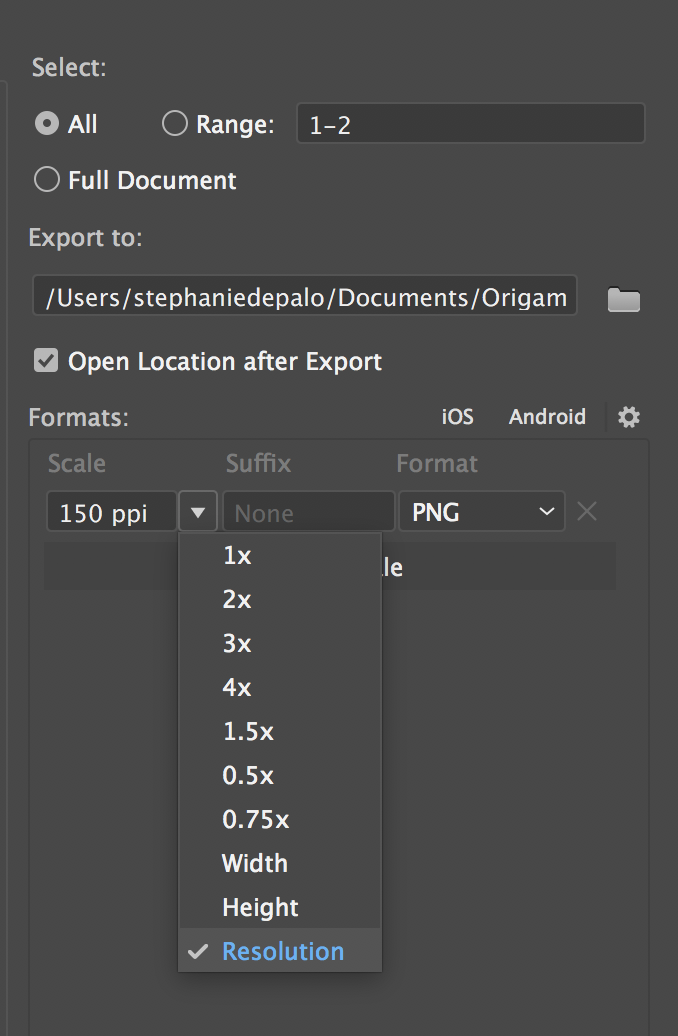
When saving for web, I like to supply my clients with a .png file that has a transparent background, and a .jpg file. To do this select the drop down box under 'Scale' and make sure it is set to resolution. Then type in the resolution you need (I usually use 150ppi). Then under 'Format' select PNG from the drop down box.
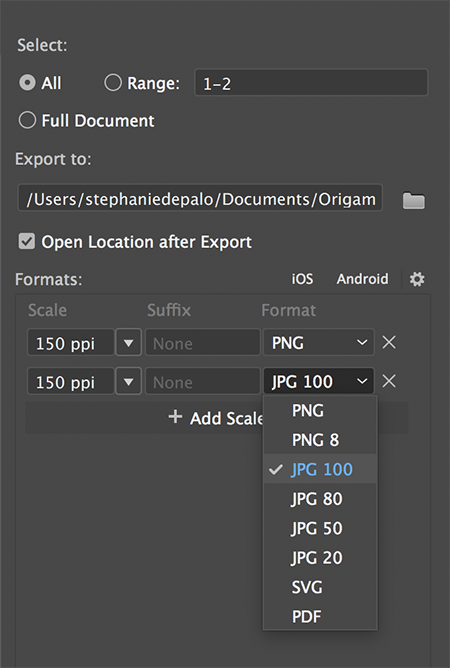
Then select the + Add Scale button and this will bring up a second row. Again, you will need to select resolution from the drop down box under 'Scale', and change the ppi to 150. Then under 'Format' select JPG 100. Hit 'Export Artboard' and you're done!
If you have any questions or feedback, I would love to hear from you! Just pop them down in the comments below.
What is a Print Ready File?
A print ready file is a file that has been optimised for print. If you run a business, chances are you've needed to get things printed like business cards, flyers , and so on. If you had a graphic designer create these files for you, they would have optimised them for print. But if you created the file yourself you may or may not have known that certain things need to be done to ensure that your file prints the best possible quality it can be.
What if I don't set my file up for print?
You may end up with a low quality looking file, and an unhappy printing company. Some printing companies will double check your file for you, make sure it's set up correctly and if not, will set the file up for you. This takes extra time, and they will probably do this without charge (so be thankful!). Other printing companies will charge you to set your file up if it hasn't been already, or they will print it exactly how you've supplied it. If it hasn't been set up correctly you may end with things like:
- Colours printed incorrect or not looking how you expected them to look
- Text or important images cut off because they were to close to the edge of the document
- Blurry text and images because the file resolution wasn't high enough
- A white border around the edge of your print because bleed wasn't set up
- Missing fonts because they weren't outlined in the file
- Incorrect document size, and spelling errors
Some of these may not make much sense, but I have created a guide on setting up documents correctly using InDesign and Illustrator. As well as how to export them for print. You can download the guide here.
Print Ready Business Card Example
Here's an example of what a print ready file will look like. It's a business card, but the same principles apply for flyers, brochures, signs etc. I've added in the art board line (black) and the margin line (pink) just so you can see how the card has been set up.
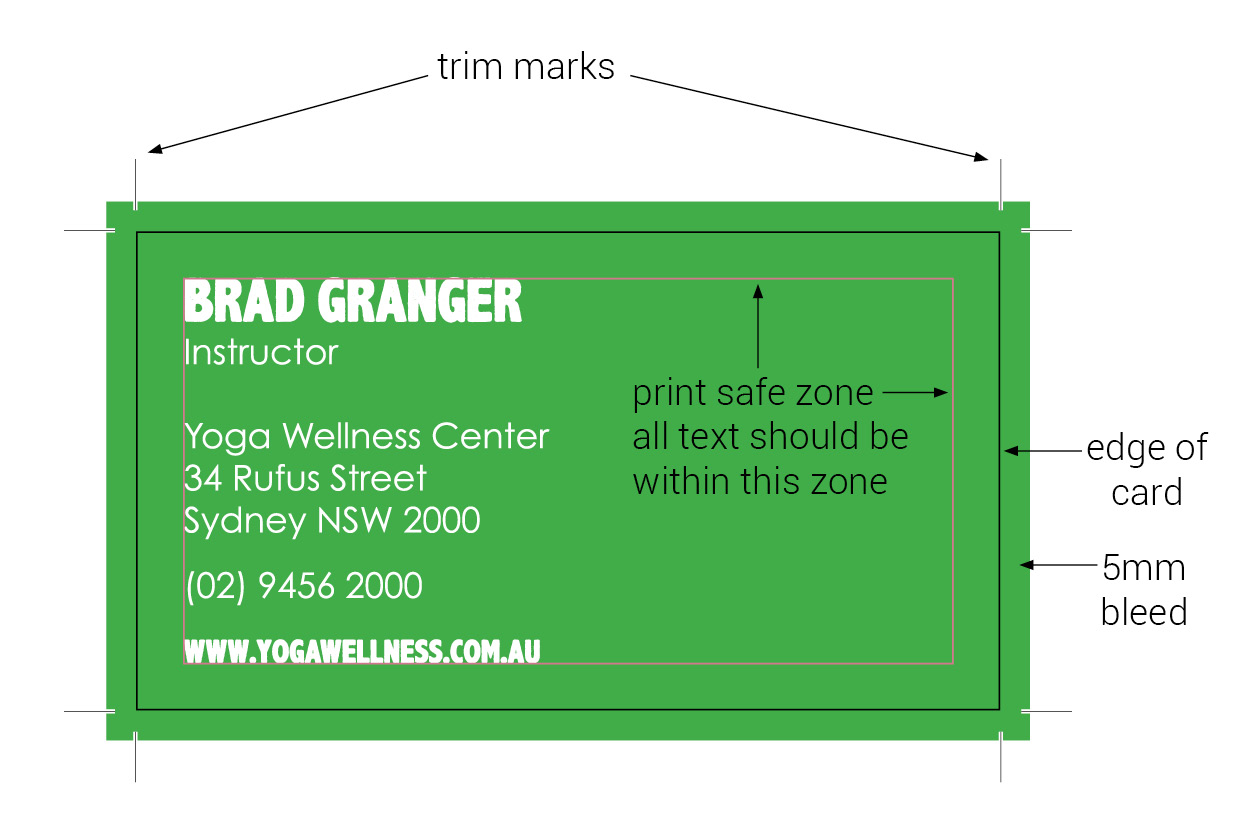 Essentially you want to make sure your file has ticked all the boxes of this checklist:
- Document size has been set up to the size the printed product needs to be
- Document colour has been set to CMYK (see my guide on how to do this)
- Document has 3mm or 5mm bleed. If you are printing large banners, the bleed should be at least 10mm
- Depending on the size of the document, a minimum of a 5mm margin has been allowed. No text is allowed outside of this margin as it may be cut off
- Text has been outlined (see my guide on how to do this)
- SPELL CHECK and PROOF READ your document! Majority of printers will not take responsibility for documents printed with spelling errors
CMYK vs RGB
Documents that are going to be printed need to be set up in CMYK colour mode. These are the colours a printer uses (cyan, magenta, yellow & black). If you set it up in RGB (screen colours, red, green & blue) colour mode, you will end up with a file that looks totally different to what you were looking at on screen. Check out this blog post to learn more about CMYK and RGB.
What is a PNG file?! Different File Types Explained
There are a lot of different file types and it is easy to get confused about which one is used for what. So I'm going to tell you, without all the technical jargon.
Why do I need different file types?
Unless you are a graphic designer you probably haven't given much thought to why we actually use different file types. Different file types are used depending on what you are using the file for. Some file types are large, while others can be compressed down really small. You wouldn't use large file types for web and they would take a long time to load.
What does each file type mean, and what do I use it for?
Image/vector file types:
PNG (Portable Network Graphics): PNG image files are used for web as they are low resolution (small file size). They will load faster on your web page, and can be saved with a transparent background. They are not good for print because of their low resolution. You will end up with an image that isn't sharp and is blurry.
JPG/JPEG (Joint Photographic Experts Group): This is the most commonly used file type for images. The quality of a JPEG will lessen the smaller the file size is. The bigger the file size, the better the quality. JPEGs are used for print as you can make the file high quality. They can also be used for web at a low resolution.
GIF (Graphics Interchange Format): I'm sure you've seen those moving images on the internet, they are GIF files. GIFs can only use up to 256 colours from the RGB colourspace. This means the file size of a GIF will be very small, as the more colours in a file, the higher quality it is. GIFs are used for web because of their small size, they will load very quickly.
TIF ( Tagged Image File): A TIF file is a very high quality, and also large, image file. It is used for images that are being printed in catalogues, or large banners etc. Anything that requires the image to be very high quality. Definitely don't use these file types for web.
EPS (Encapsulated Postscript): An EPS file is a vector file type that is used for high quality graphics for print. For example, you could use an EPS version of your logo for business cards and it would print looking sharp.
Document/Adobe file types:
PDF (Portable Document Format): This file was type was created by Adobe so that everyone could share files, and not need programs such as Illustrator to open them. PDFs are great for keeping a documents quality. If you supply a printer with a PDF version of your business card file it should print with no loss of quality.
PSD (Photoshop File): This is a file type that has been created in Photoshop, and you would need Photoshop to open it. Photoshop is an Adobe program used for editing images and creating web assets.
Ai (Illustrator File): This is a file type create in Illustrator, and you would need to open it in Illustrator to view it correctly. Illustrator is an Adobe program used for creating vector graphics.
INDD (InDesign File): This is a file type created in InDesign, and you would need InDesign to open it. InDesign is an Adobe program used to create multiple page documents and more.
To read more about what the Adobe programs are used for check out our previous blog post.