How to export logo files in Illustrator CC
So you’ve designed a logo, now what? Because a logo is used across a variety of mediums, it needs to be saved in a variety of different file types. This tutorial is going to show you how to save your logo files for print, and how to use the ‘Export for Screens’ function to save for web.
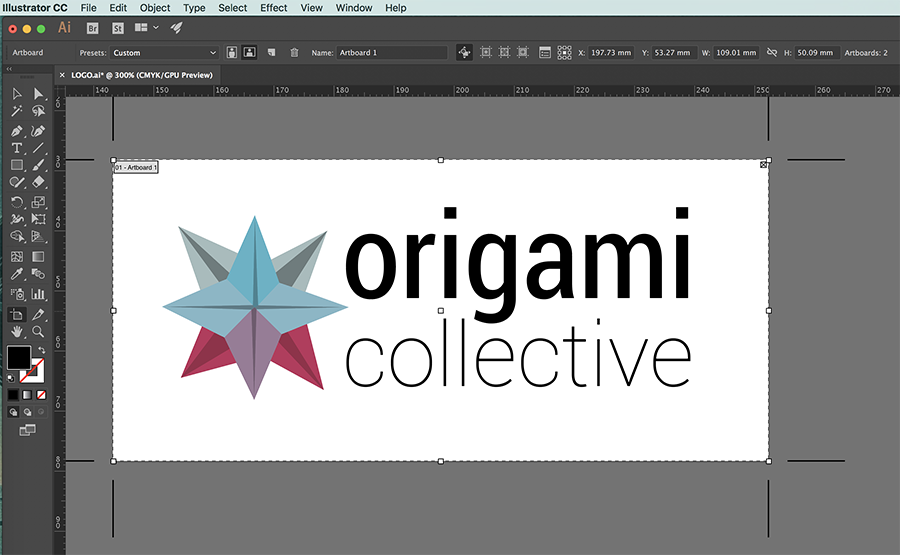
Before you save, you want to make sure your logo is right in the middle of your artboard, and that there isn’t too much white space around it. A good artboard width for a logo is around 400px (140-150mm) as it is better to have a larger file than one that is too small.
You can change the size of your artboard by going to File > Document Set Up and clicking ‘Edit Artboards’ (or by the short cut SHFT + O) and dragging the artboard in or out. You can also use the W: and H: to manually put in an exact size for your artboard.
Saving logo files for print
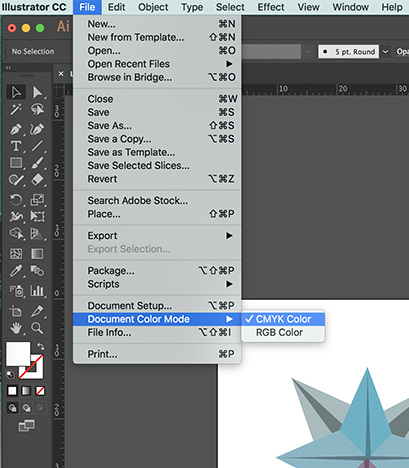
First you want to make sure that your file is in CMYK colour mode by going to File > Document Colour Mode > CMYK. I always recommend designing a logo in CMYK, as this avoids any colour surprises when you see your logo on printed materials.
Then, you want to select your whole logo (CMND + A) and go to Type > Create Outlines (SHFT + CMD + O). This turns any text into a vector object so that you don’t have issues with missing fonts when you send your logo to printers.
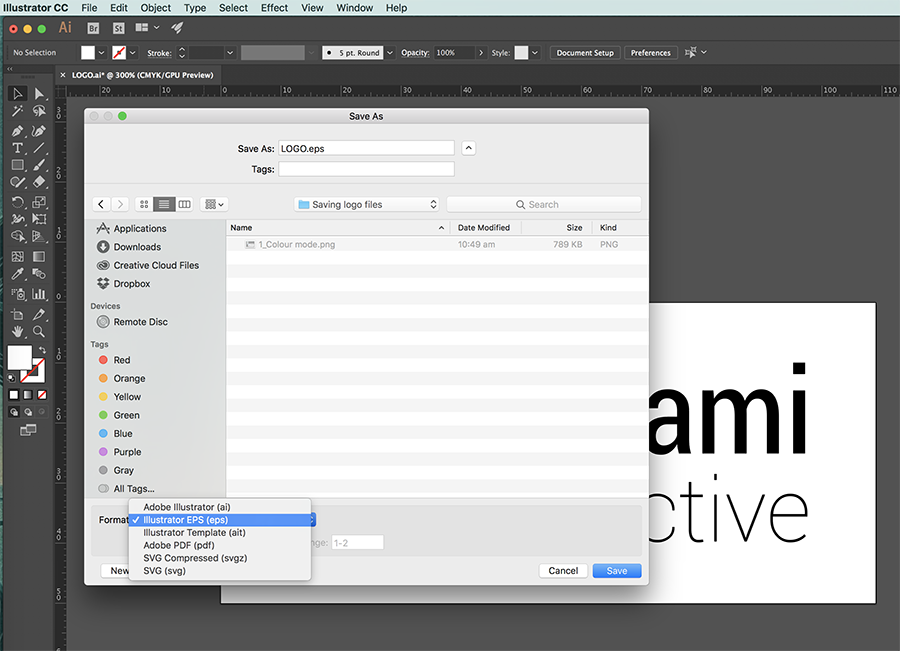
Now it’s time to save. I usually save an eps. and .pdf version of the logo for print, just to make sure all my bases are covered. Go to File > Save As (CMND + SHFT + S) and chose where you want the file saved. Then you want to select ‘Illustrator EPS (eps)’ from the drop down box next to ‘Format’. My preference is to tick ‘Use Artboards’ underneath the drop down box, as this will make my file the size of the artboard. Then hit save, and a new window with your EPS options will pop up.
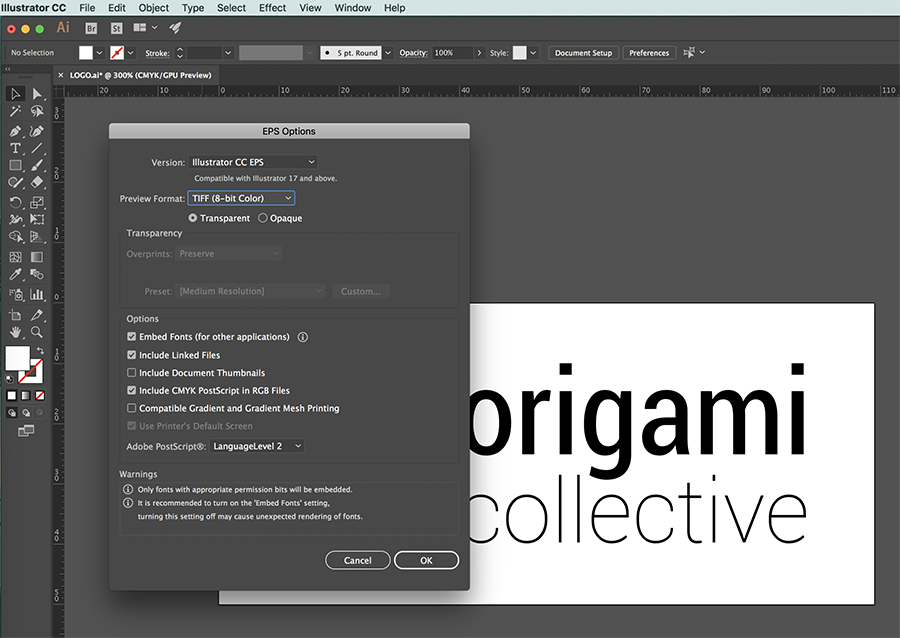
I generally just use the standard options that have been pre selected, but make sure ‘Transparent’ is selected. This gives your file a transparent background. Hit OK and you’re done!
Now you need to go back and save as a PDF. This is a simple as going to File > Save As (CMND + SHFT + S) and selecting Adobe PDF (pdf) from the ‘Format’ drop down box instead of eps.
You will then get a new window pop up with your PDF options. Generally, these are the options you should select:
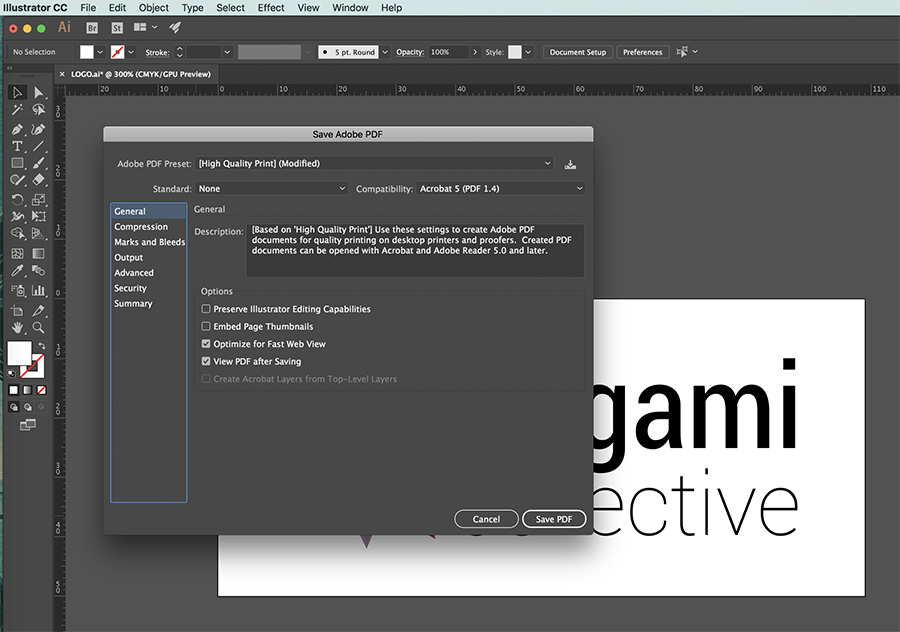
I like to turn off ‘Preserve Illustrator Editing Capabilities’ to try and avoid my logo file being altered in any way. I don’t usually edit any of the other PDF options when saving a logo file.
[thrive_leads id=’72553′]
Saving logo files for web using ‘Export for Screens’
When you are saving a logo for web you want to change the colour mode to RGB by going to File > Document Colour Mode and selecting RGB.
Once that is done, go to File > Export > Export for Screens (OPT + CMND + E) and the Export for Screens window will pop up. This new function is awesome as it lets you save .jpg, .png, .svg, and .pdf files all in one go. You can even save them at different resolutions, and only save the Artboards that you have selected.
Select the artboards you want to save, and the location you want the files saved to.
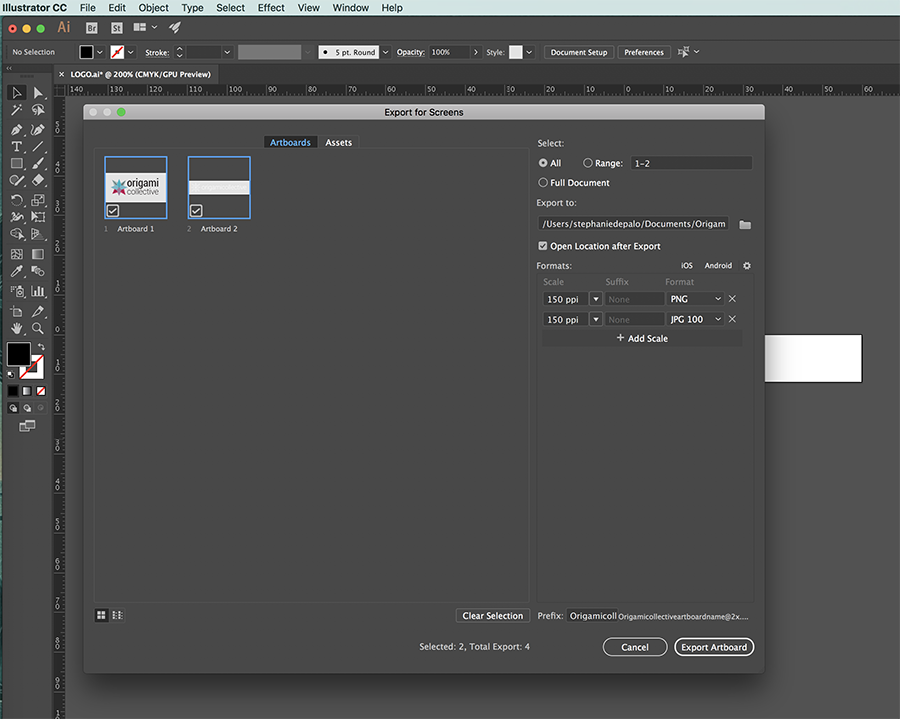
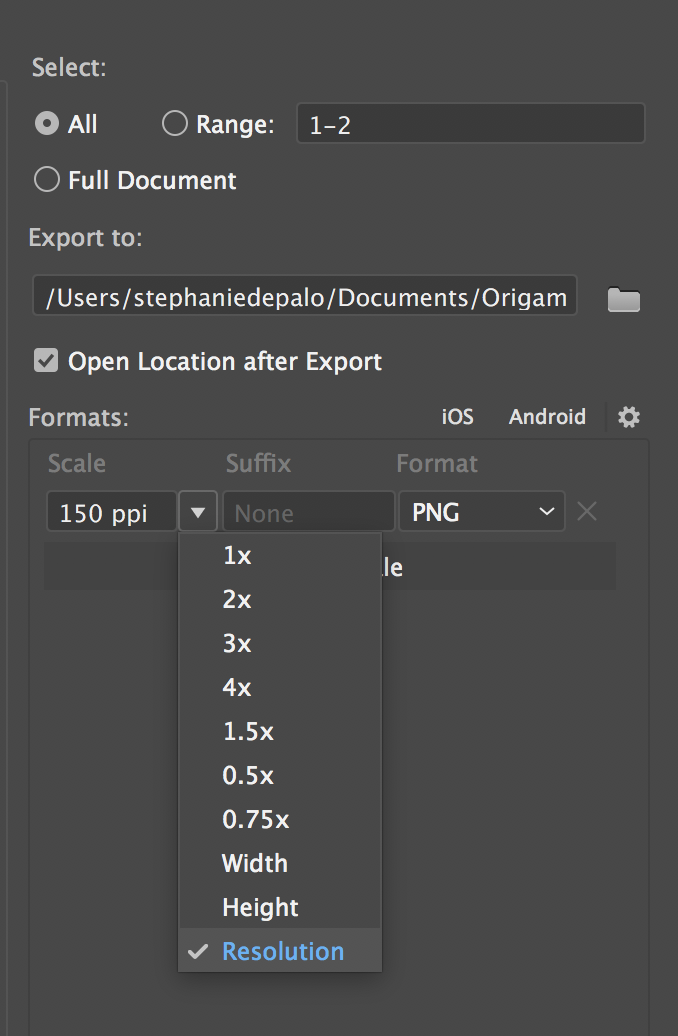
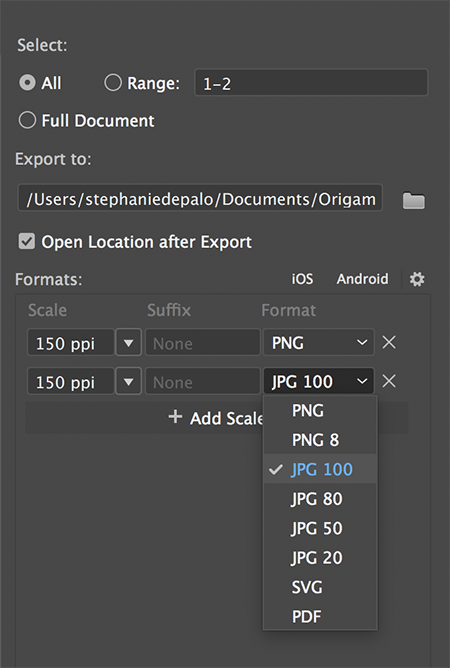
When saving for web, I like to supply my clients with a .png file that has a transparent background, and a .jpg file. To do this select the drop down box under ‘Scale’ and make sure it is set to resolution. Then type in the resolution you need (I usually use 150ppi). Then under ‘Format’ select PNG from the drop down box.
Then select the + Add Scale button and this will bring up a second row. Again, you will need to select resolution from the drop down box under ‘Scale’, and change the ppi to 150. Then under ‘Format’ select JPG 100. Hit ‘Export Artboard’ and you’re done!
If you have any questions or feedback, I would love to hear from you! Just pop them down in the comments below.