How to organise your online business to avoid overwhelm & maximise your time
You’ve probably seen blog articles such as ‘17 apps that you NEED to run your online business’, or ‘100 ways to organise your online business’. And if you’re anything like me, seeing those big numbers instantly makes you feel overwhelmed.
Well I’m not here to add more to your plate. I’m here to share the 5 applications/platforms that I use to organise my online business. Yep, just 5! I’m all about keeping things simple and organised so that I don’t overload myself.
What I love about the below apps, is that they can be accessed on mobile and desktop, so I am never caught off guard. As an online business owner, I’m not always at my desk and do find myself working on the go. So being mobile is really important when it comes to staying organised.
Some of the apps I use are not free, but I’m a firm believer that time = money. And anything that frees up my time for more important things, is well worth the money.
So, here’s how I organise my online business:
1. Google Drive
This is probably my most used application! Because it can be accessed from any device, I’m able to have my work files on hand wherever I am (including on the couch bingeing Netflix).
Within Google Drive, I use Google Sheets (like Microsoft Excel) and Google Docs (like Microsoft Word) for the day to day running of my online business. Here’s a few ways I use them that have helped me become so much more productive and organised:
1.1 Writing content such as blog posts and website copy
Right now I’m writing this blog post straight onto a Google Docs document. Once I’m finished I will then transfer my blog post onto my website. When I’m coming up with content for my website pages, I will add it onto my ‘Website Content’ Google Doc, and then add it to my website when I’m happy with it.
Why not just write it straight into WordPress? Well, several reasons:
- I can access Google Docs on my computer, phone, iPad, ALL the devices! Which means that while I may start writing my blog post on my computer, I could finish writing it from my phone while I’m waiting in the car for my kids to finish school.
- I’m not distracted by my website (anyone forever fiddling with their website design?) I can type without being influenced by my website design, which means I don’t add or leave out content just to fit in with the design. I design around my content (here’s a great article on how to DIY your own website copy).
- Google Docs automatically saves my work while I’m typing so I know I’ll never run into an issue with my website glitching and I lose everything.
1.2 Organise my online business and personal life
Did you know that you could use Google Sheets like a planner? A free digital planner? Yes please!
Don’t get me wrong, I have always been a paper planner lady. But being an online business owner (who works from home), I’m not always working at my desk, which is where I keep my planner. And I was finding that sometimes I would check an email on my phone, and would forget to write down the new task in my planner because I wasn’t sitting in front of it right then and there.
Being a mum of 3 who runs a household and an online business, I always have something on my mind that needs to be done. So if something isn’t written down it’s getting lost in the abyss of “I’ll remember that for later”.
Not to mention when planning appointments or catch ups on the go, I was always telling people “I’ll have to check my planner when I get home and I’ll let you know.” Spoiler: I didn’t let them know.
I never thought I would say it, but a paper planner just wasn’t working for me anymore.
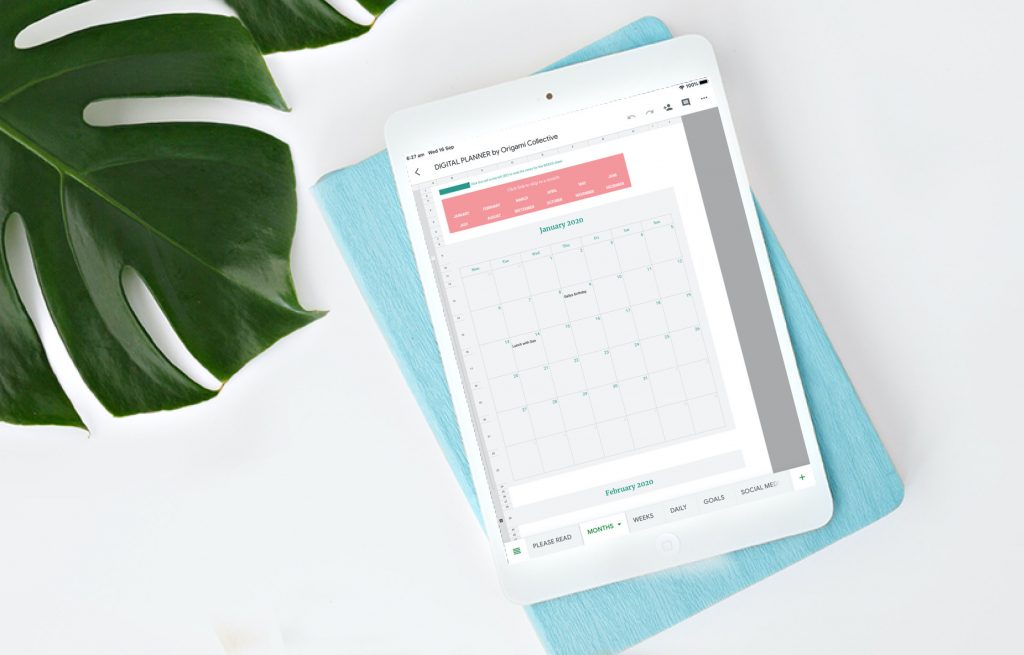
So after a bit (a lot) of trial and error, I created a Digital Planner using Google Sheets. That I can bring with me wherever I go! No more forgetting tasks or appointments, and no more getting burned out because I’m trying to remember a million things at once.
Here’s an article on how you can create your own to-do list using Google Sheets.
Or, I’ve done all the hard work for you and created a full blown Digital Business Planner which you can find here. It’s got all the bells and whistles so you won’t think twice about betraying your paper planner.
1.3 Backing up my website and my computer
I used to keep all of my files and backups on an external hard drive. But said hard drive is now inaccessible and my files are probably lost forever. Who still uses an external hard drive to store their files?!
I now use Google Drive to backup all my important business stuff in two ways:
- I use a plugin called UpdraftPlus to back up my website to Google Drive automatically twice a day.
- I manually drop all my work files into Google Drive every so often. Because I keep all my freelance and website stuff in one place all I need to do is drop my Jobs folder from my computer into Google Drive and all the sub folders will auto update with the new files.
I do pay for extra Google Drive storage but it’s totally worth it to know that my files are safe and I’ll never be burned again by a broken hard drive.
Google Drive has also added a new ‘Privacy Screen’ feature for iPhone and iPad if you’re using the Google Drive app. You can read more info about how to use Privacy Screen here.
Using UpDraft for website backups, and manually dropping in folders for computer backup. Have paid for extra storage for Google Drive.
1.4 Sharing files with clients
As a designer, the files I usually need to share with clients are huge. So rather than trying to email them a 20gb file, I’ll create a folder for their project on my Google Drive and the share the link to the folder with them.
And then if they have images or content that they want to share with me, they can drop it straight into the Google Drive folder I created and everyone has access to all the project files.
2. Asana
If you offer 1:1 services, Asana is the perfect way to track your clients. And it’s free! (There is a pro version however I’ve managed to get by just using the free version).
But Asana can be used for so much more than tracking clients. I love using it to organise my online business side of things too.
Because Asana is so versatile, it can replace other 1 or 2 apps that you may have been using as well. For example I used to use Evernote (as well as Asana) to plan out content and keep track of ideas. However it was just another app to keep track of.
When I sat down and really thought about how I wanted to organise my online business, I decided I was going to use as little apps as possible. I realised I wasn’t using Asana to its full potential.
So here’s how I use Asana to stay organised the simplest way possible:
2.1 Tracking client projects/vendors
While running Origami Collective, I also have freelance projects that I take on occasionally. Using Asana to track these projects means I always know what stage of the process my clients are at.
Basically, Asana allows you to create ‘Projects’, and within those projects you can add tasks. You can view tasks as either a list, or a board (boards are my favourite way to organise everything!).
If you are a marketplace or directory business, you could use Asana to track your vendors and packages. For example you could add a vendor as an Asana project, and then use tasks to track social media shout outs.
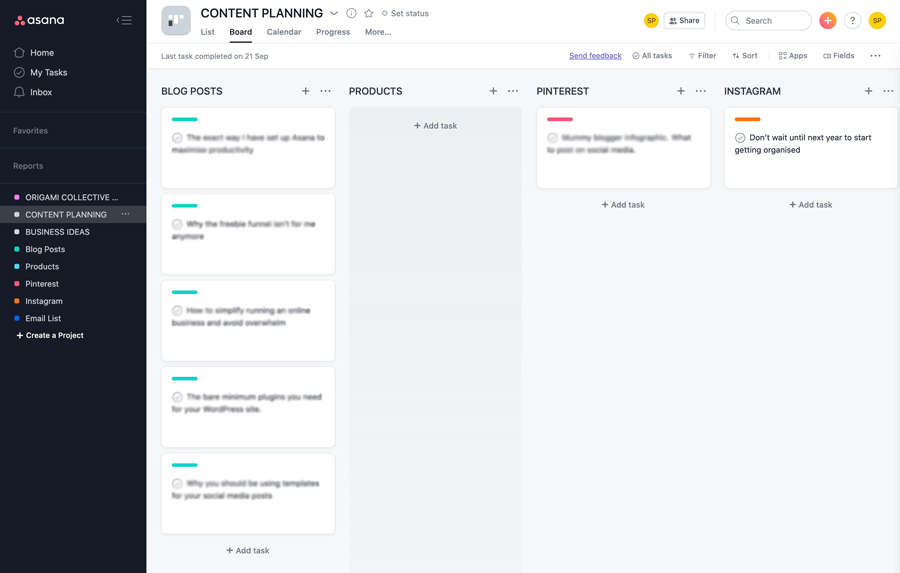
2.2 Content planning
I have a project that is displayed using the ‘boards’ view where I keep track of all the content I need to create for my business. So blog posts, social media posts, products, email campaigns etc.
Each post/product is a task that I then move through the boards as I create them. This allows me to get an overview of exactly what I need to be focusing on at any one time.
2.3 Keeping track of new business ideas
I have an Asana project that is dedicated to any ideas for my online business that pop into my head.
When I get an idea I’ll add it as a task, and then within that task I can add any further notes.
This way everything is all in one place, and my brain isn’t overloaded with trying to remember everything.
Related post: How I use Asana to plan content and stop faffing
3. Tailwind
Ah social media scheduling. Everyone has their own favourite scheduler (there are heaps of them out there), but mine is Tailwind.
Sticking with the theme of ‘keeping things simple to avoid overwhelm’, I only focus on two social media channels; if that.
And that is my advice to you. As an online business owner you already have to fill many roles, you don’t also need to be stretching yourself thin trying to be active on every social media platform there is.
Pick 1-2 platforms that you are comfortable with. And that your audience uses the most. Then stick with those.
So here’s how I use Tailwind to streamline my social media posting, and avoid overwhelm.
3.1 Scheduling IG posts then auto sharing to FB
I repurpose my IG posts for FB, tailwind let’s you post to both at the same time. This means I’m not having to create original content for two different social media platforms.
I will sometimes add something different to FB that I haven’t added to IG. For example if I’ve created a new blog post I’ll add more of an excerpt to FB than I would on IG as I’ve found my audience likes to read more on FB, and scroll more on IG.
3.2 Scheduling Pinterest posts
Pin your own pins to your boards first, then use Tailwind to pin them to other boards. Pinterest likes when you spend time on its platform rather than always using Tailwind to schedule posts.
A handy feature on Tailwind is the ‘shuffle button’. This is great for when you’re bulk scheduling to different boards at the same time. You can shuffle all your scheduled posts.
Keep in mind though, Pinterest no longer likes it when you pin 100 pins a day. In 2020 they have recommended 15-20 pins a day. Even better if you can be pinning your own ‘fresh, original’ content.
When Im scheduling pins, I’ll go into the board I’m scheduling to and use the ‘more ideas’ tab to find relevant content to pin to my board. Super easy and effective.
If you’re having trouble coming up with content that your audience wants to interact with, check out my social media templates. I’ve done the research for you and created templates based on types of posts that I have seen that get good engagement.
[thrive_leads id=’87585′]
4. ActiveCampaign
This is one of the paid applications I use, and it’s the only one of the 5 that isn’t really mobile friendly (where’s your mobile app ActiveCampaign?!). But it’s still a very powerful tool and I would recommend it to all of my clients.
If you’re on a small budget there is a Lite plan that you can go on, made cheaper by adjusting the amount of your contacts to 500.
So here’s how I use ActiveCampaign to streamline my business:
4.1 Sending out updates
At the time of writing this post I’m currently only using AC for staying in touch with my subscribers and customers. Because I’m only attracting subscribers who are genuinely interested in the content I’m putting out I’m not pressured to be sending weekly (or even daily) emails to remind them that I’m here.
I keep it super simple for myself and my audience and just send out an update when a new post or product goes live. This way my audience doesn’t feel bombarded, and I’m not burning myself out trying to stay on top of funnels and multiple campaigns (as they’re called in AC).
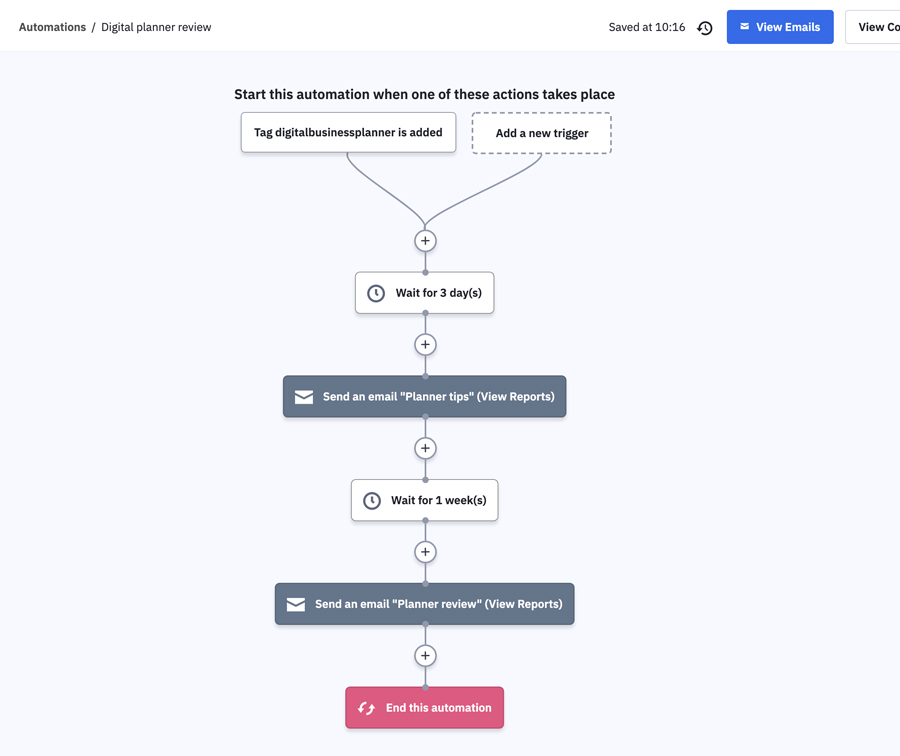
4.2 Following up with customers
I try to make everything I do about my customers as much as possible. So when someone makes a purchase I send them a quick email with some tips on how to get the most out of their template.
A week later I send out an email to ask that if they loved the template, to leave a review so that their fellow online business owners can benefit from it too.
It’s a super simple automation that’s straight to the point and gets the job done.
5. PayPal
I know a lot of online business owners have a love/hate relationship with PayPal because of the fees.
But being one of the most trusted and easy to use payment methods for my customers, I feel that it’s worth the cost. I know that if a website doesn’t let me pay by PayPal, I’m less likely to follow through with the purchase if I have to go and get my wallet (because who knows where that thing is anyway).
So aside from taking payments on my website, here’s what else I use PayPal for:
5.1 Tracking income and expenses
Create a business PayPal account using your business email address. Then use that account for any purchases that you make for your business. As well as receiving any payments from your clients/customers (see invoicing below).
That way when tax time comes you can easily see what your expenses and your income have been.
If you login to your PayPal and go to Reports > Financial summaries > Financial summary you can create a report of all your income/expenses for the financial year.
Any fees that you paid PayPal will be on the report which you can also claim as a business expense during tax time.
5.2 Invoicing
I use PayPal invoices for my freelance clients as it’s easy for them to make payments. Again, yes there is a fee for using this service. But it’s worth it if it means the payment process is easy for my clients (plus these fees can also be claimed at tax time).
You can set invoices to be able to be part paid if you require deposits on any work you do. Send invoice reminders, or even give refunds.
Everything is in the one place so you don’t need to digging through various apps to find an invoice you may or may not have sent 2 years ago.
It’s time to get organised
So those are the 5 applications I use to organise my online business. And while a couple of them may be paid, I truly feel that the cost is worth it for my sanity!
If it makes your life loads easier, helps you be more productive, and less stressed, then it’s worth it. Don’t be afraid to invest in yourself and your business.
Do you use any of these applications? What do you think of them? Please feel free to share how you organise your online business in the comments below.